Dreaming about playing one’s favourite Dreamcast games on PC has always been a dream. And with a plethora of Dreamcast exclusives not coming to newer hardware anytime soon, emulation is the only way to experience them. Enthusiasts took it upon their shoulders to make the impossible, possible. Although the relationship between the Dreamcast and emulation has encountered several difficulties during its initial days, each update made the experience better.
Which Dreamcast emulator should you pick these days to play your favourite games? The best option is Flycast. An up-to-date emulator that is both easy to configure and can run other systems such as Atmosiwave and Naomi. Without further ado, this guide will help you learn how to run Flycast from start to finish.
Just a couple of years ago, Redream was the go-to for any Dreamcast title, but as soon as Flycast made an appearance, Redream was sadly dethroned. Flycast can run Atomiswave and Naomi & Naomi 2 titles without breaking a sweat. Additionally, the ability to scale your games without paying for premium is a huge plus to using Flycast.
However, Redream still has the best UI (User Interface) among other Dreamcast emulators. Plus, the emulator is low-end-pc friendly. Meaning if you’re using a potato computer you can run a handful of Dreamcast titles without worrying about performance. In addition to this, Redream has a bigger community than redream.
Flycast is an open-source Dreamcast emulator developed by flyinghead. It originated as a fork of Reicast, another Dreamcast emulator that’s considered obsolete these days. Not only can Flycast run Dreamcast games, but it can also emulate NAOMI, Atomiswave and Windows CE applications almost perfectly.
Flycast is completely safe and free to use. Make sure you download it from the official website to avoid any issues.
Flycast can be either downloaded from the GitHub page or directly from this page. The latter includes different platforms such as Android, iOS, Xbox One and macOS. For the sole purpose of this guide, we will be using the Windows 64 builds.
Here’s how it’s done:

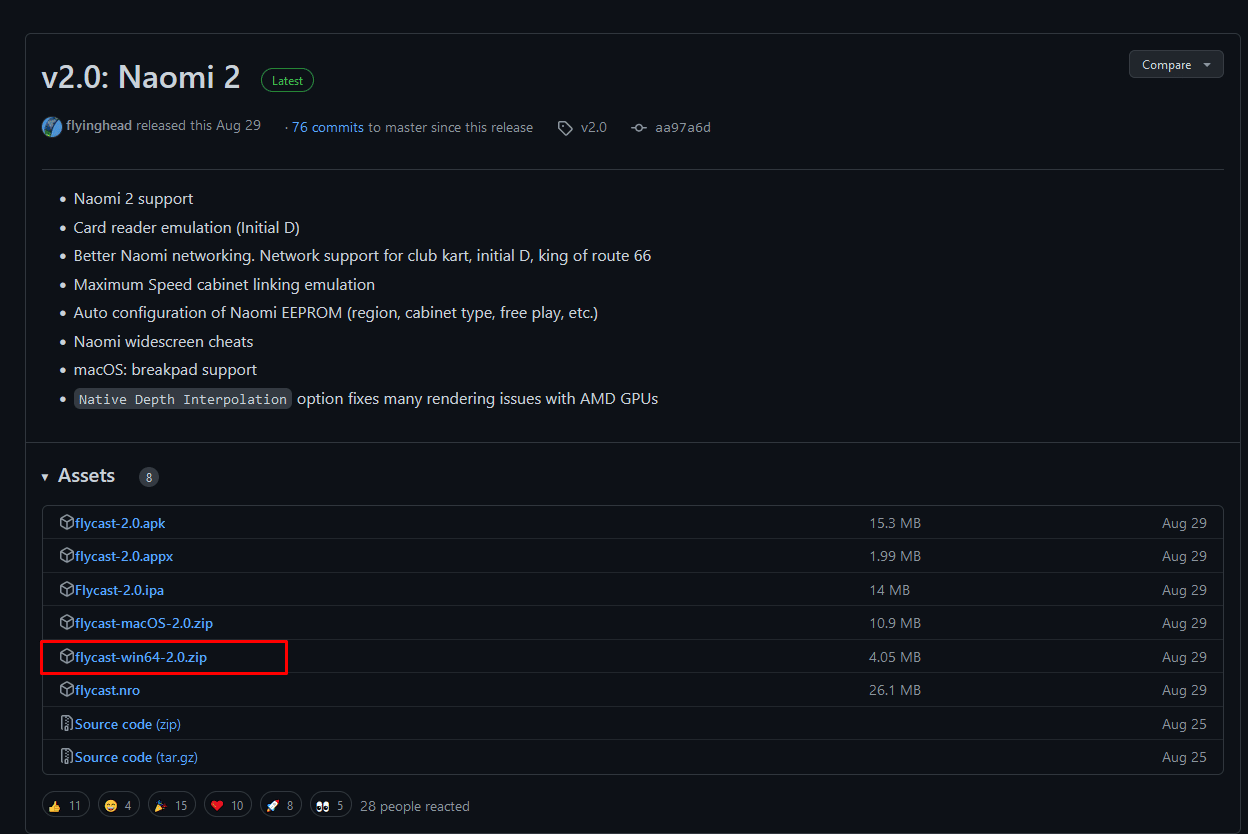
Once done, your emulator will be downloaded as an EXE file. All you have to do afterwards is just double-click and there you go.
If you access the second embedded link, do the following:
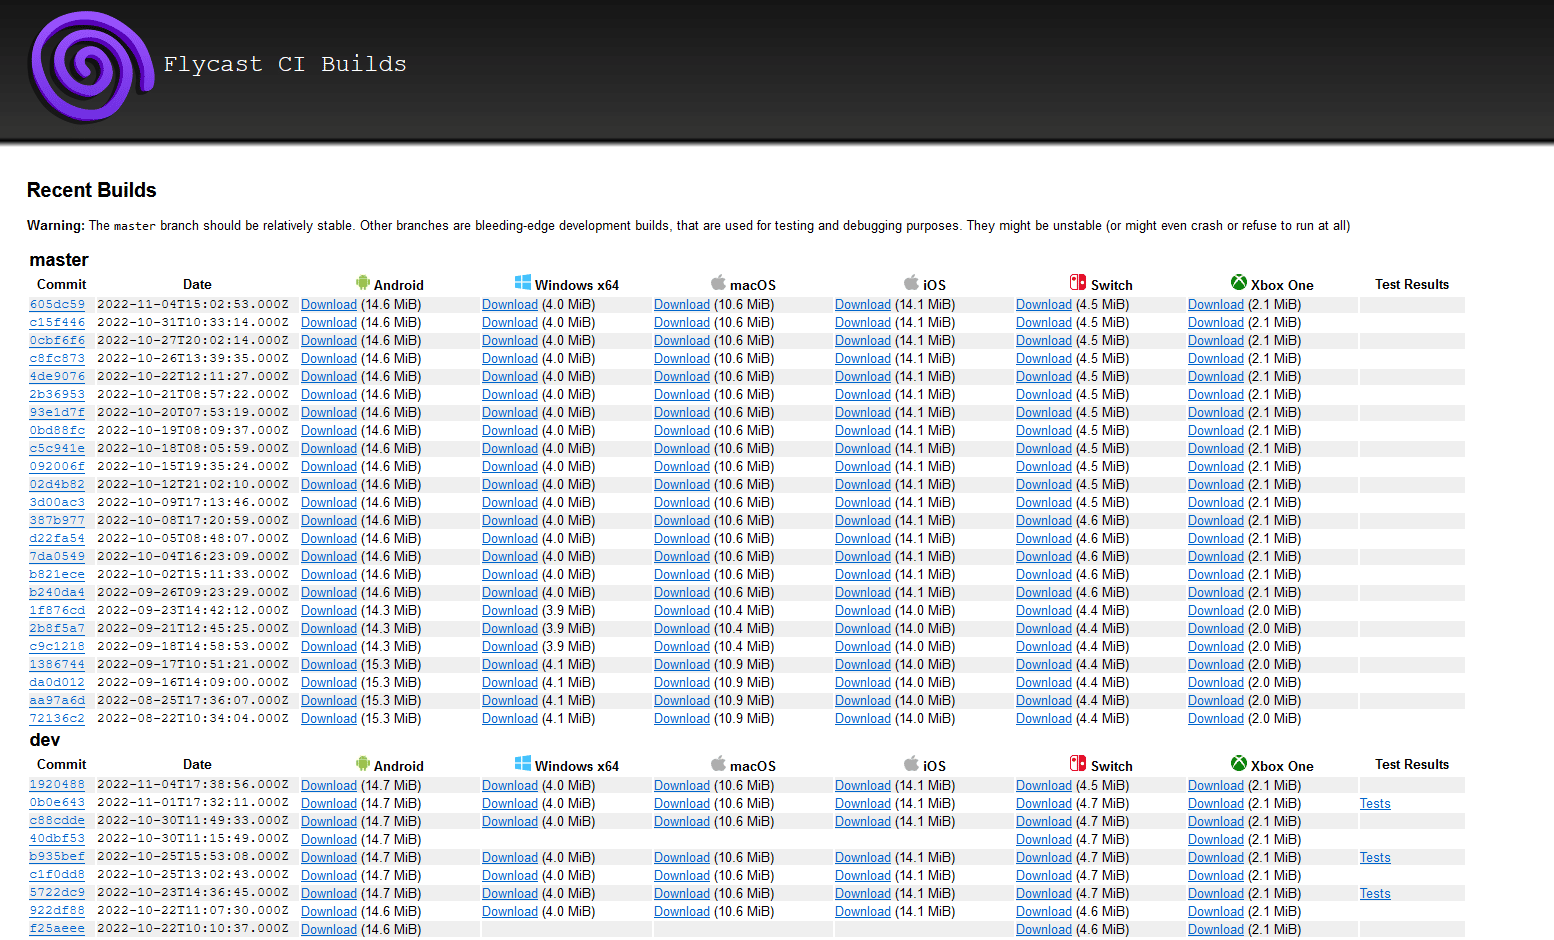
There are two builds of Flycast: Master and Developer build. Master builds are up-to-date and work without any issues. If you just want to play games, then the Master builds are your best choice. They’re relatively stable with fewer issues. Pick the latest build from the Windows 64 section and click Download. After doing that, you should see something like this:
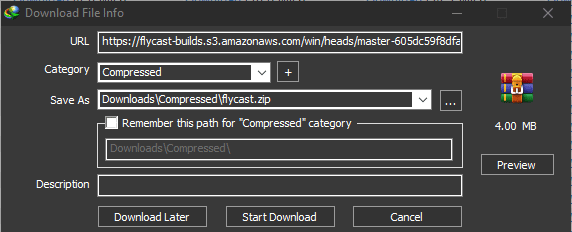
Your emulator will be downloaded as a zip file, and what to do next is simple: just extract, double-click on the Flycast.exe and there you go.
For developer builds, if you’re someone who enjoys debugging and testing in order to contribute by helping make the world of emulation better, then it’s for you.
Unlike Redream, Flycast can be pretty demanding at times, but not as demanding as other emulators such as PCSX2 or Xemu. Bear in mind that the requirements below are conjectural, but they should give you a glimpse of what to expect.
GPU: Graphics Cards that support OpenGL 3.0 or OpenGL ES 2.0. Any GPU released 10 years ago should do the job.
CPU: Processors that support Intel® SSE4.1, Intel® SSE4.2, Intel® AVX and above. Any CPU released 10 years ago should do the trick.
RAM: 4GB DDR3 of RAM and above
OS: Windows 7 64-bit and above
Flycast supports the following formats:
On the other hand, Flycast doesn’t support Hikaru and SEGA System SP games yet.
I’ll try to explain this as simply as possible so that every newcomer could understand the difference between these files instantly. Check the following:
Flycast will be downloaded as a 7-zip file, and you’ll have to extract it into a folder of your choice in order to boot. Upon extracting your Winrar file, you’ll see 3 files; the emulator, a data folder, and an emu.cfg.
I would recommend creating a new folder and naming it ” Flycast ” and putting your extracted emulator over there so that it’s easy to reach. Don’t forget to also create a game folder and name it “ROMS” so that it’s easy for you to access your games. While Dreamcast BIOS is optional, you will have to find the BIOS for Naomi and Atomiswave system, without those, any game won’t launch. Unfortunately, I can’t provide you with links to the BIOS or anything similar, but I’m sure you’ll figure out something. The next step is to put the BIOS files into the data folder, and that’s it.
Here is what it should look like:

Grab the BIOS files so that all your games should run. The BIOS files you should have are the following:
This section will help you learn how to configure Flycast from start to finish. It will also include miscellaneous information that you may find helpful in the future.
Configuring your controller using Flycast is easy and doesn’t require much tinkering. Here’s how it’s done:
Explanation using pictures:
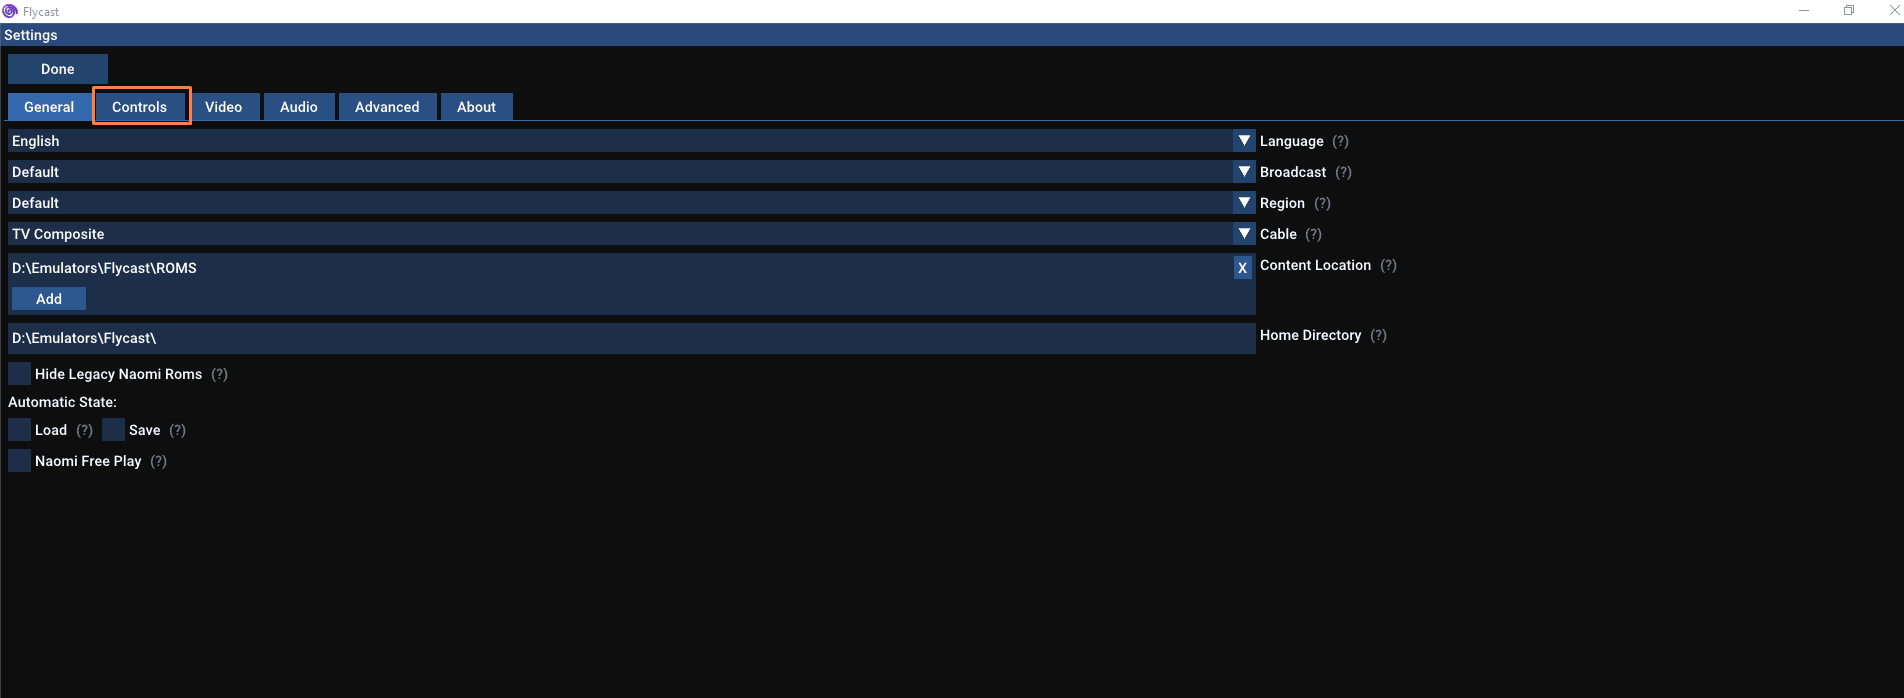
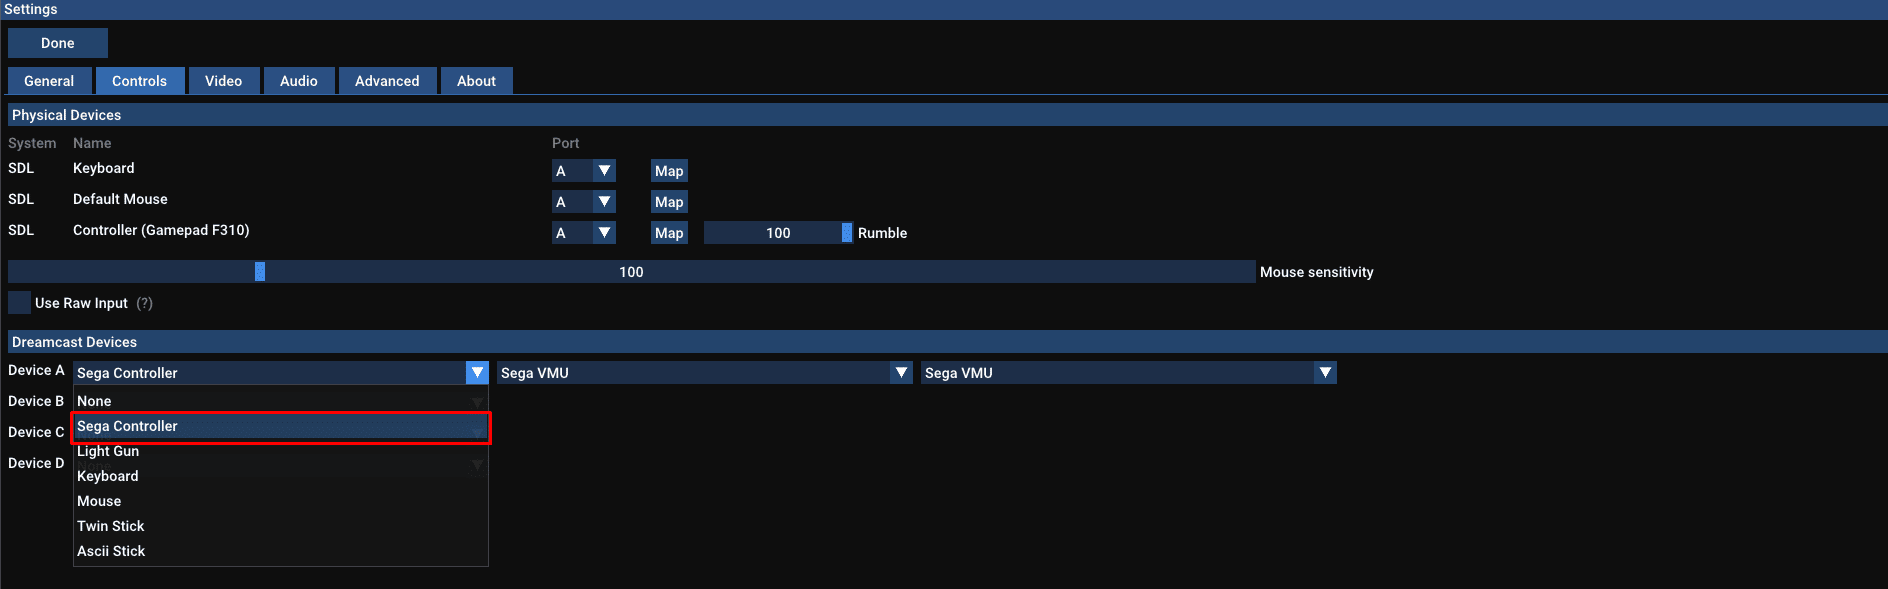

And this is how you do it. Simple, right?
Flycast supports a multitude of controllers such as:

The options below describe the following:
This section will tackle the different video options you can use on the emulator

Each option in the emulator plays a role. We’re here to explain what each option represents and what it does
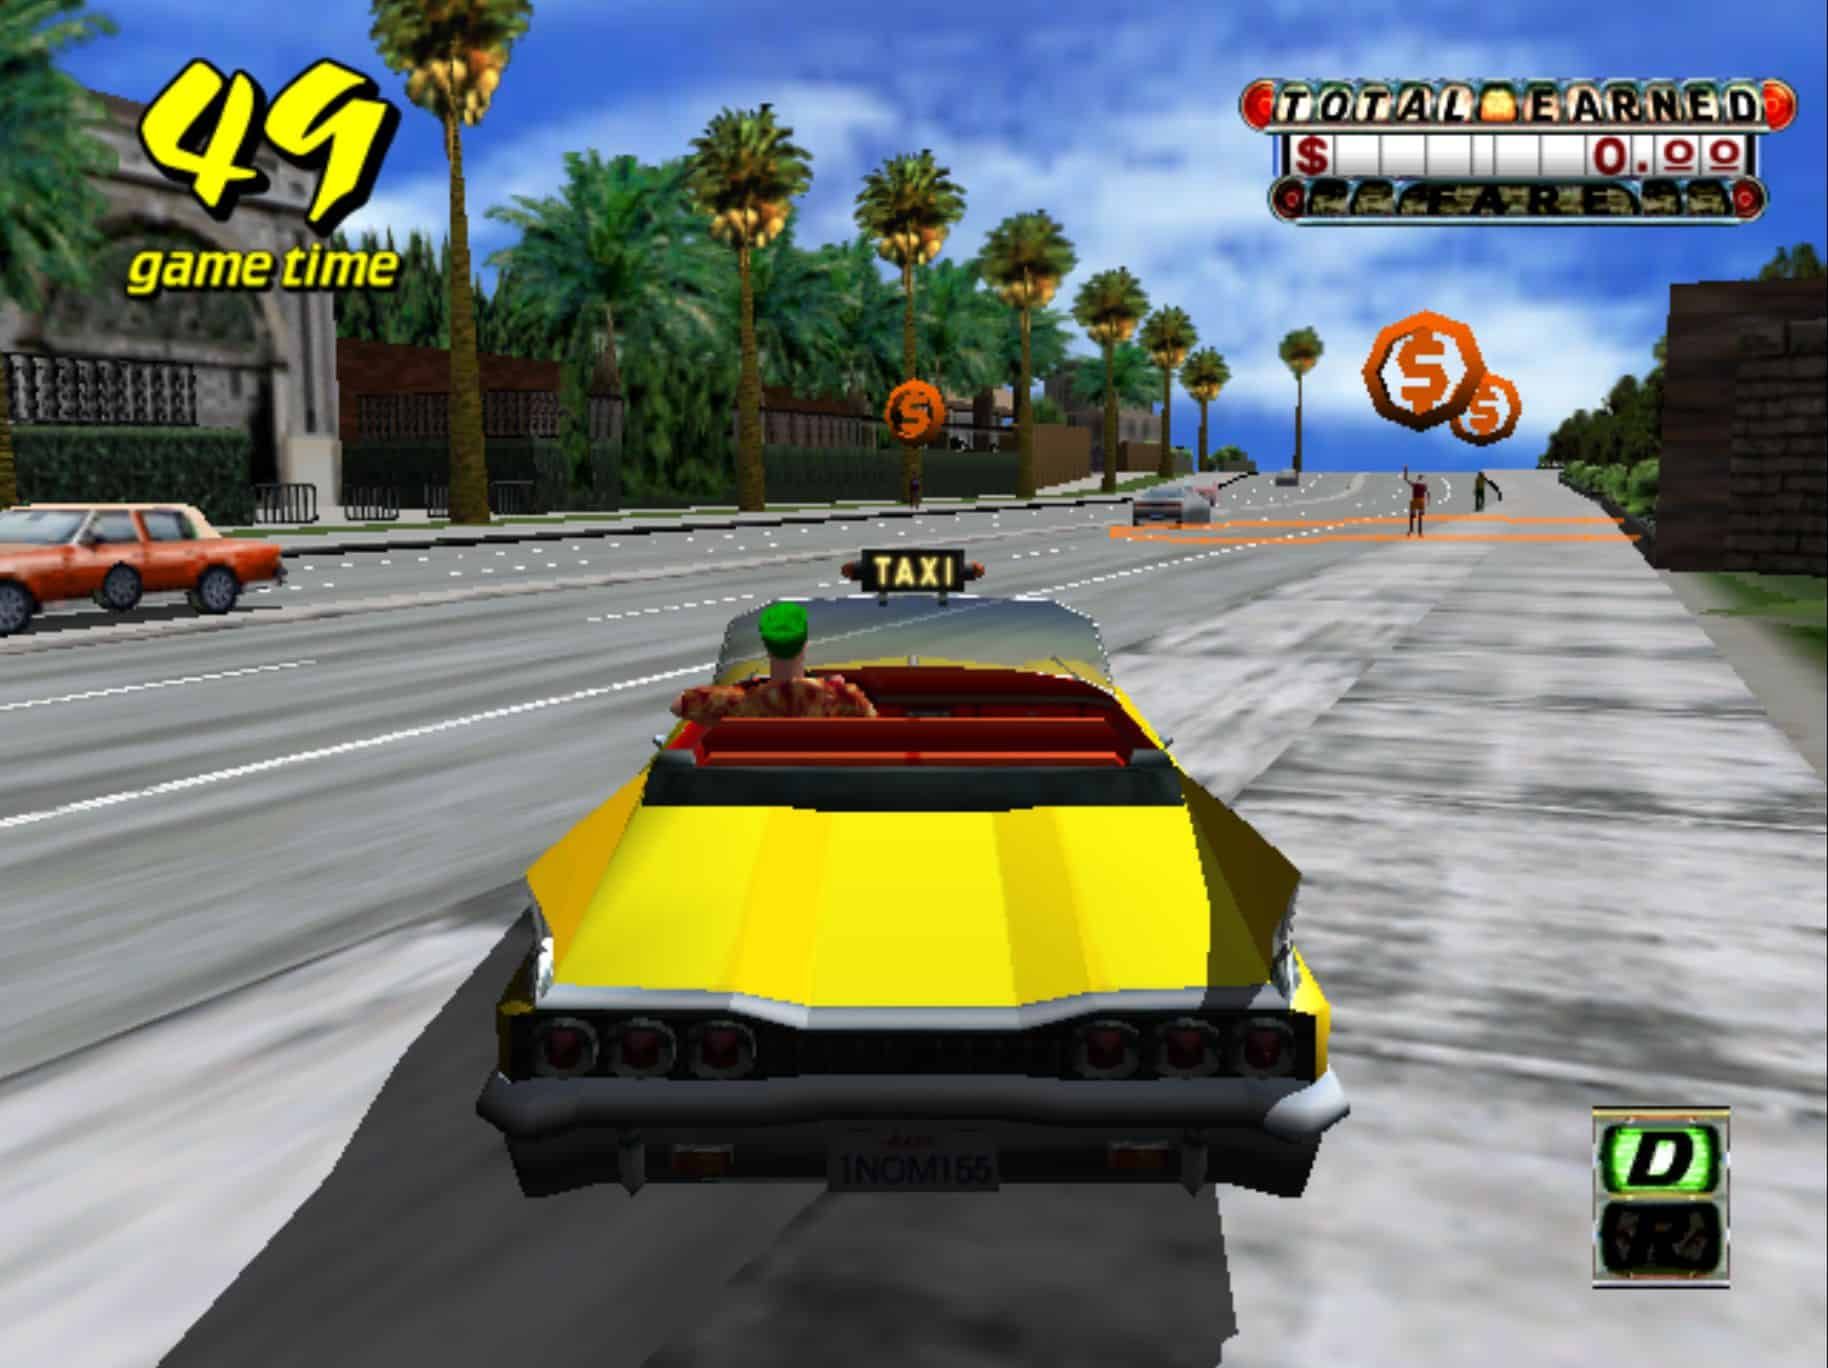
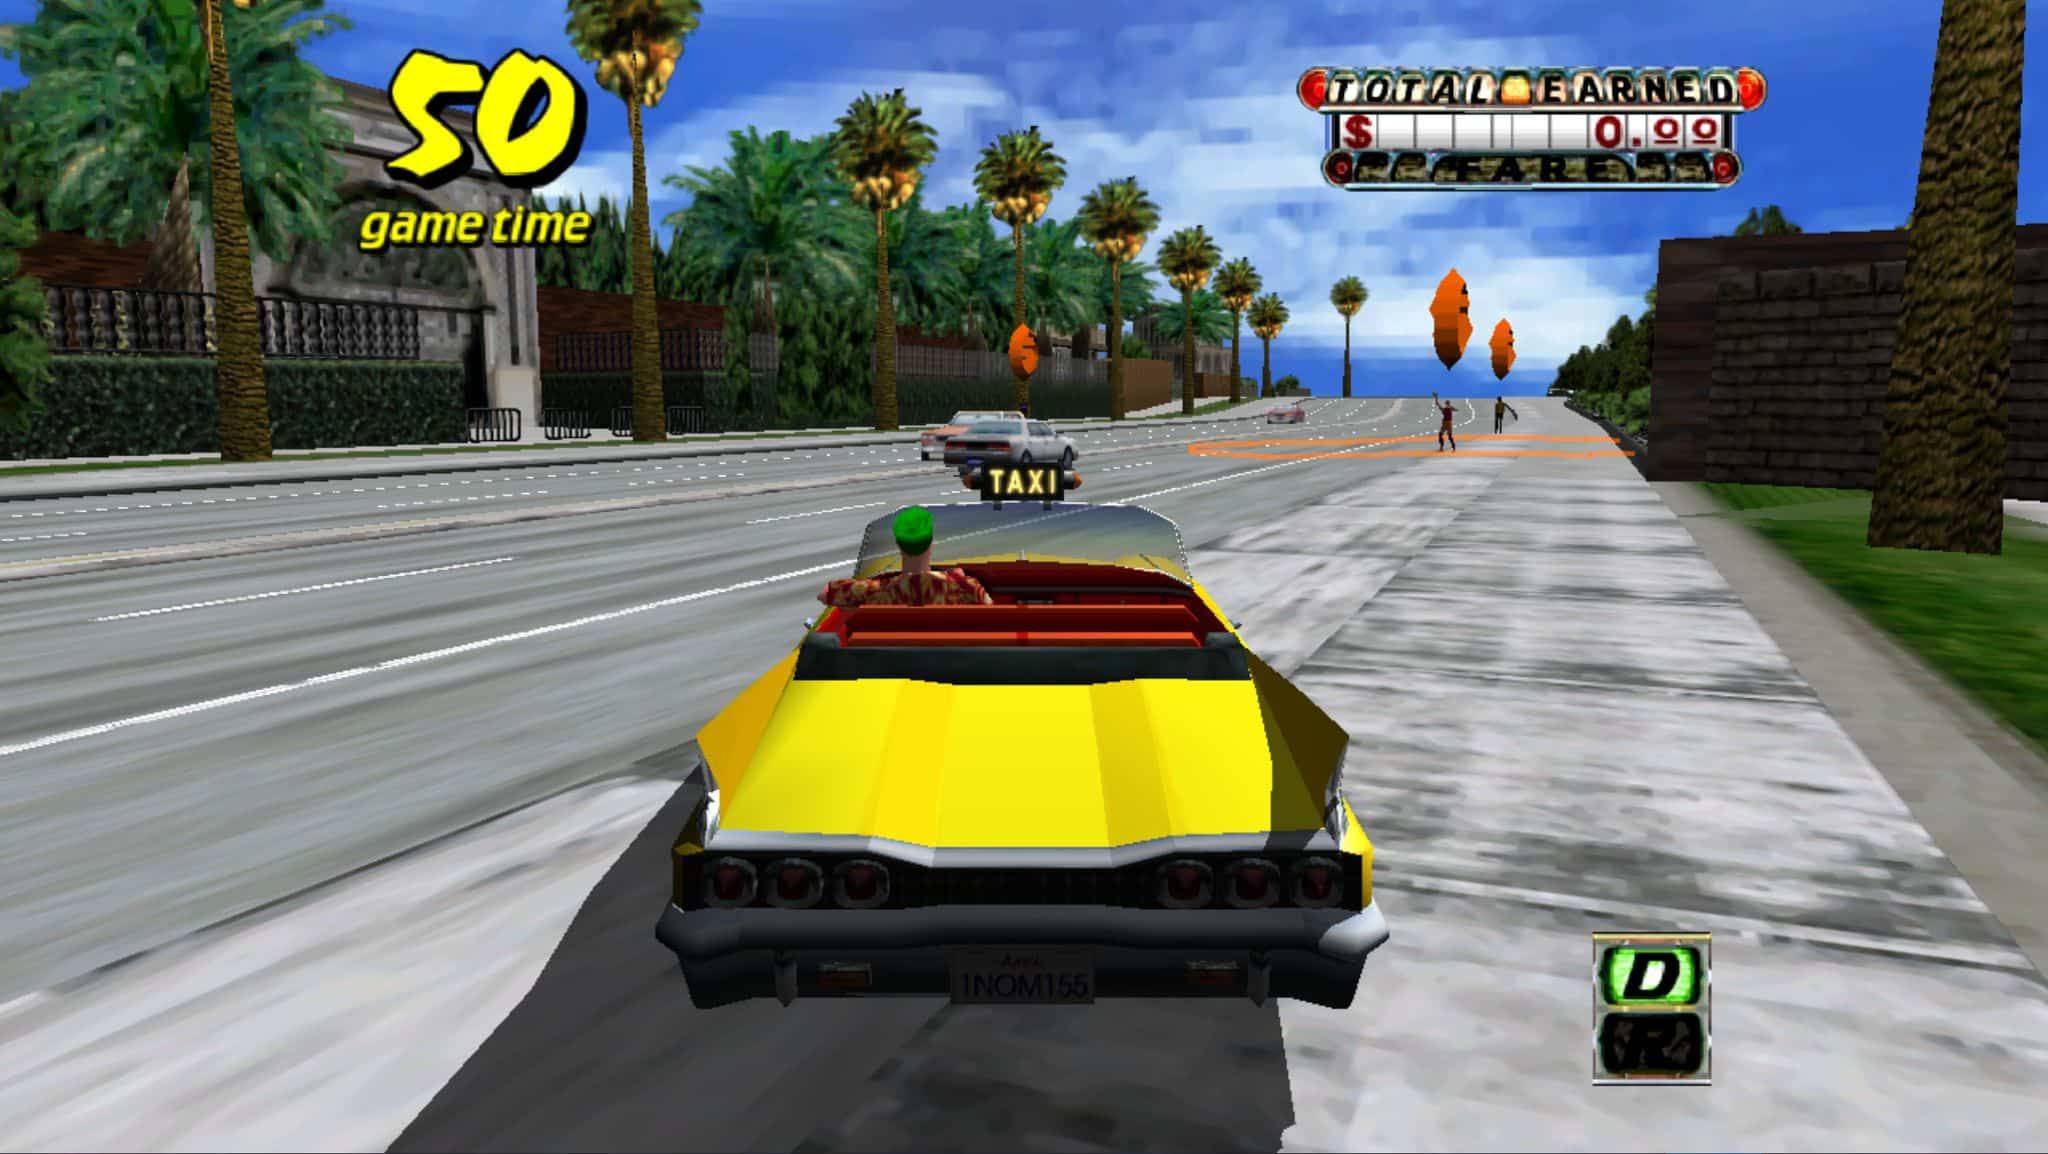
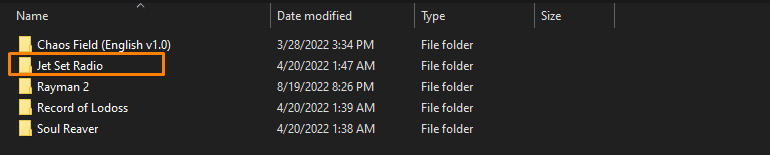
Launching your game on Flycast is easy, and I don’t think I need to explain it in detail, but in case you’re struggling, keep reading. One thing you should do beforehand is to create a separate folder for each game you own. DO NOT under any circumstances put all of your ROMs in one folder. Create a folder, name it ROMS and for each game, you obtain, create a new folder with the same name as your game. It should look like this:

The reason why you should do this is that putting your ROMs together in one folder results in issues. You are better off doing what I did. Once you’ve done this, you’re good to go. Follow these steps to boot your games:
Note: If you don’t like creating a separate folder for each new game you own, read the ” How to convert GDI to CHD files” section.
The reason why you want to consider converting GDI files to CHD is the following:
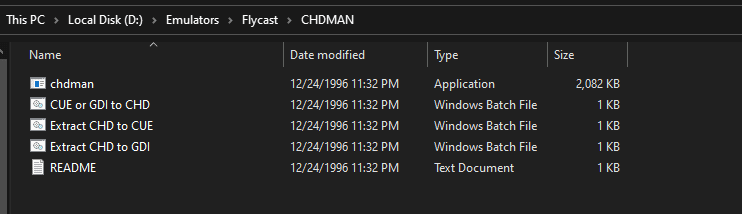
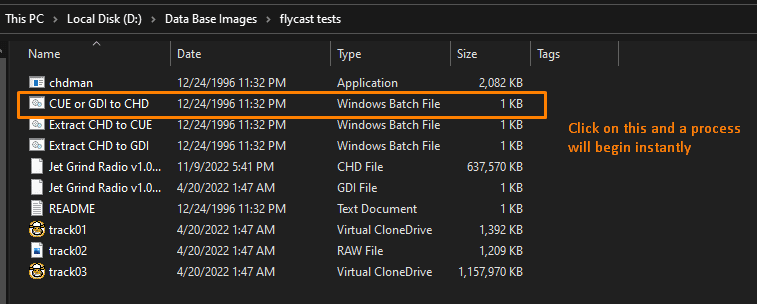
The first thing you want to do is download a tool named CHDMAN. You can either download it from archive.org website, or this alternative google drive link. The tool is completely safe, and you have nothing to worry about. Once you download the file, extract it into your prefered folder. I’d recommend creating a folder named CHDMAN and placing it in the same folder as Flycast. Like this:

Next, grab your game files (the GDI files) and paste them inside the CHDMAN folder. Then, click on CUE or GDI to CHD and the process will start. To show you how it’s done, I’ve picked Jet Set Radio. A great action game on the system. Here’s a demonstration:

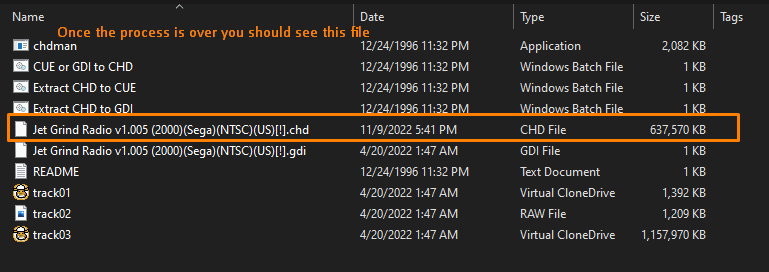
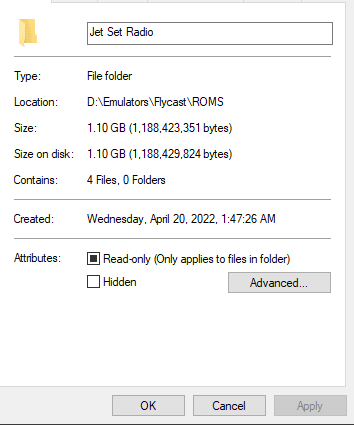
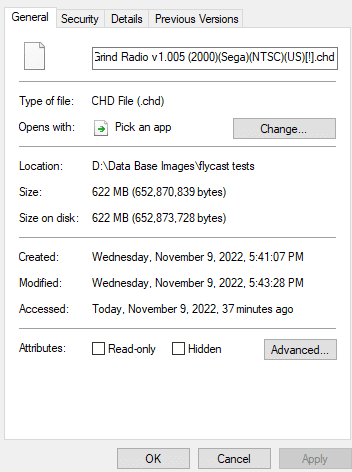
It’s that easy, and if you check the sizes of both GDI and CHD you’ll realize there’s a strikingly noticeable difference between the two:
That’s it for this section.
This marks the end of this guide, thank you for reading!
|
|
FreeckyCake
I'm just your average gamer who enjoys hunting hidden gems and underrated games. My love for Onimusha: Dawn of Dreams is like a truck and I recommend that you play it.
|
On Windows, there is a GUI for chdman.exe called namDHC which is available on Github.
Also Flycast does support NAOMI games that use GD-ROM CHDs. You need the MAME ROM in your usual ROMS folder and the MAME CHD in a subfolder named after the MAME ROM.
So, for Azumanga Daion Puzzle Bobble, your ROM folder would look like this…
ROMS
|
– azumanga.zip
|
– azumanga
|
– gdl-0018.chd