The PlayStation Portable (abbreviated as PSP) is one of the best handhelds to ever set foot in the gaming industry. And Sony’s Vita flop, made people yearn for the past, a past when the PSP was kicking strong. This handheld wasn’t an ordinary piece of hardware. It was a system that pushed home console experiences all into our hands. While the graphics were a tad downgraded compared to its brother, the PlayStation 2, the PSP managed to produce incredible games such as Final Fantasy Type 0, God of War: Chains of Olympus, Resistance: Retribution, 3rd Birthday and so many other iconical gems.
Today, with this tutorial, you will learn how you can play your favourite PSP games on your PC. The emulator that we will be showcasing is PPSSPP. A fine emulator that can run anything you throw at it. Without further ado, let’s hop into the guide right away.
PPSSPP is a free open-source PSP emulator developed by Henrik Rydgård, one of the founders behind the Dolphin emulator. The project initially made an appearance back in 2013, and since then, the emulator has been receiving several updates that made the program run various PSP exclusives.
PPSSP is safe to use. Just make sure you download the program from the official website or reputable websites such as emulation wiki.
PPSSP can be downloaded from the official website over here.
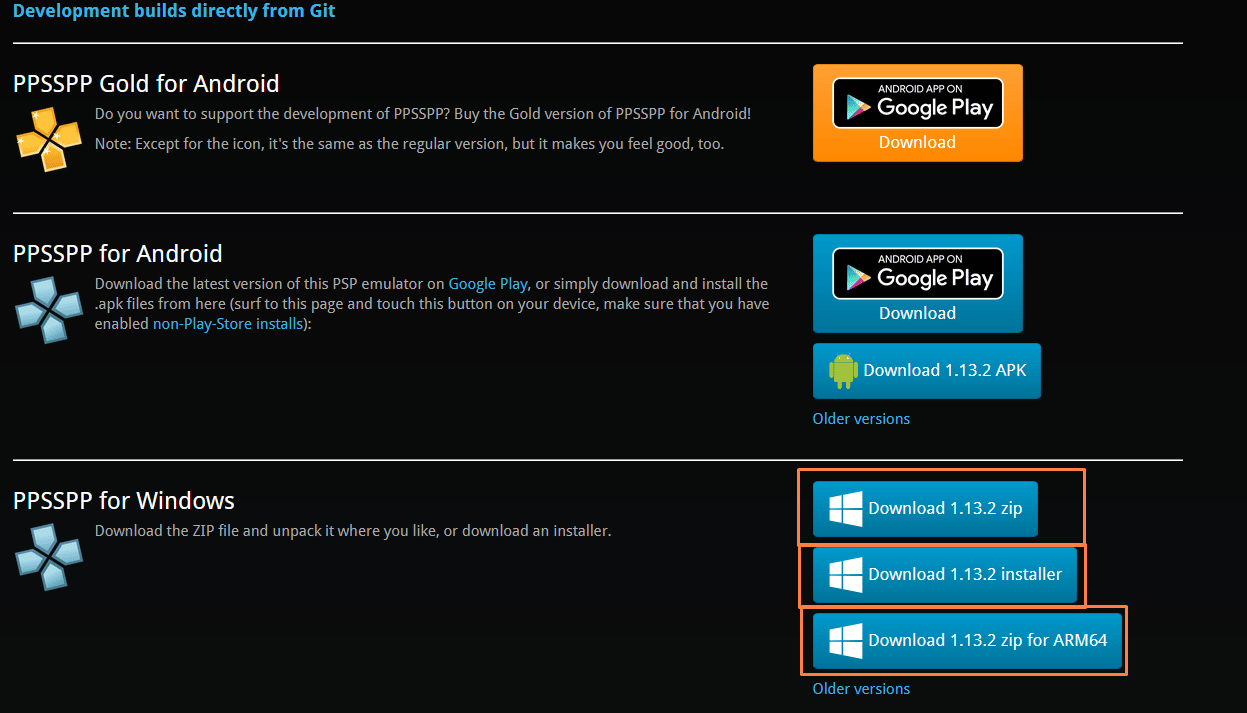
Upon entering the official PPSSPP website and clicking on download, you will notice 3 versions:
To make it as simple as possible, just go with the installer version. By picking the latter you will be able to update your emulator’s version anytime a new update is released. By picking the zip version, you’ll be obliged to update manually each time a new version is released.
Alternatively, there are what are called Git versions. These are developer builds that come every day. These builds are often used to debug and test games to solve issues within the emulator. So, if you want to help the PPSSPP emulation scene, keep an eye on this.
These are the system requirements to run PPSSP. Note that using a low-end machine to run the emulator may result in some slowdowns which will make the experience less enjoyable.
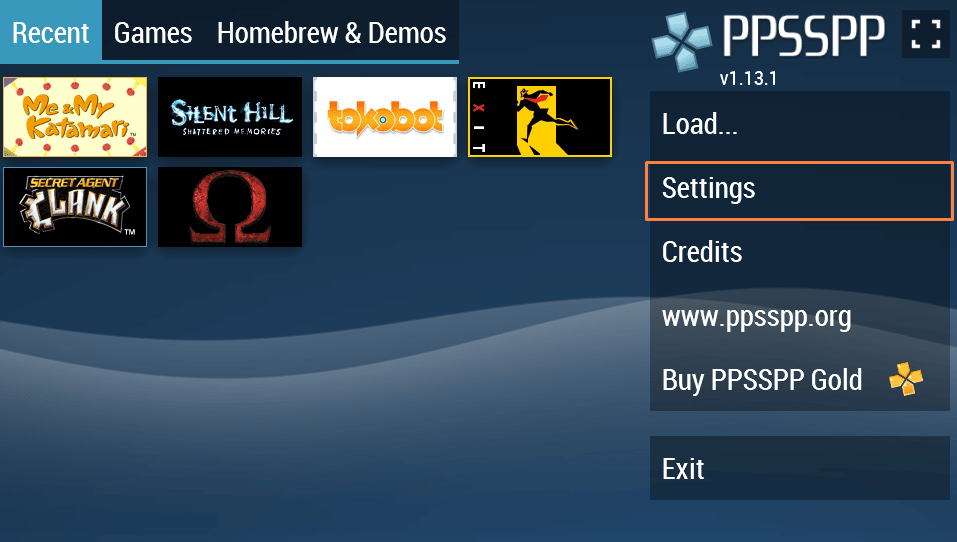
Once you’ve downloaded the Installer for PPSSP, it’s time to install it. Once you’ve done that, it’s time to configure your emulator for the first time.
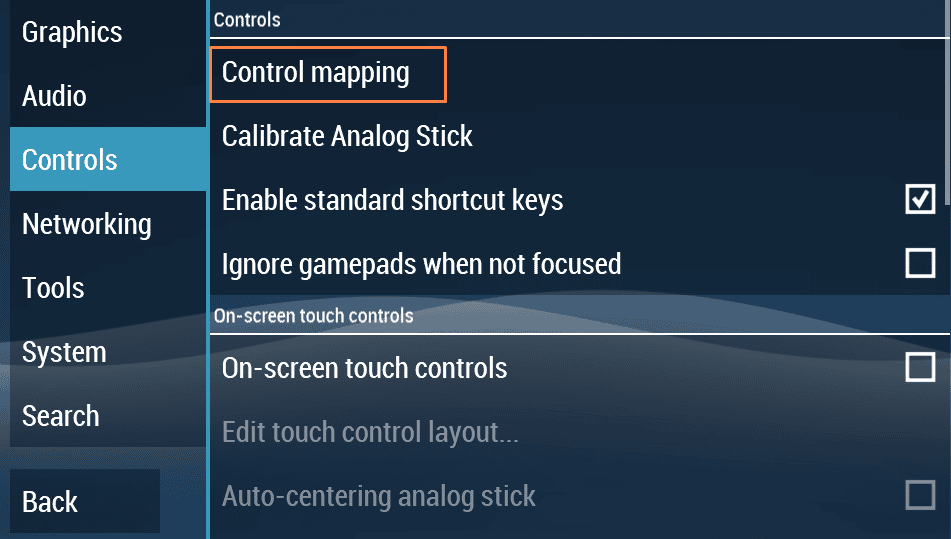
The first time you boot PPSSPP your controller won’t be configured. But don’t worry, setting up the whole thing is easy:
In case you didn’t understand what to do above, follow the steps shown in the pictures below:

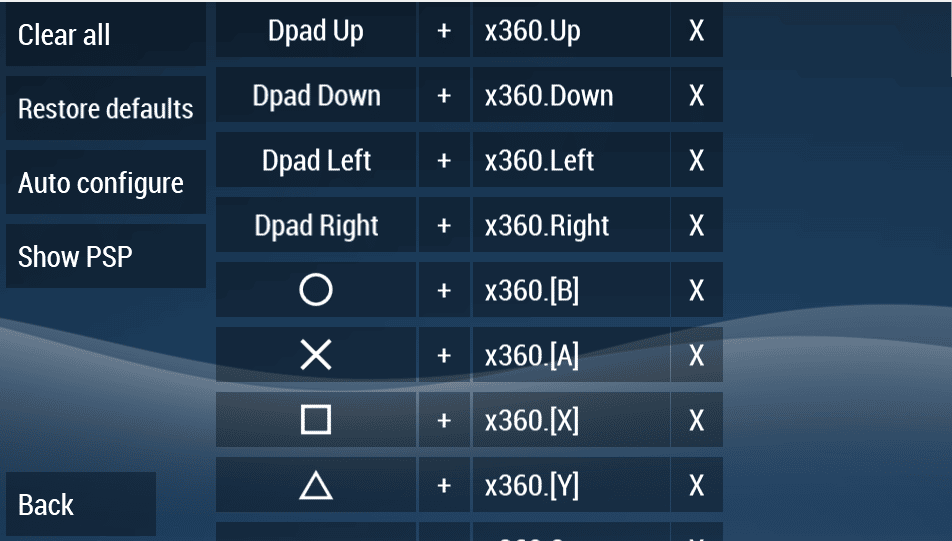
PPSSPP supports a multitude of controllers such as:
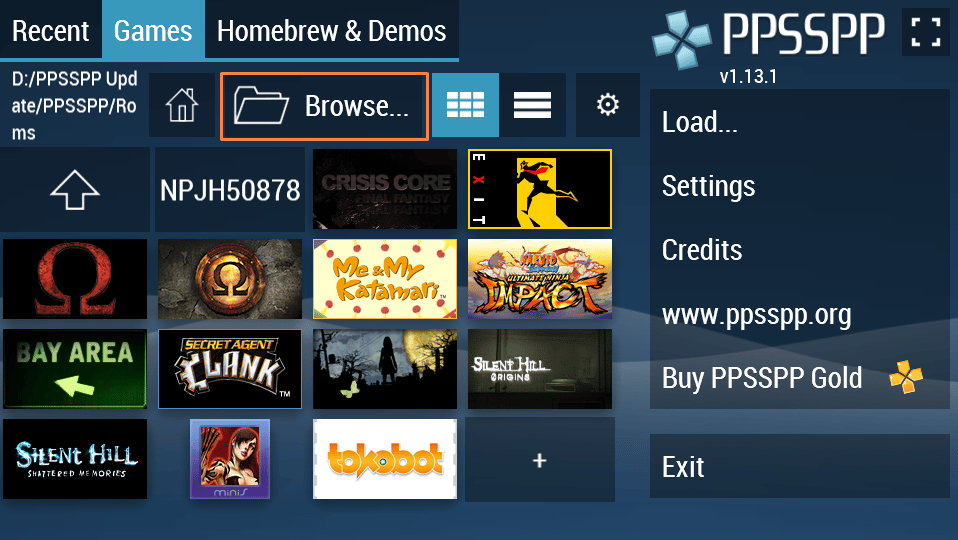
Your emulator doesn’t recognize your games instantly because you haven’t set a specific folder. This is easy for beginners as it only takes a couple of seconds to configure the whole thing. Here’s how it’s done:

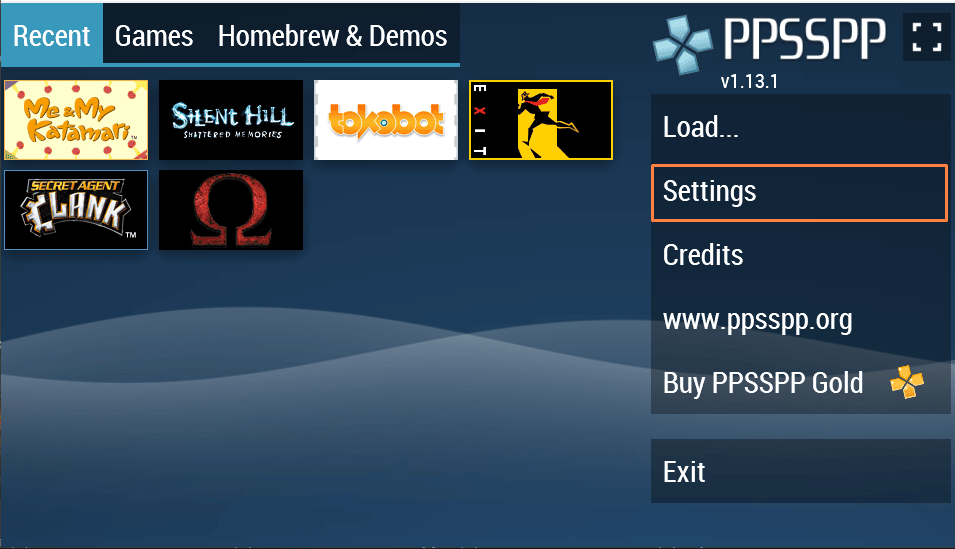
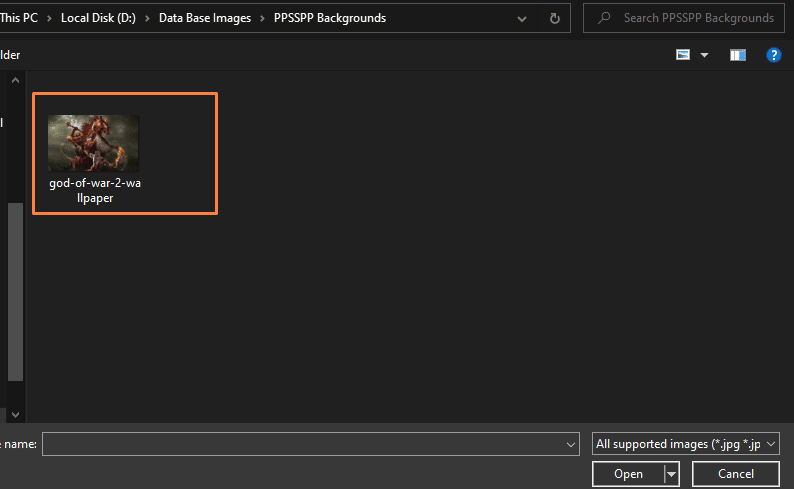
By default, the PPSSPP UI Background is like this. To change it, you’d have to download a background image from the internet and use it on the emulator. The steps to do this are easy even for a beginner. Here’s how it’s done:
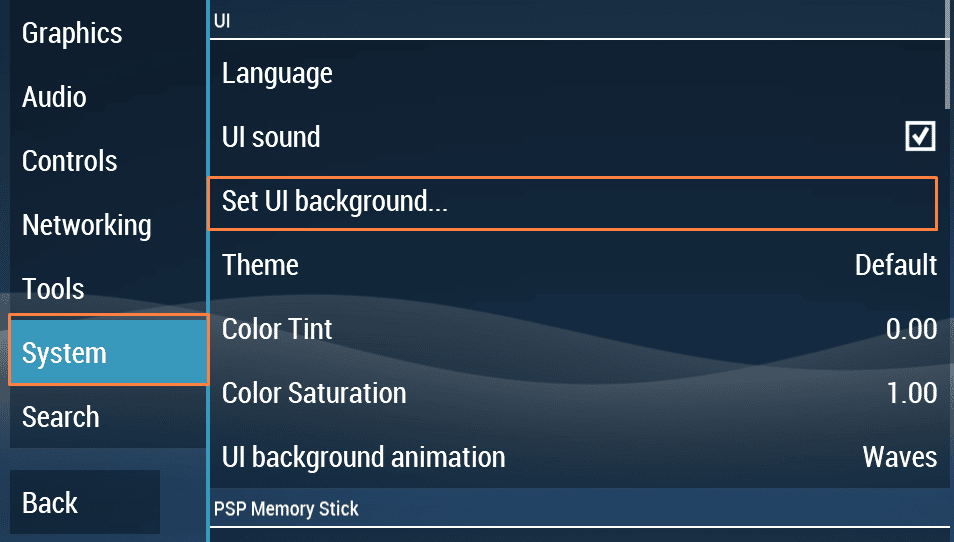
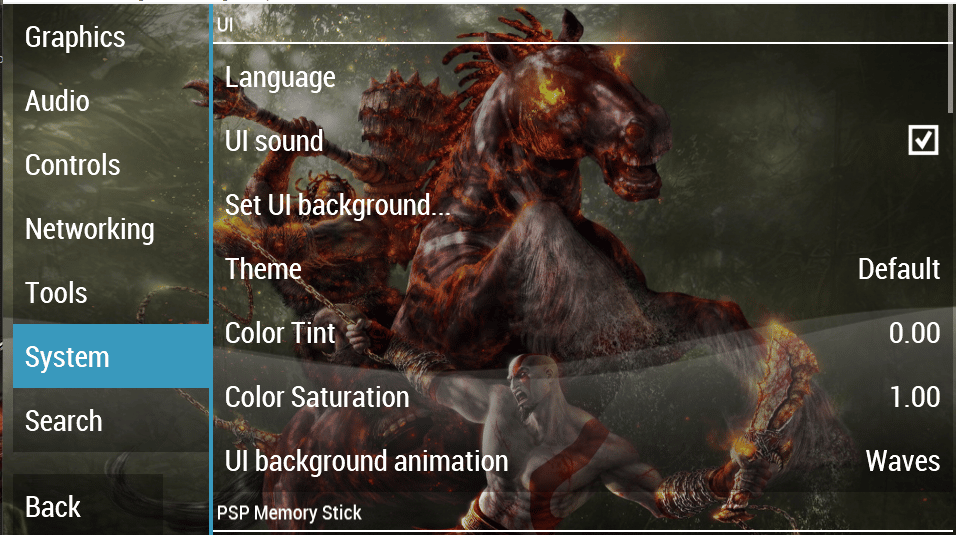
Go to Settings ☛ System ☛ UI Background Animation ☛ No Animation.

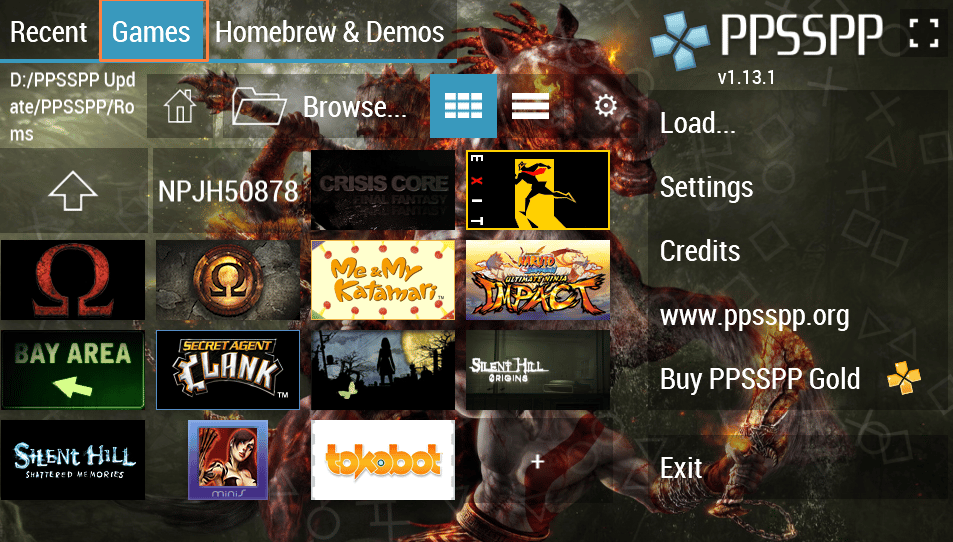
If your games’ folder is detected by the emulator, you should see icons of your games. All you have to do is double-click on the game’s icon and it will launch.

While PPSSPP is nearly perfect these days, users should make it a habit to check the games’ compatibility through the PPSSPP website once in a while. The webpage has all the information you need to know about the state of each game. The site even hosts information about homebrew titles you probably didn’t know existed.

Like the case with every emulator out there, PPSSPP allows users to enhance the way their games look. To go deep into this matter, I’ll be explaining some settings below.
There exist various enhancements to PPSSPP. Each setting plays a pivotal role in further enhancing your experience with the emulator. I’ll only focus on the ones you truly need.
Texture Filtering
This setting affects the textures in the game. By default, it’s set to xBRZ, but you can always change it to something else. Check below for a demonstration of each setting:


Upscale Level
Enhances the resolution of your game. If you have potent hardware, you can safely put this setting to the highest value.
Conclusion
At the end of the day, there are no best settings. It boils down to what you prefer.
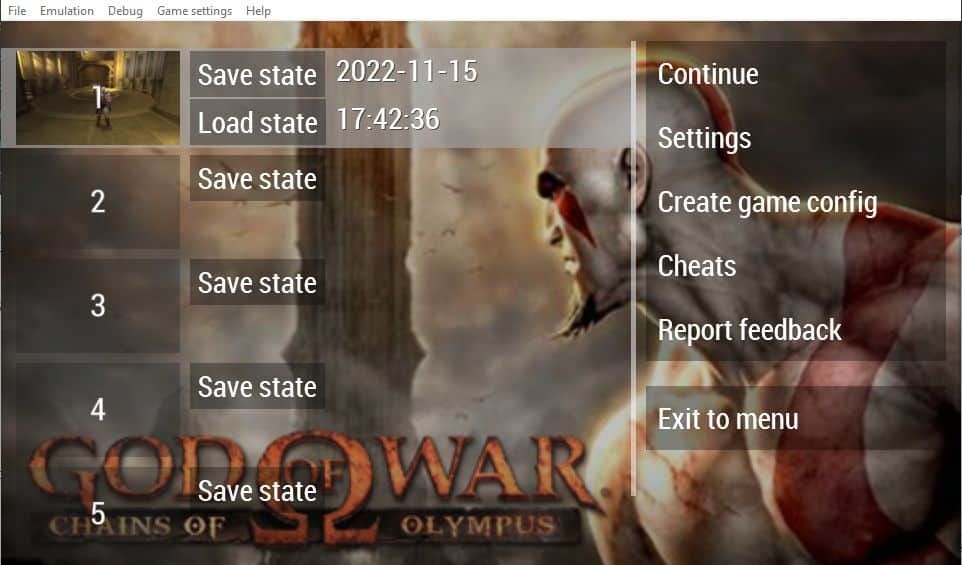
To save or load your progress on PPSSPP do the following:
Bear in mind that using this method may sometime produce issues with your in-game save data. It’s not common, but it’s something you should know about.
Press F12 on your keyboard to take screenshots. The place where your screenshots will be saved unto C:\Users\(username)\Documents\PPSSPP\PSP/SCREENSHOT
That’s it for the guide. Thank you for reading!
|
|
FreeckyCake
I'm just your average gamer who enjoys hunting hidden gems and underrated games. My love for Onimusha: Dawn of Dreams is like a truck and I recommend that you play it.
|
Leave a Reply