About SCUM |
||
|---|---|---|
|
|
||
| Release Date Aug 29, 2018 |
||
|
|
Developer Gamepires |
|
|
|
Publisher Gamepires |
|
|
|
Country of Origin Croatia |
|
Scum is a game that tries to think outside the box when it comes to survival games, the developers have added more immersive mechanics, like a metabolism system or complex crafting and inventory management, making it quite an ambitious project.
This game is developed by Gamepires with the help of Croteam.
In this article, we will go through the basics of base building, some tips and tricks, and some suggested locations that we found by playing the game.
Remember that each server has its own rules so whenever you join an unofficial server it will probably have discord or a site with its own rules.
And always keep in mind that no base is unraidable.
In order to build your base in Scum, you need to have the Engineering skill and the Survival skill.
You will also need materials, like some Bolts or Nails, Toolkits and Knives, or a Saw and Shovel, when you want to upgrade your structures you will need more toolkits, some metal scrap, barbed wires, cement, etc.
There are three basic choices for a player to build a base, you can either fortify an existing building on the map, make your own from zero, or a combination of both.

The first item you need is a Flag, placing a flag allows you to claim a section of the map, and an area appears that represents the working space for you to build your base, when you are close to the flag a Hand icon will take the crosshair’s place (this happens with every interactable object in the game), and by simply pressing F (default) on the flag you can enable or disable the visual boundaries in which you can build.

Objects and items in the world have multiple uses, by holding F when the hand icon appears you will see a drop down menu and the actions that can be taken accordingly to the interactable object, there’s also another way, when you are close to an object or an item and open the inventory menu by pressing TAB (default) you can right click on them and see the drop down menu again.
You can build your base first and place the flag inside of it later, but you have to be careful because anything you build without having a flag around can be claimed by another player, they also can claim your Doors and Locks so keep that in mind.
Also, most of the items can be dragged and dropped within a certain distance from a player.

Locks are the next item that you will need if you want to have a secure base and make it harder for people to raid it.
They are used to lock doors, chests, and vehicles and you can craft them by gathering Padlocks from around the map which is quite a challenge, to be honest.
The basic lock requires five, the silver ten, and the enforced 15.

Doors can equip up to three different locks and two lock protections that cause damage to anyone who tries to lockpick each time they failed an attempt.
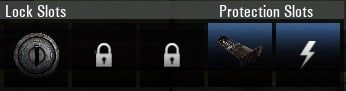
Lock Protections will only be removed from your door until all three locks are gone.
In order to lock a door simply drag and drop it in the special window that pops up when you approach it.
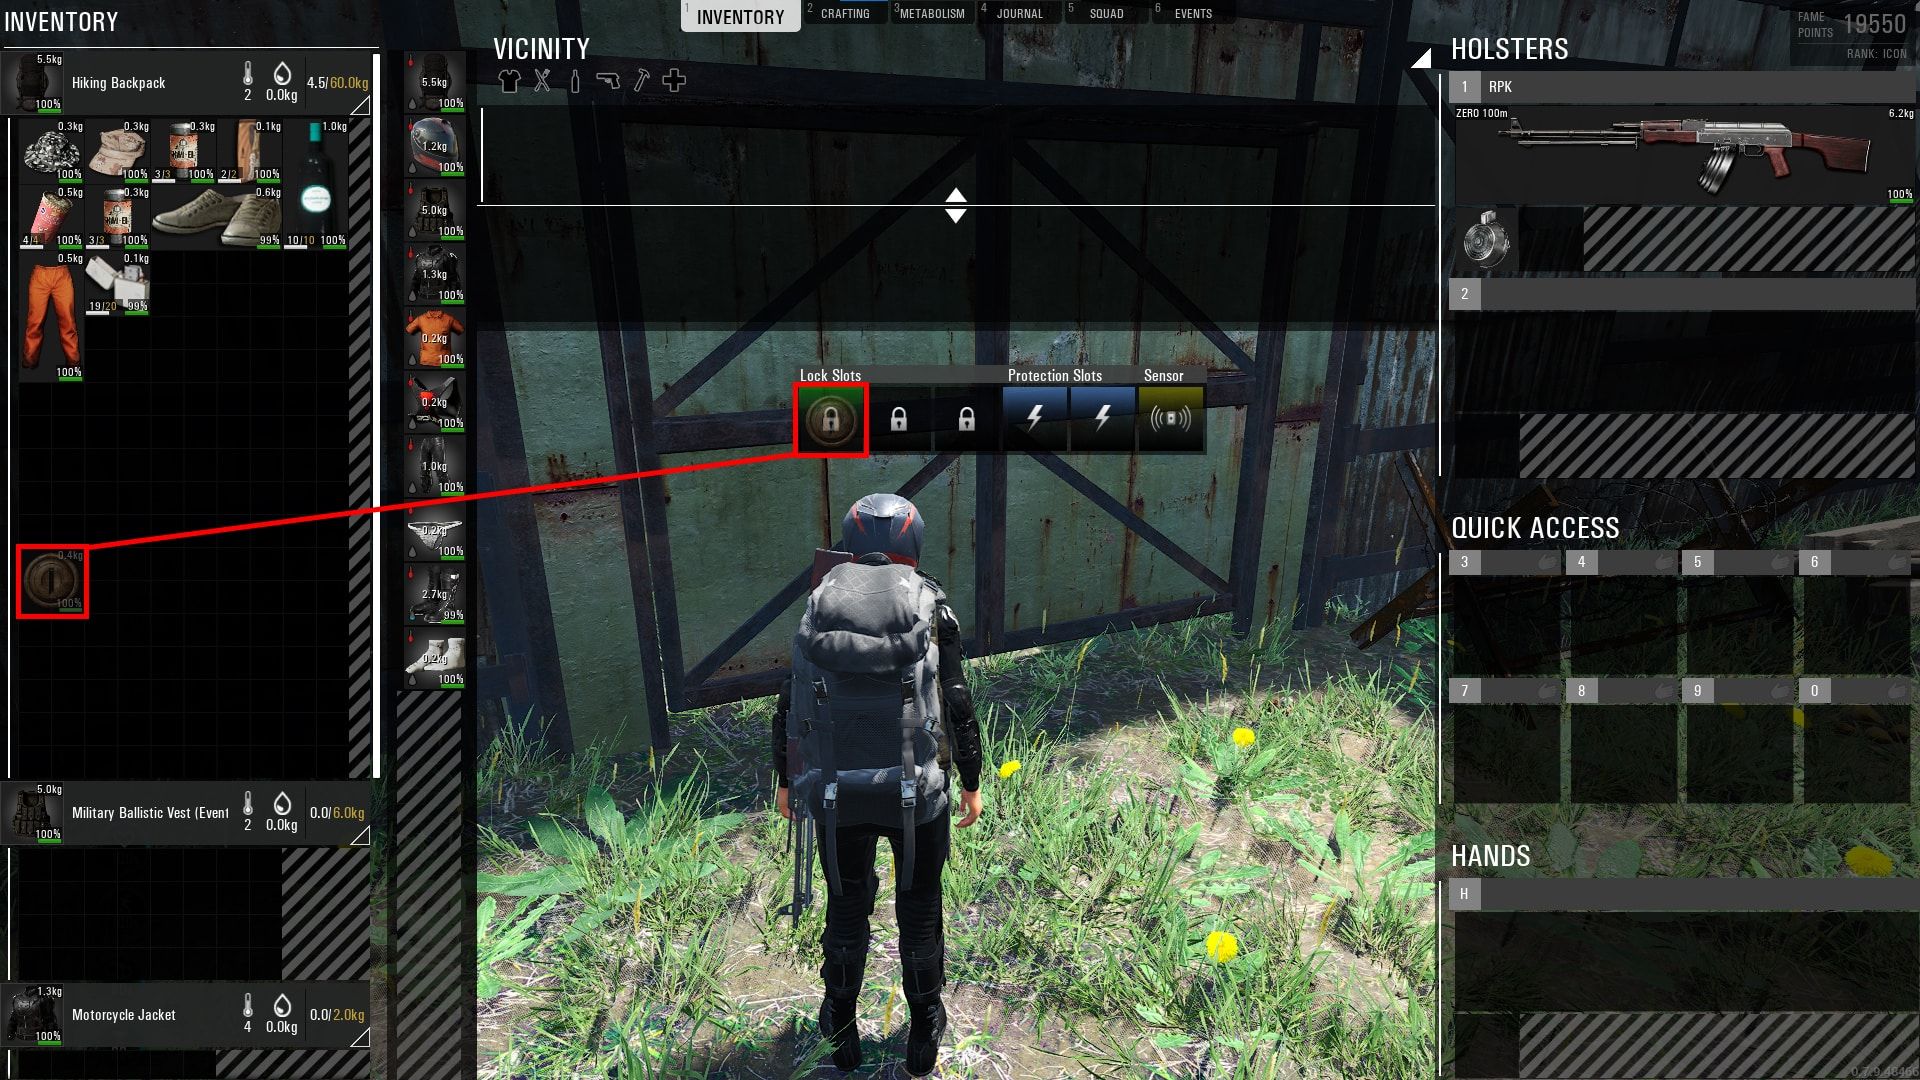
You can place a lock by dragging and dropping it in the door interface.
There are two items that can be used to open doors remotely, the Remote Control and the Receiver.
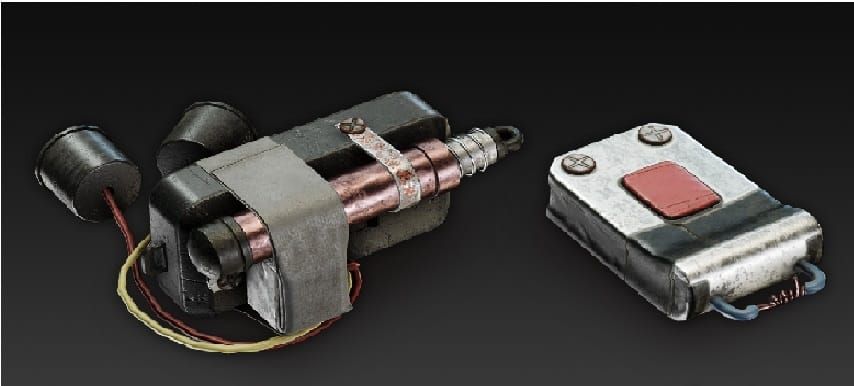
They can link up to ten locks.
If you want to lock vehicles or chests once you’re close enough and they appear in your vicinity you can drag and drop a lock on them, but keep in mind that locked vehicles and chests can only equip one lock without a lock protection.
Locking a Vehicle, notice how the padlock icon under the name SUV is grey, that means I haven’t placed the lock yet.
Also when you lock something you can set special permissions with the drop down menu, you can manage who can unlock certain things by managing your Squad.

Lock on an Improvised Metal Chest, here the lock is placed and has lit up.
Chests And Storage

Another important component for your base is chests, they can be used to store all different kinds of items that you will need, like tools, weapons, ammunition, and crafting materials.
There are three types of chests, Wooden Chest, Improved Wooden Chest, and Improvised Metal Chest.
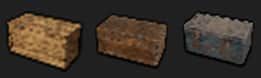
Unlike walls and structures, chests can not be upgraded every type has to be crafted separately but with each level, they will also have more storage.
Be careful where you place your chests when you are making your base because they can be dragged and dropped when the TAB interface is open.
They can also be loaded onto a vehicle so it’s generally better to just have stuff that you don’t care much about losing.
Chests can be buried and that is their biggest advantage, in order to bury a chest you need a shovel, you can find shovels around the world or you can craft some.
It’s recommended to put some useful stuff into buried chests and hide them away from your base in case it gets raided or you die so you don’t have to start from scratch.
A few weapons some health items and food are a decent option, but don’t forget you need a shovel to get it out and you have to remember its location.
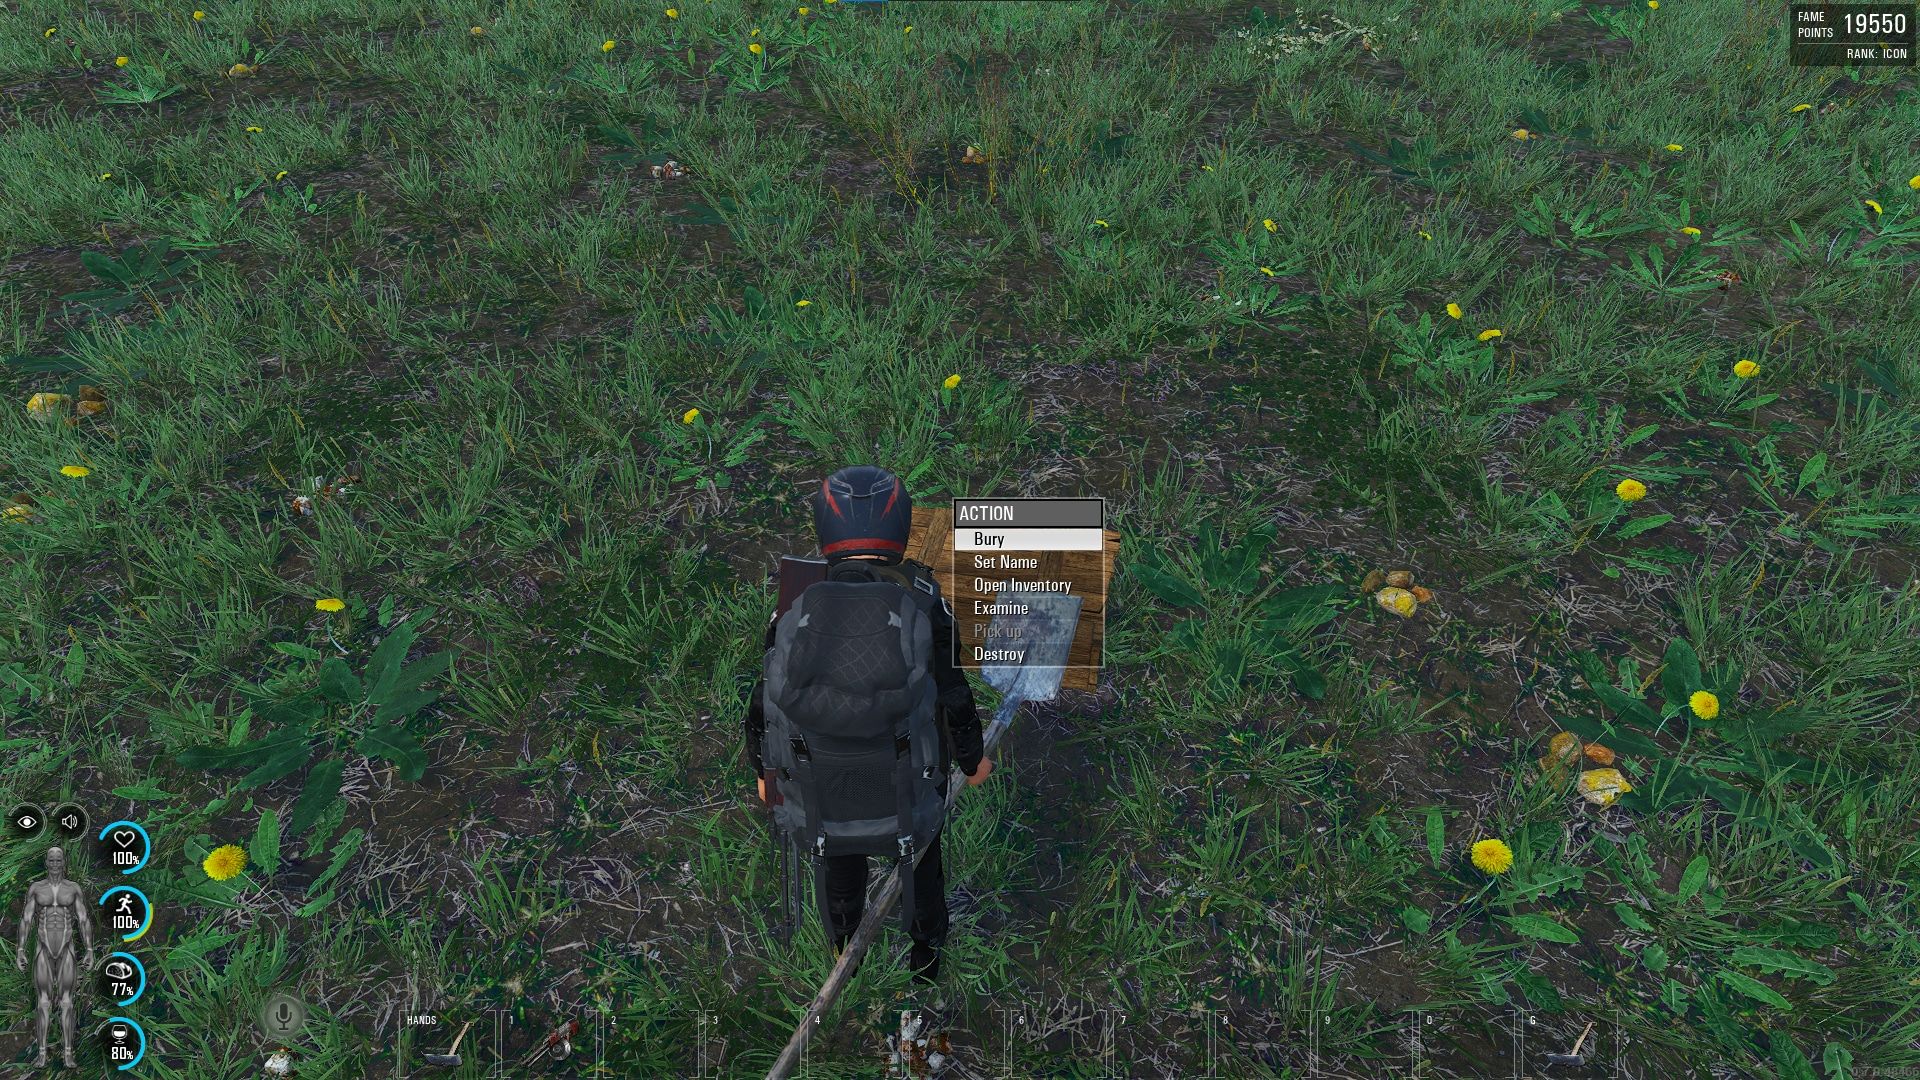
Burying a Chest.
When you hold Right Click you enter Focus mode which allows you to see where you have buried your chests.
Focus mode can be used for other things as well like tracking animal footprints, finding where a sound is coming from, or zooming in on your weapon sights further.
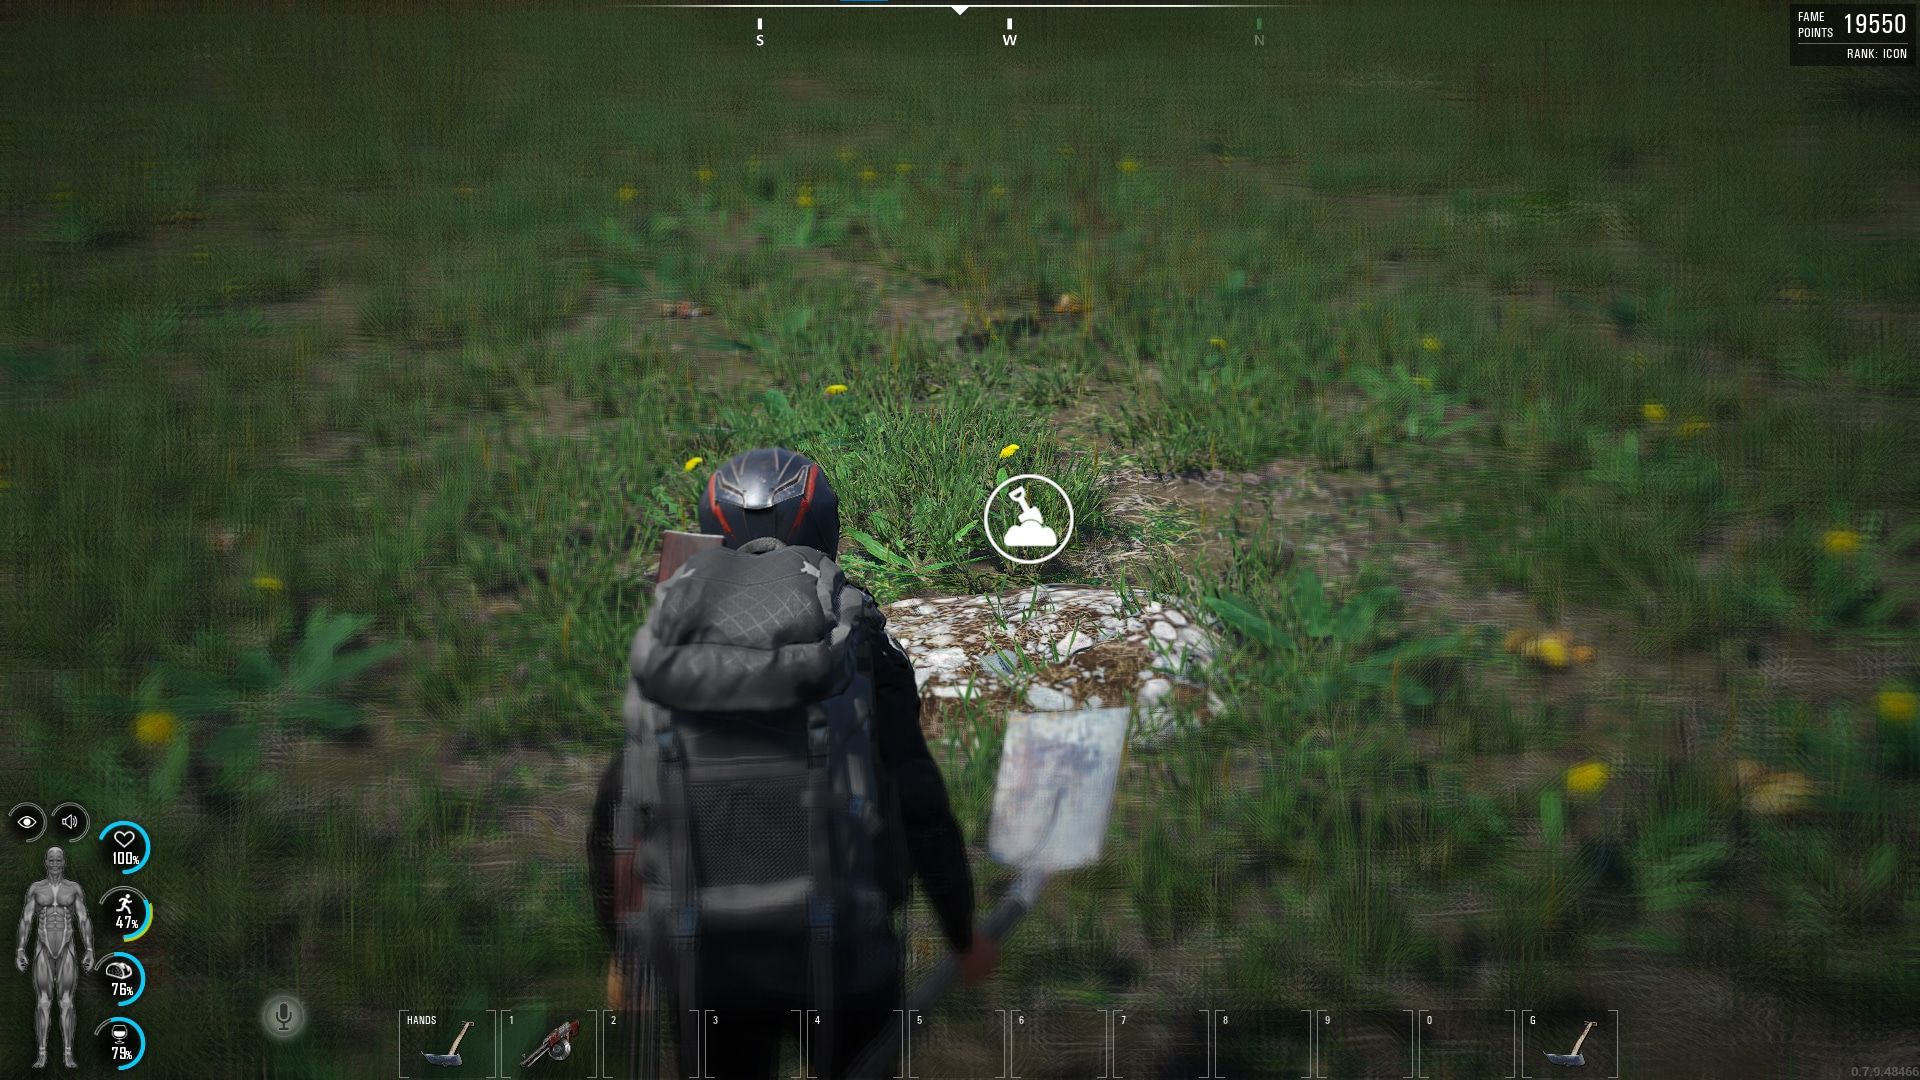
You can see where you buried your chest by using focus mode.
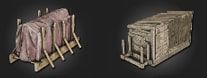
There are other alternatives to chests like the Improvised Wardrobe and Storage Shelf, there are also Weapon Racks and Log Sheds amongst other things.
Wardrobes have greater storage than metal chests but the storage shelf has the most capacity.

There are two types of log sheds, the Small Log Shed and the Large Log Shed each having its own capacity and you can store big logs small logs planks, and sticks in them.

There are two types of beds the Improvised Bed and the Bottom Bed, both serve the same purpose and are for respawning there when dying.
The bottom bed can be upgraded to a Double Bunk Bed but there’s no use for it since you can’t sleep on the top one nor create it as a respawn point for another player.
When you build a bed an H is going to appear on your map, only one H can exist at a time and it symbolizes your bed’s location.
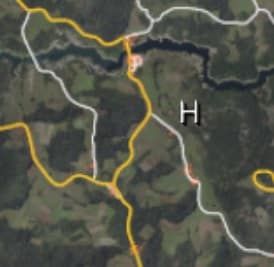
This is what the H(ome) looks like on the map.
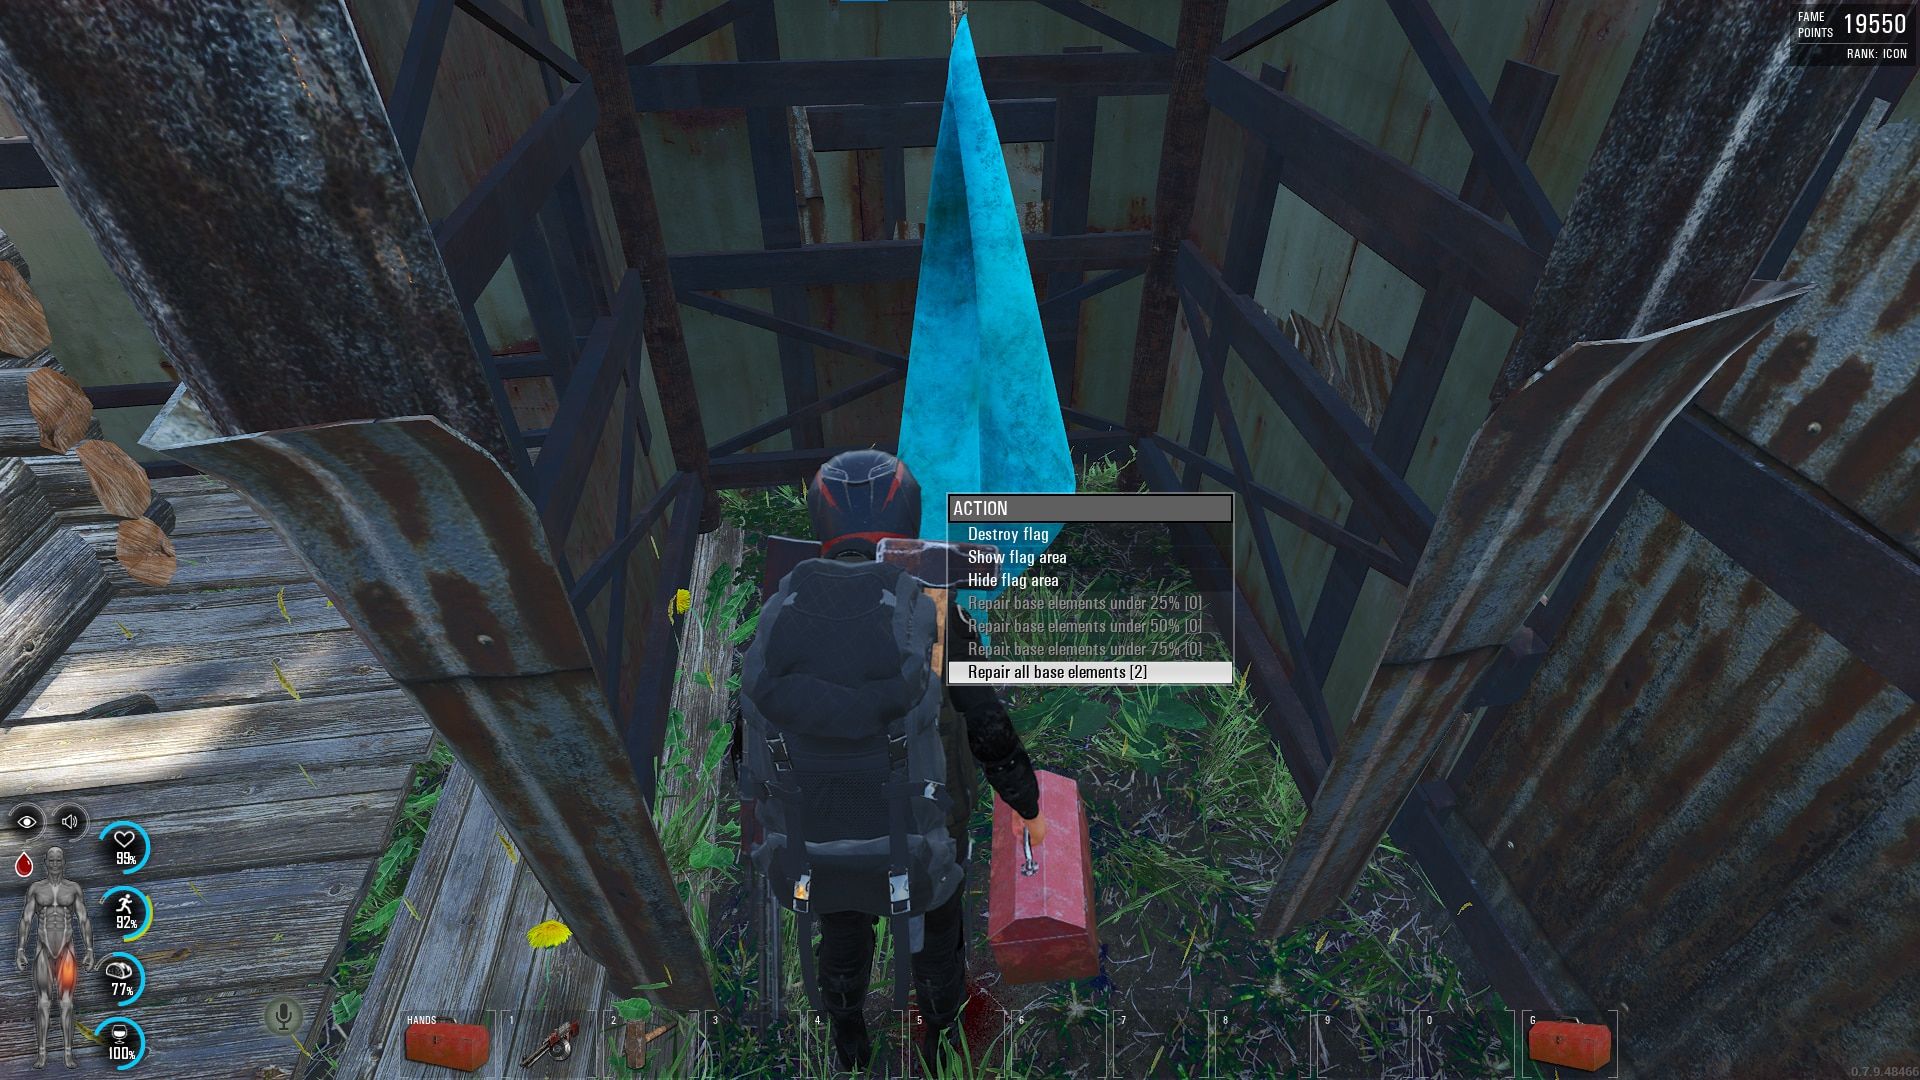
Drop down menu to repair base at the Flag, needs a Tool Box.
You can repair your structures and everything you own with a Tool Box.
The tool box can be crafted or can be found around the world.
You can repair each object individually or by going to the flag and repair everything from there.
To maintain your base in a server you have to log in once every 14 days and walk within the boundaries of your flag.
Everything inside its perimeter will be maintained automatically.

Various objects and structures you can build in your base.
Building a base in Scum plays a big role in PvP Servers rather than PvE, because in PvP there are more parameters that you have to think when you have to go against other players.
Base building in Scum is more complex than other Survival Games as it gives more freedom of choice on where to place your structures.
Most players build their bases like a fortress having their main rooms or cabins inside a perimeter of walls that can be in multiple layers and each one can be upgraded accordingly from wooden to metal and concrete.
This means that you can adjust your base for the number of players you have in your squad by learning and taking examples of how other people present their own bases.
You should never build your Walls at the border of your flag’s area because people can easily build a Watch Tower outside of the wall and jump over it.
You might have extra protection across your loot rooms and your beds but still, the enemy managed to get inside your wall.

Don’t build walls on the edge of your Flag’s Zone.
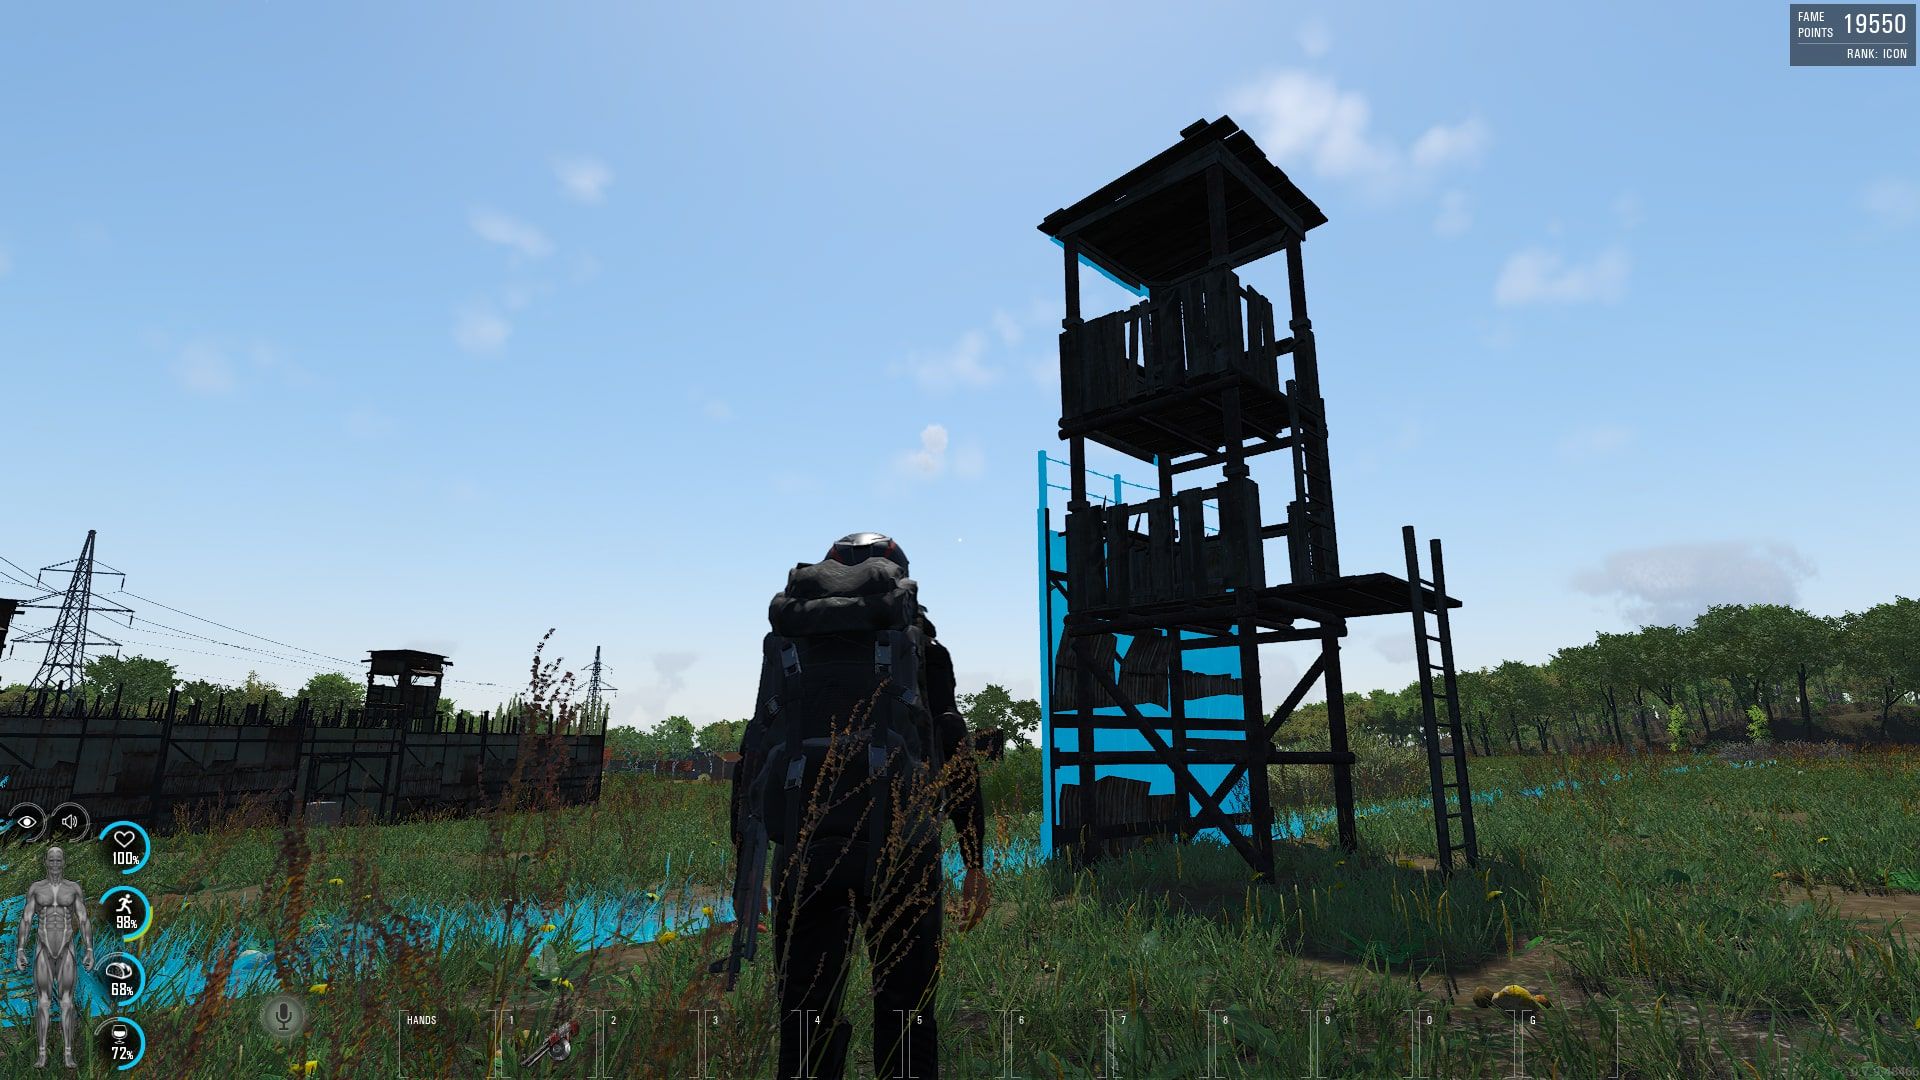
As you can see the Watch Tower can easily help them get inside.
Blueprints (the blue placeholder structures) can not be snapped together but you can snap the next blueprint onto foundations that are already built.
This works for other structures such as walls and door frames as well.
You can see in the picture below that the blueprints haven’t snapped together.
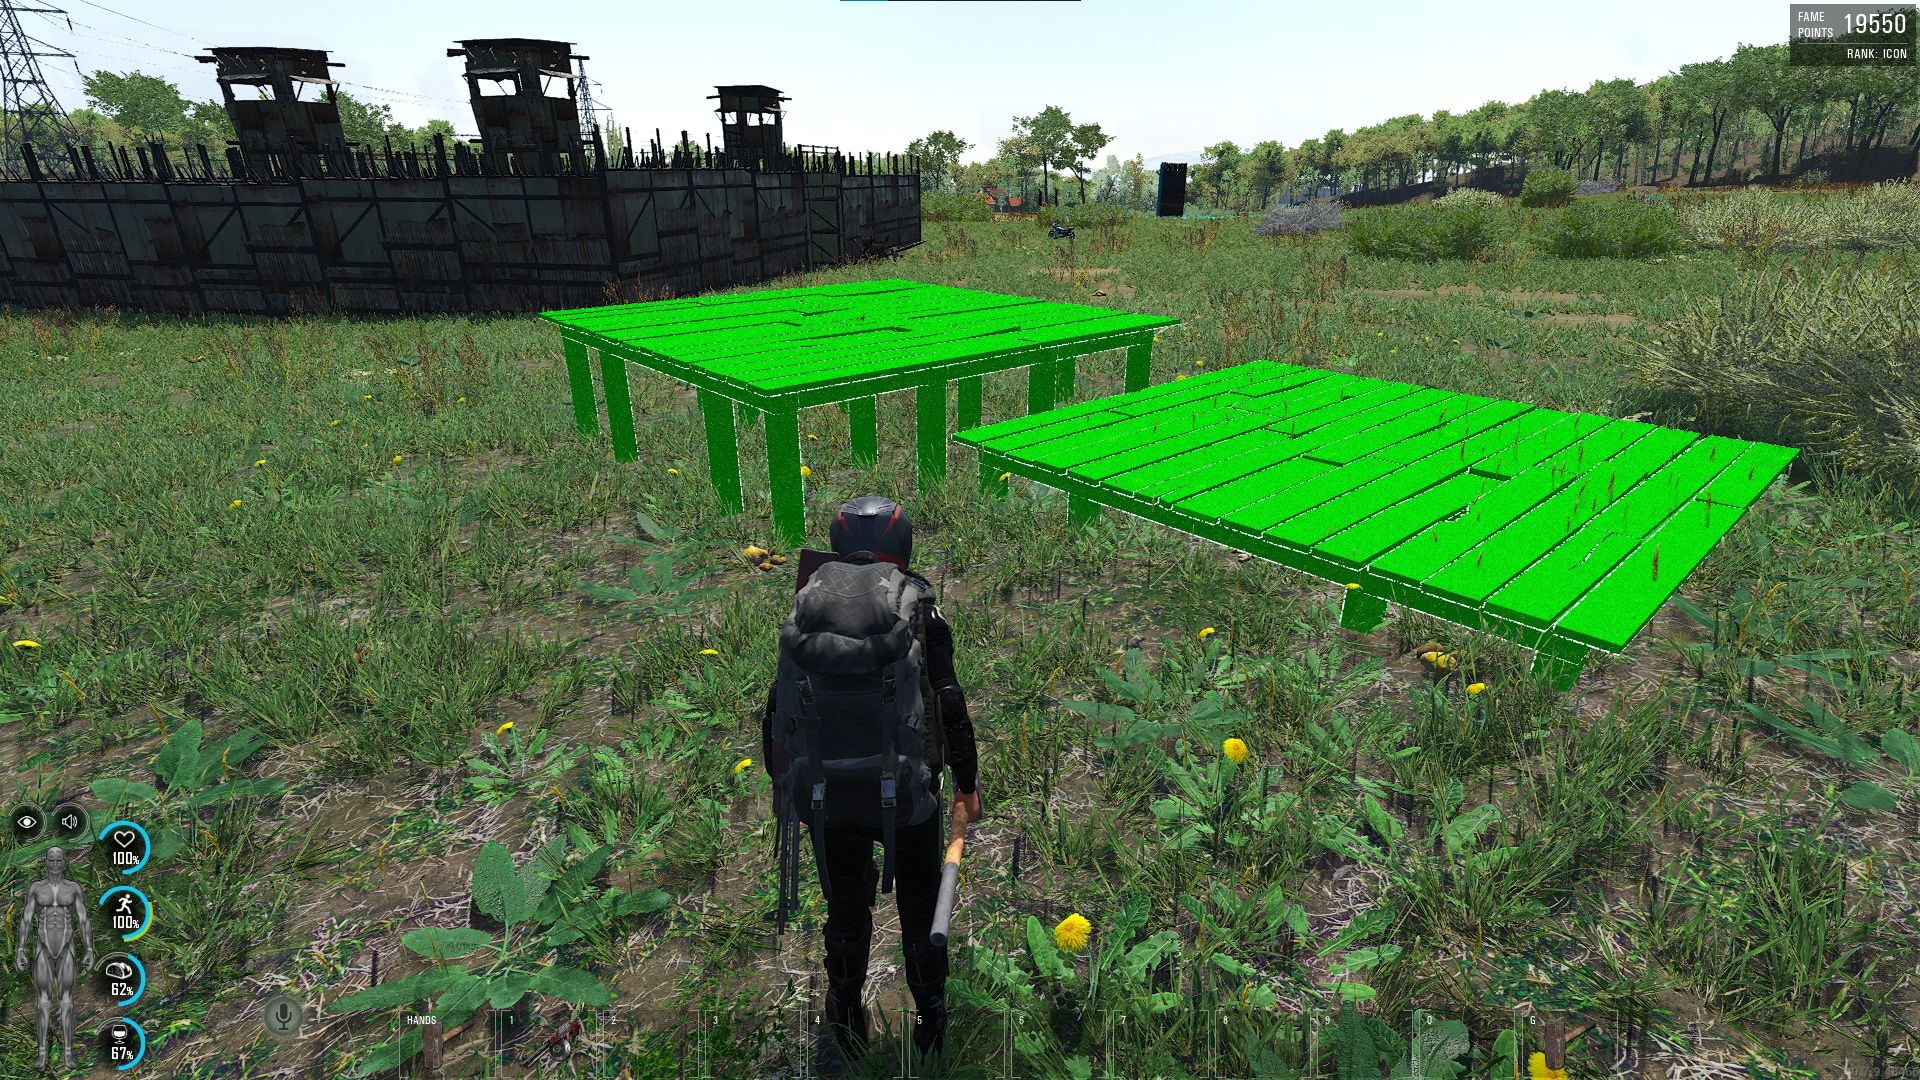
These Blueprints have not snapped.
But on the already built foundation, they snap just fine.
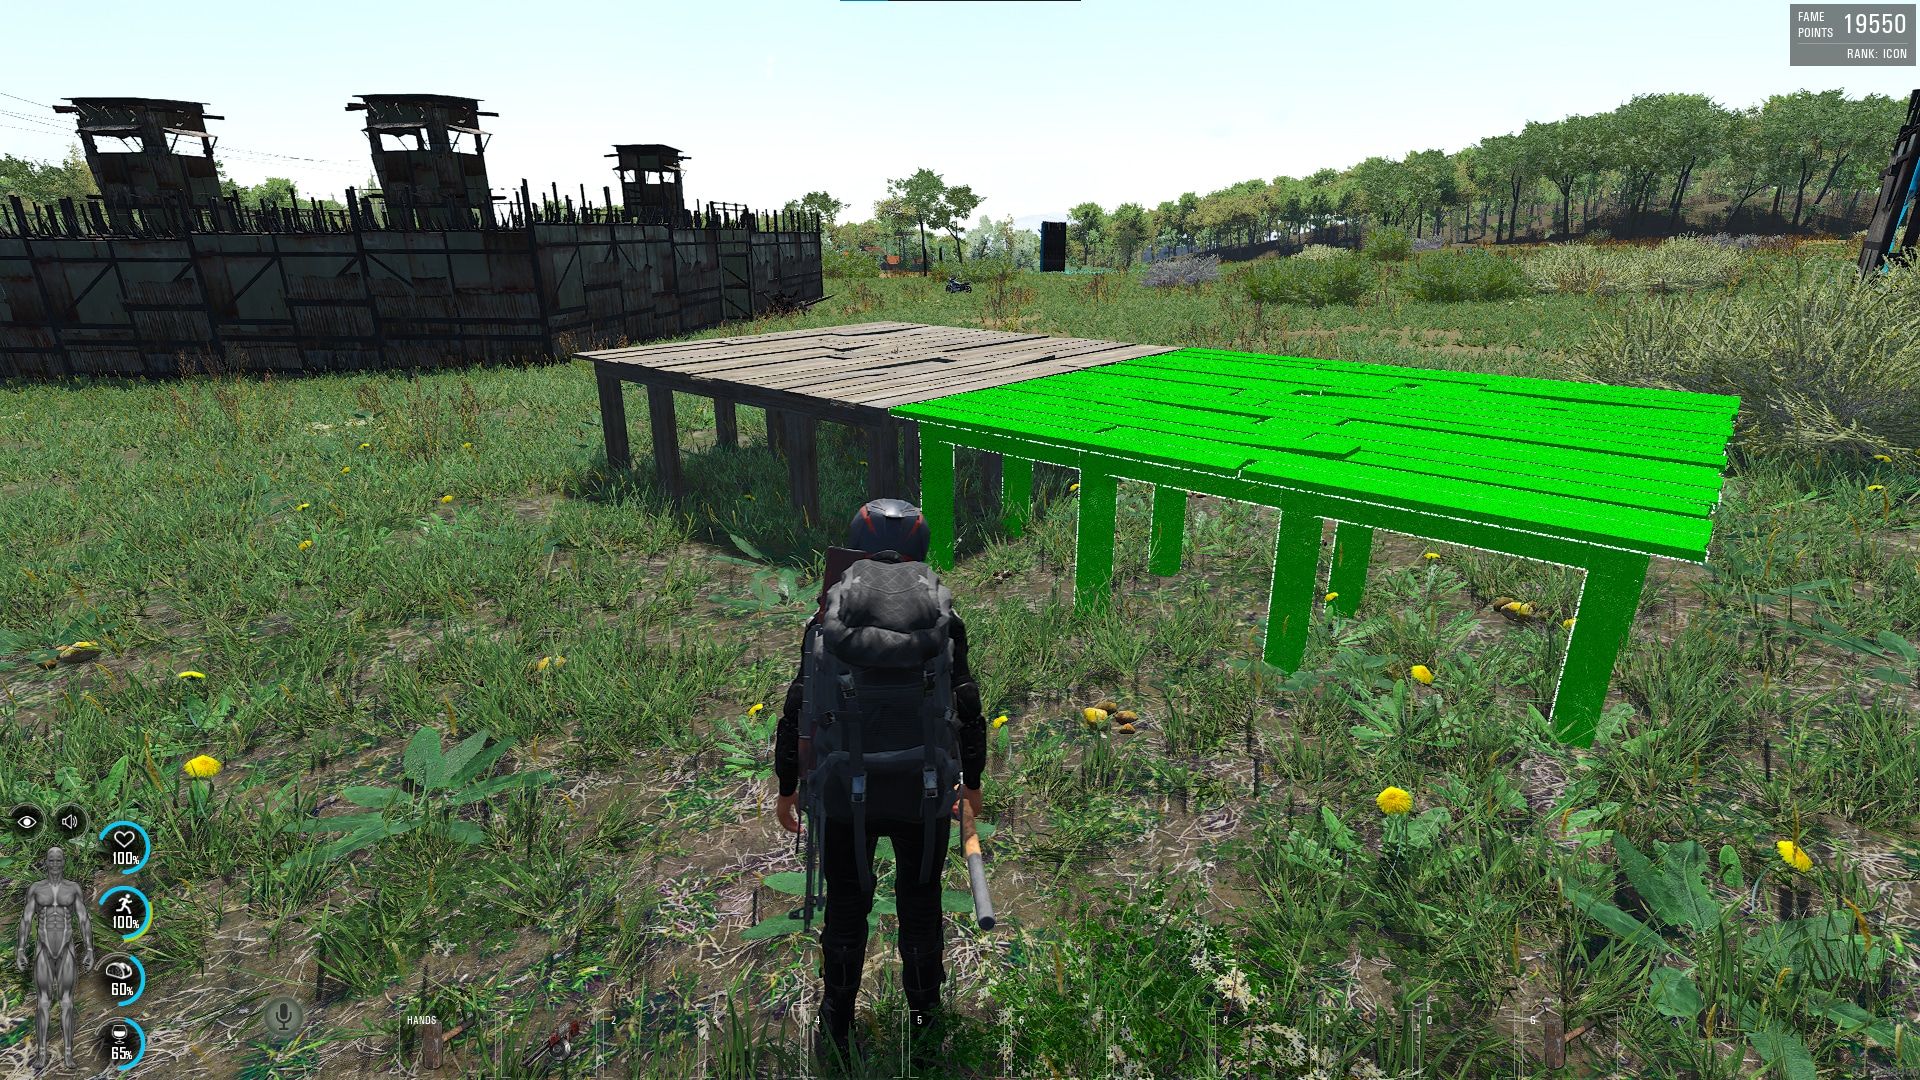
Snapped Blueprint on an existing Foundation.
You can adjust the height of the foundation regardless if it’s snapped onto an existing foundation or next to another blueprint.
Adjusting the height can be done by holding F and using the scroll wheel on your mouse.
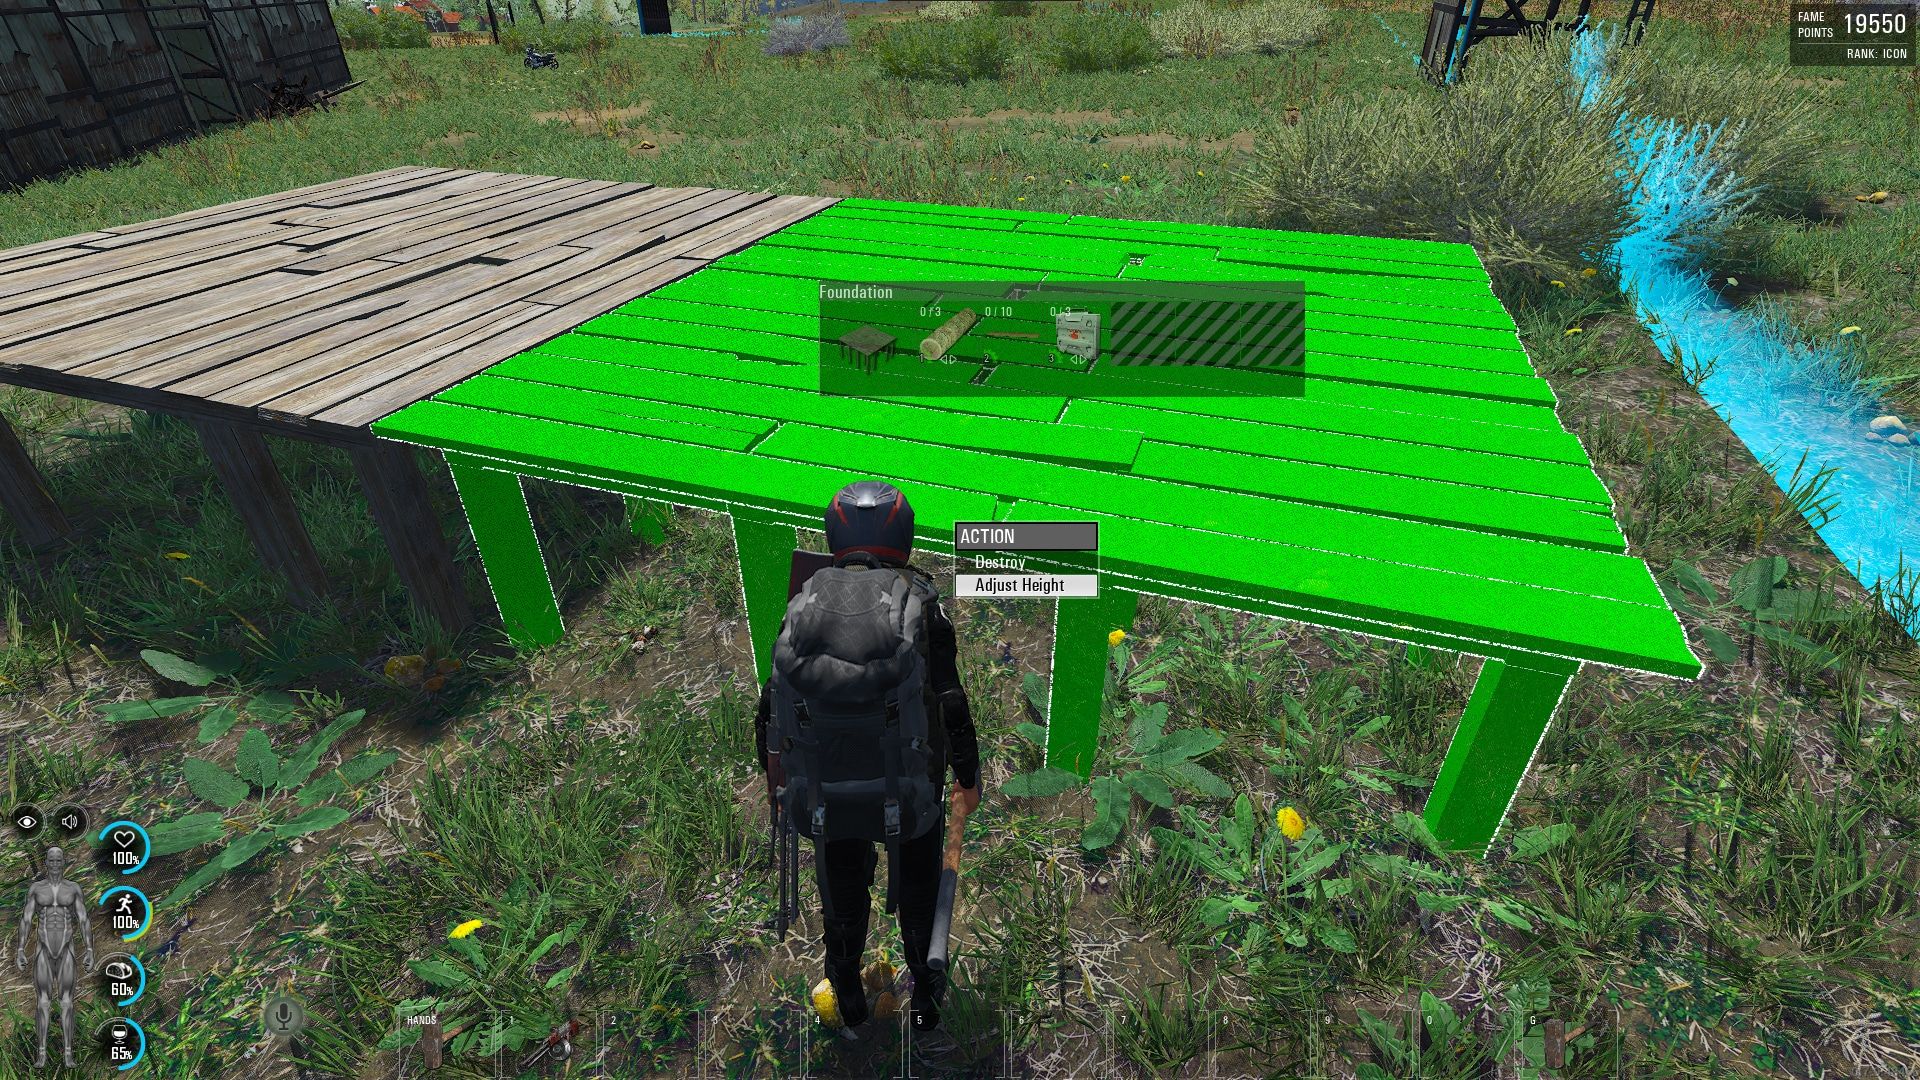
Press and hold F to bring out the drop down menu.

Press and hold F to bring out the drop down menu so you can destroy structures when you have an axe or a hammer on you.
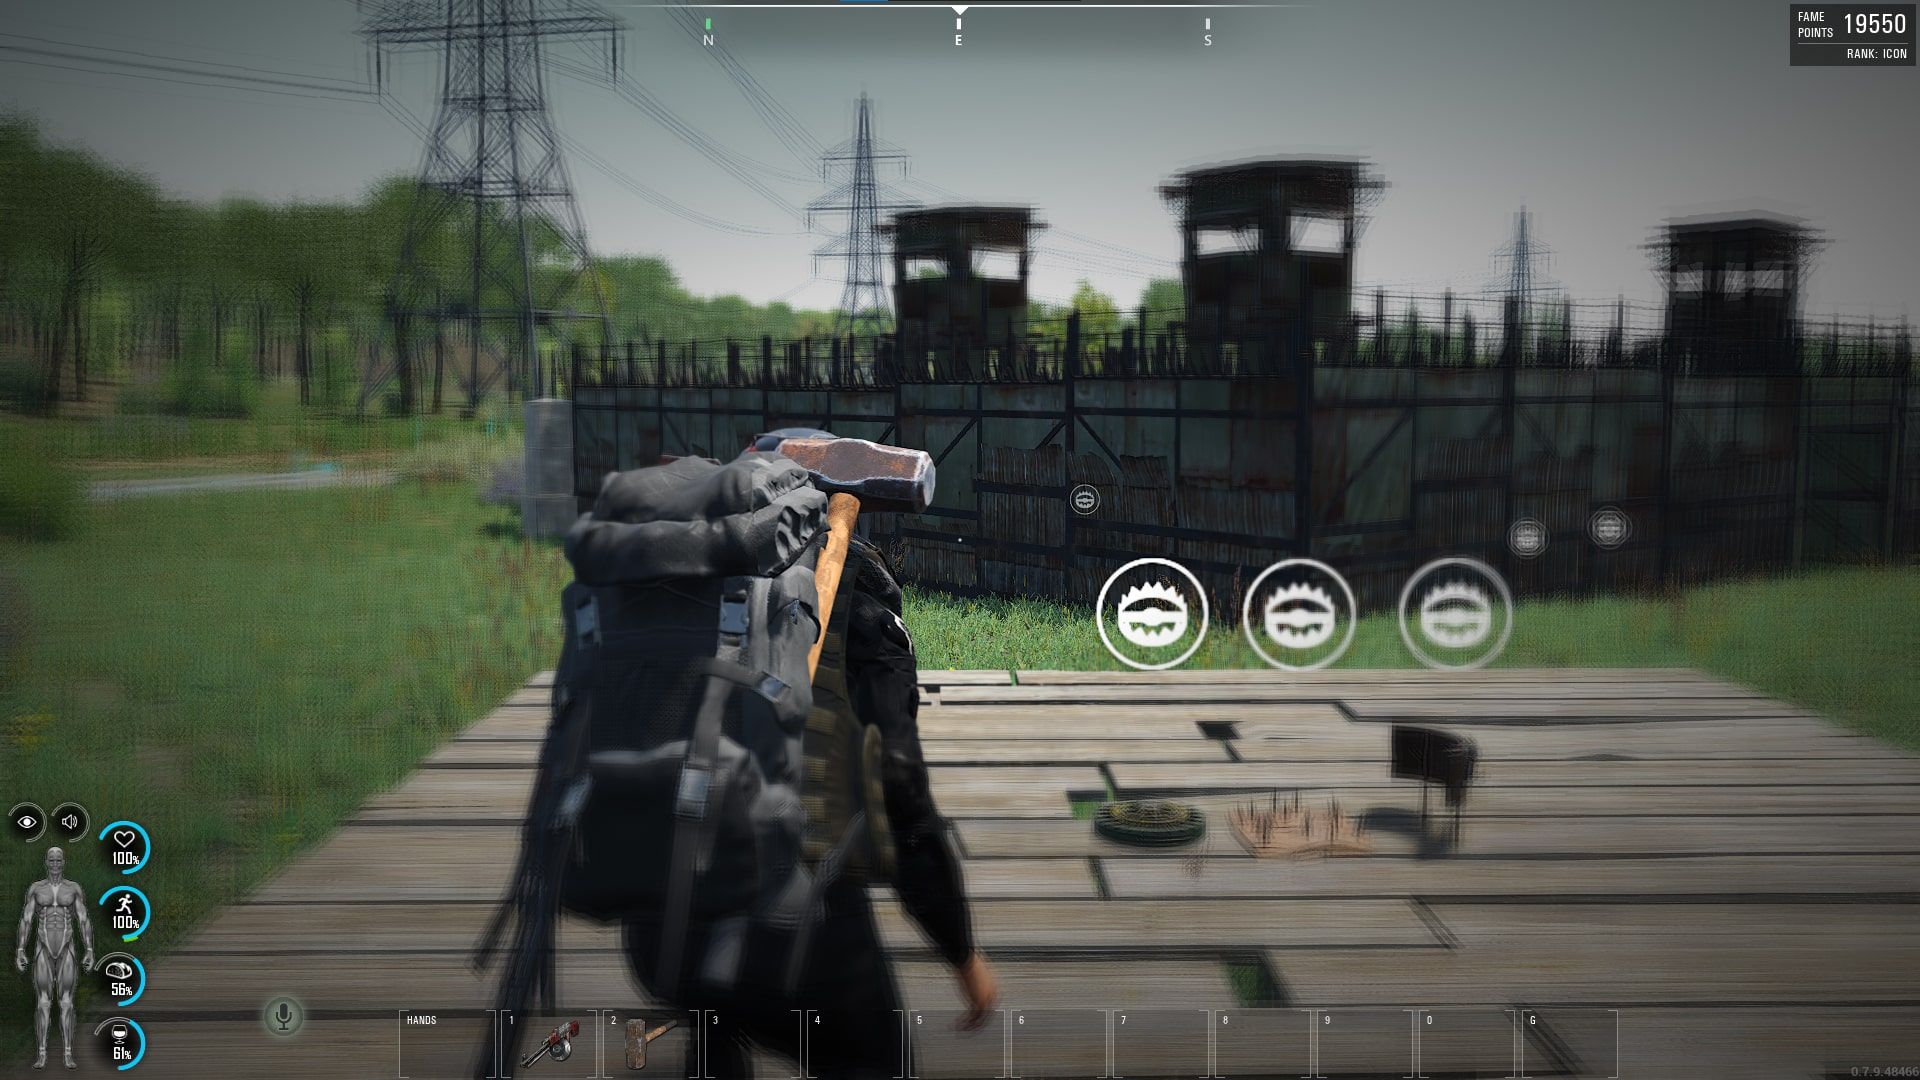
The best way you can destroy your structures effectively is with an Axe or a Sledgehammer.
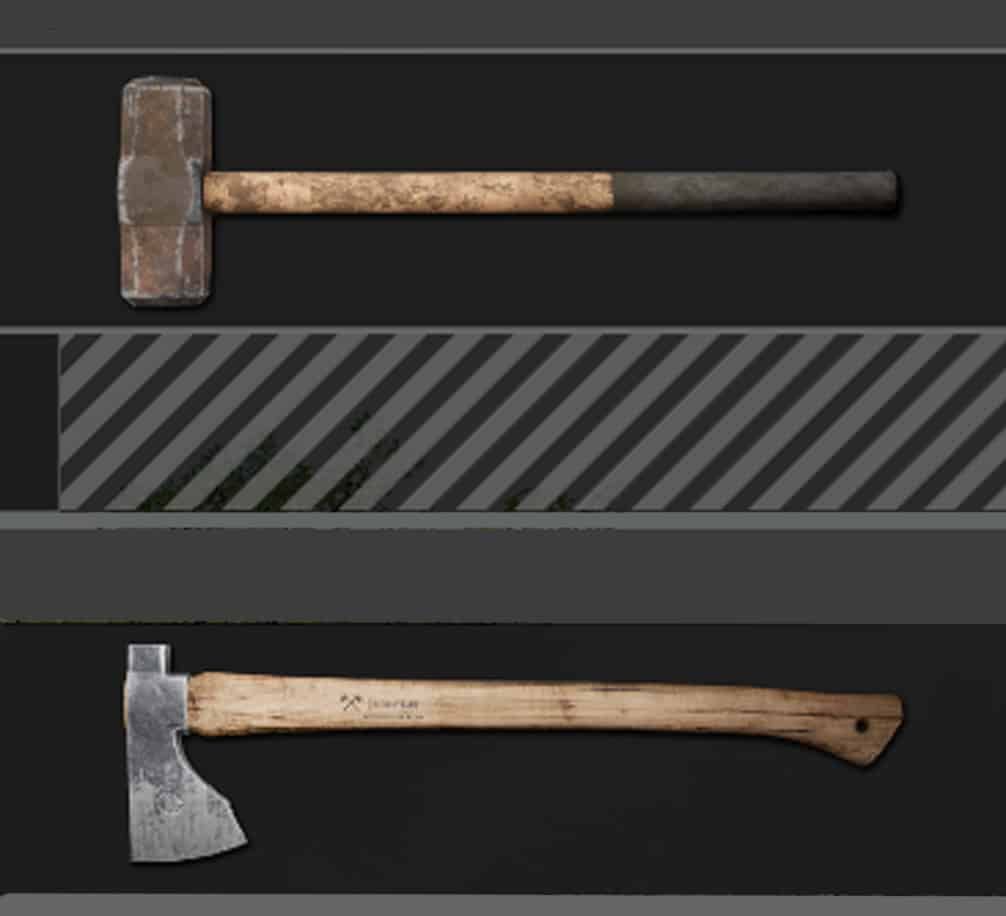
An Axe and a Sledgehammer.
Destroying your own structures inside your flag area will only take a few seconds, this counts for other structures that are not inside your flag.
You can destroy structures in an enemy territory flag like this but it will take ages, that’s where explosives such as C4 come in hand.
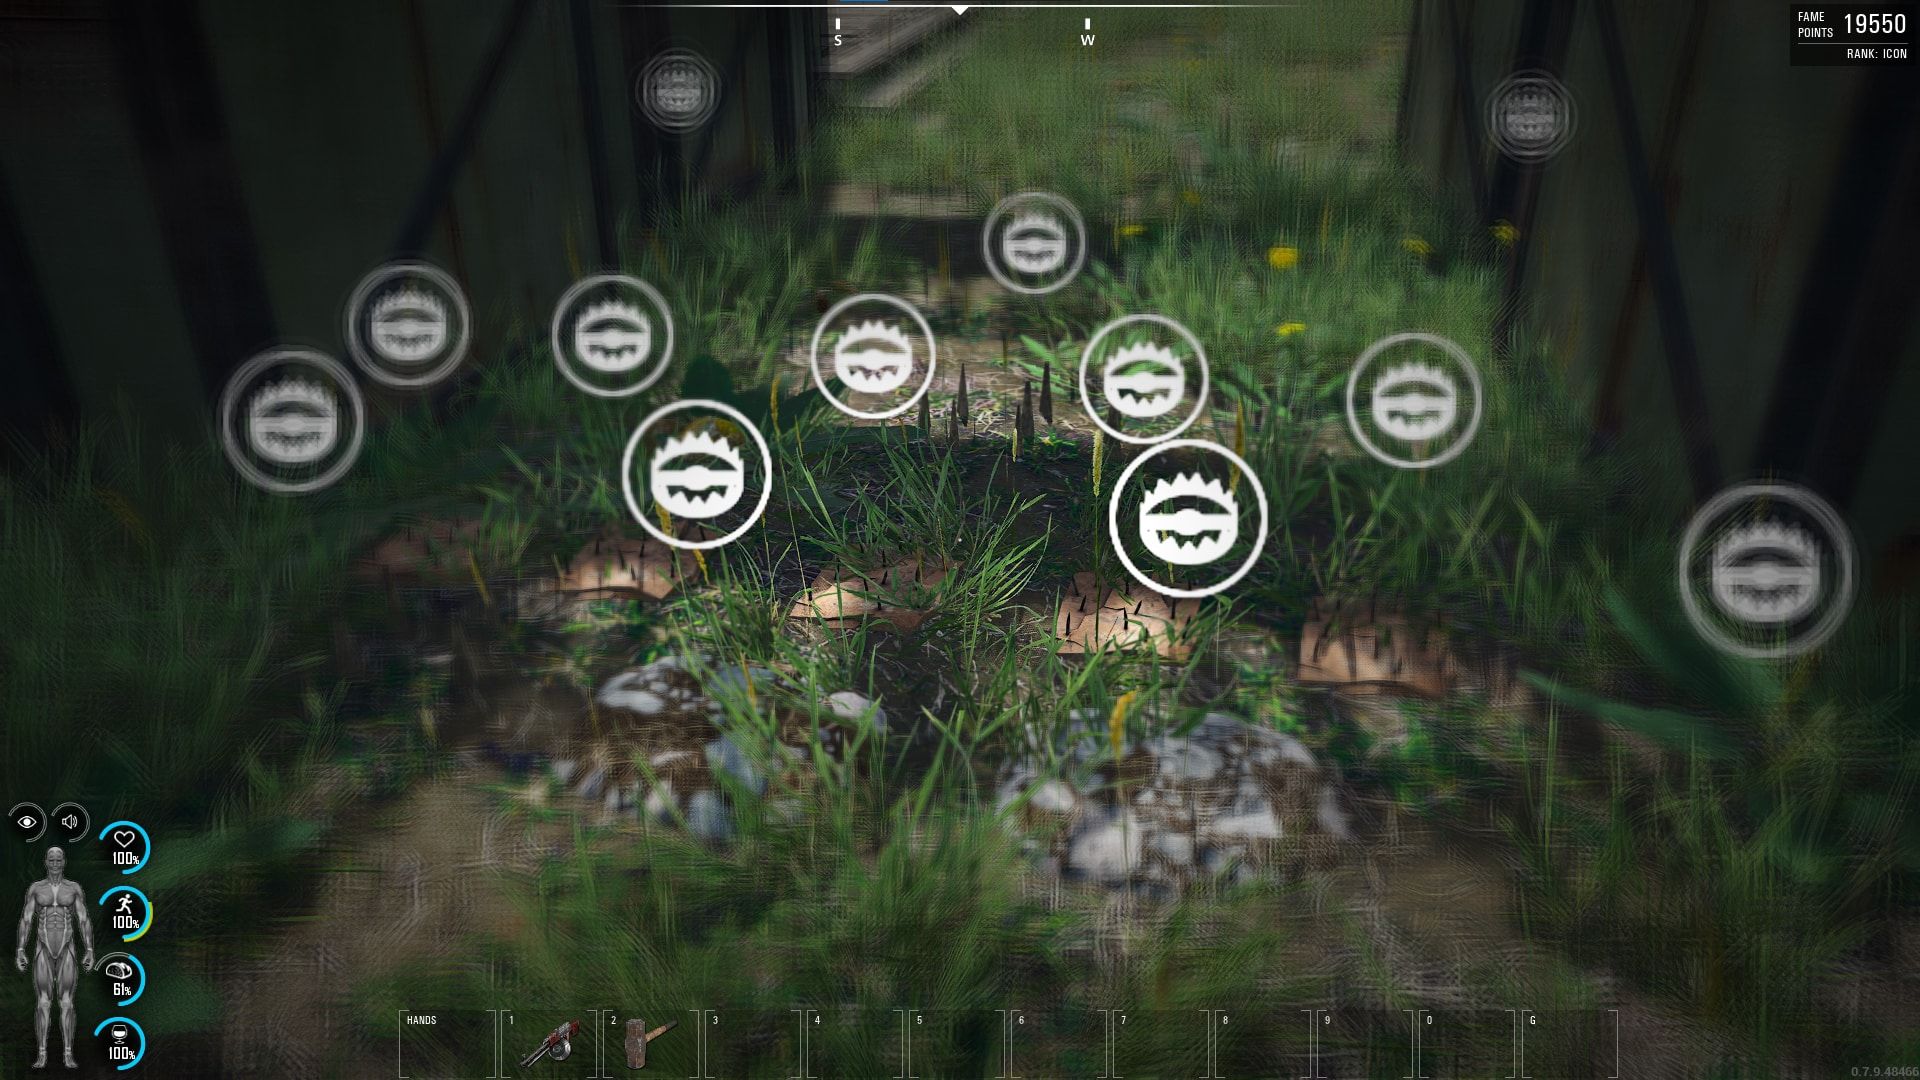
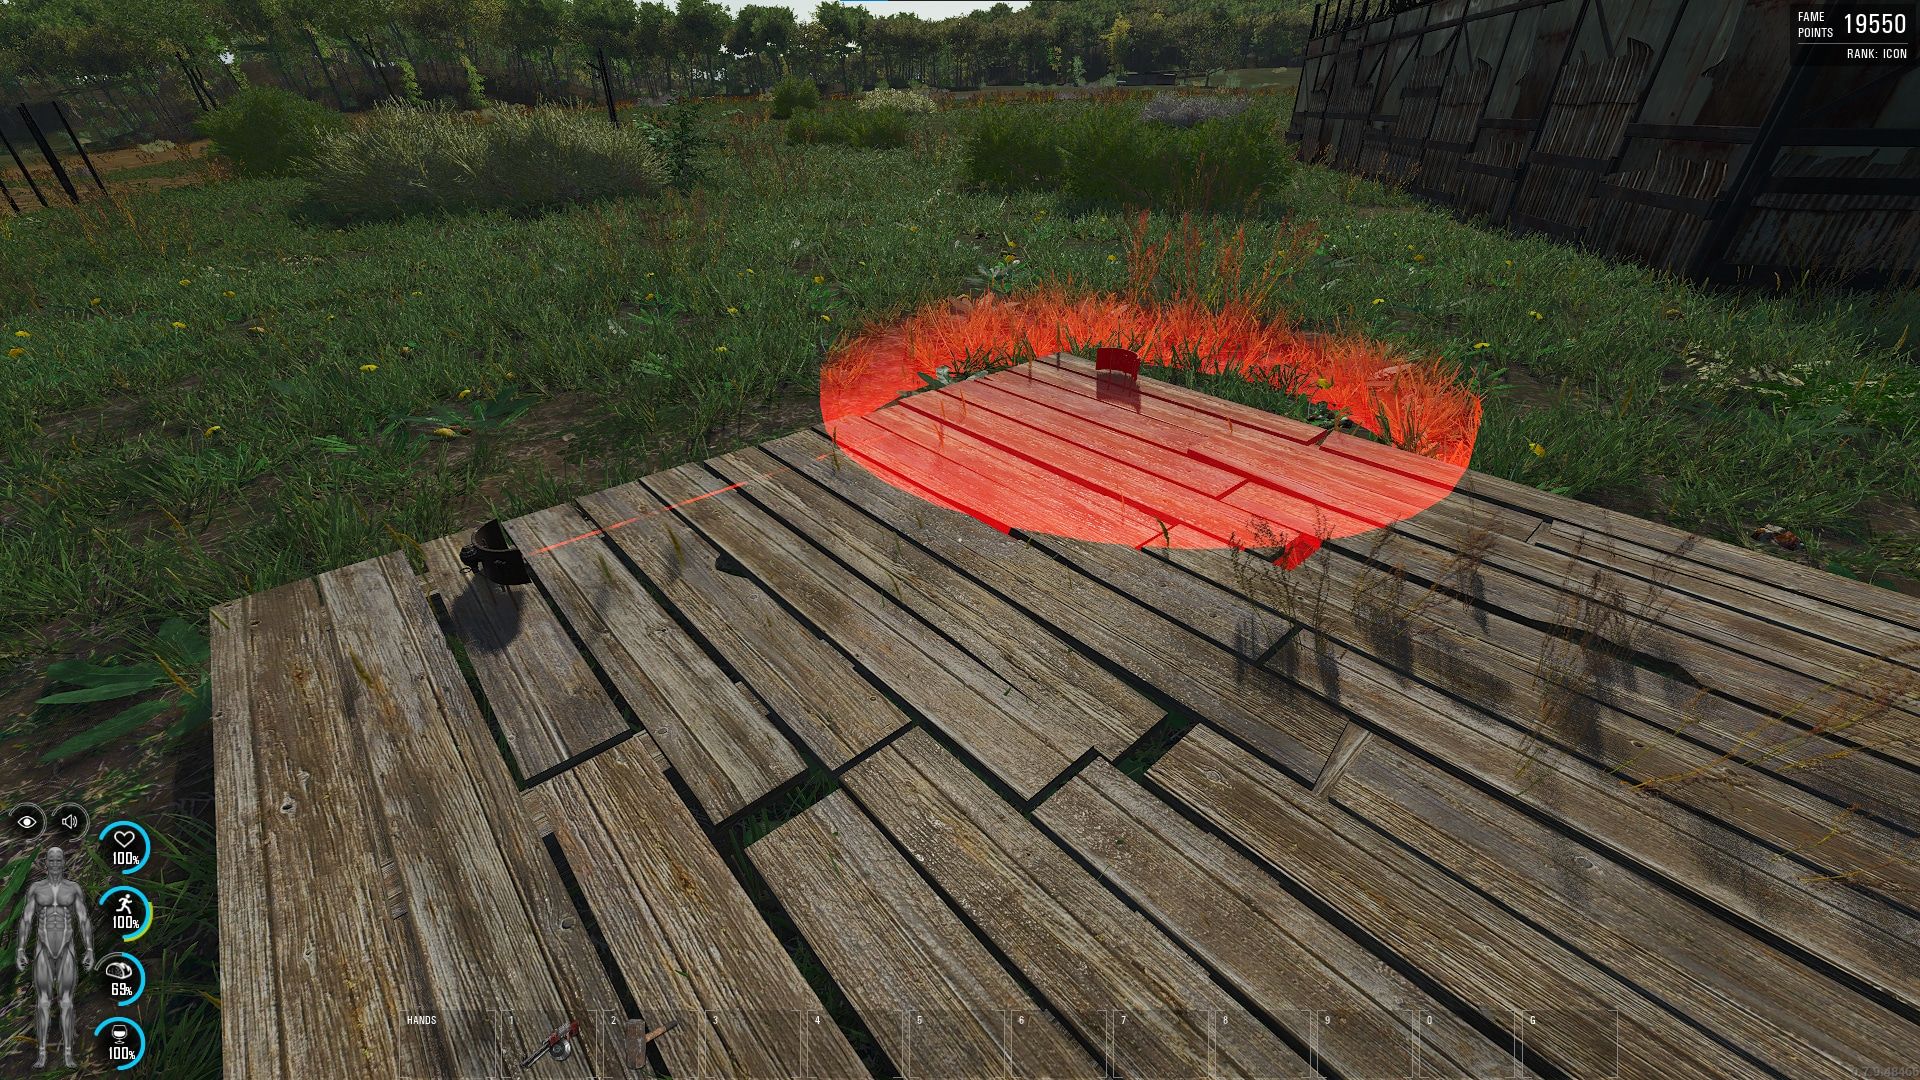
Tip 4. Traps inside your Flag zone will not activate when you arm them but the explosion from Mines or Claymores will damage you.
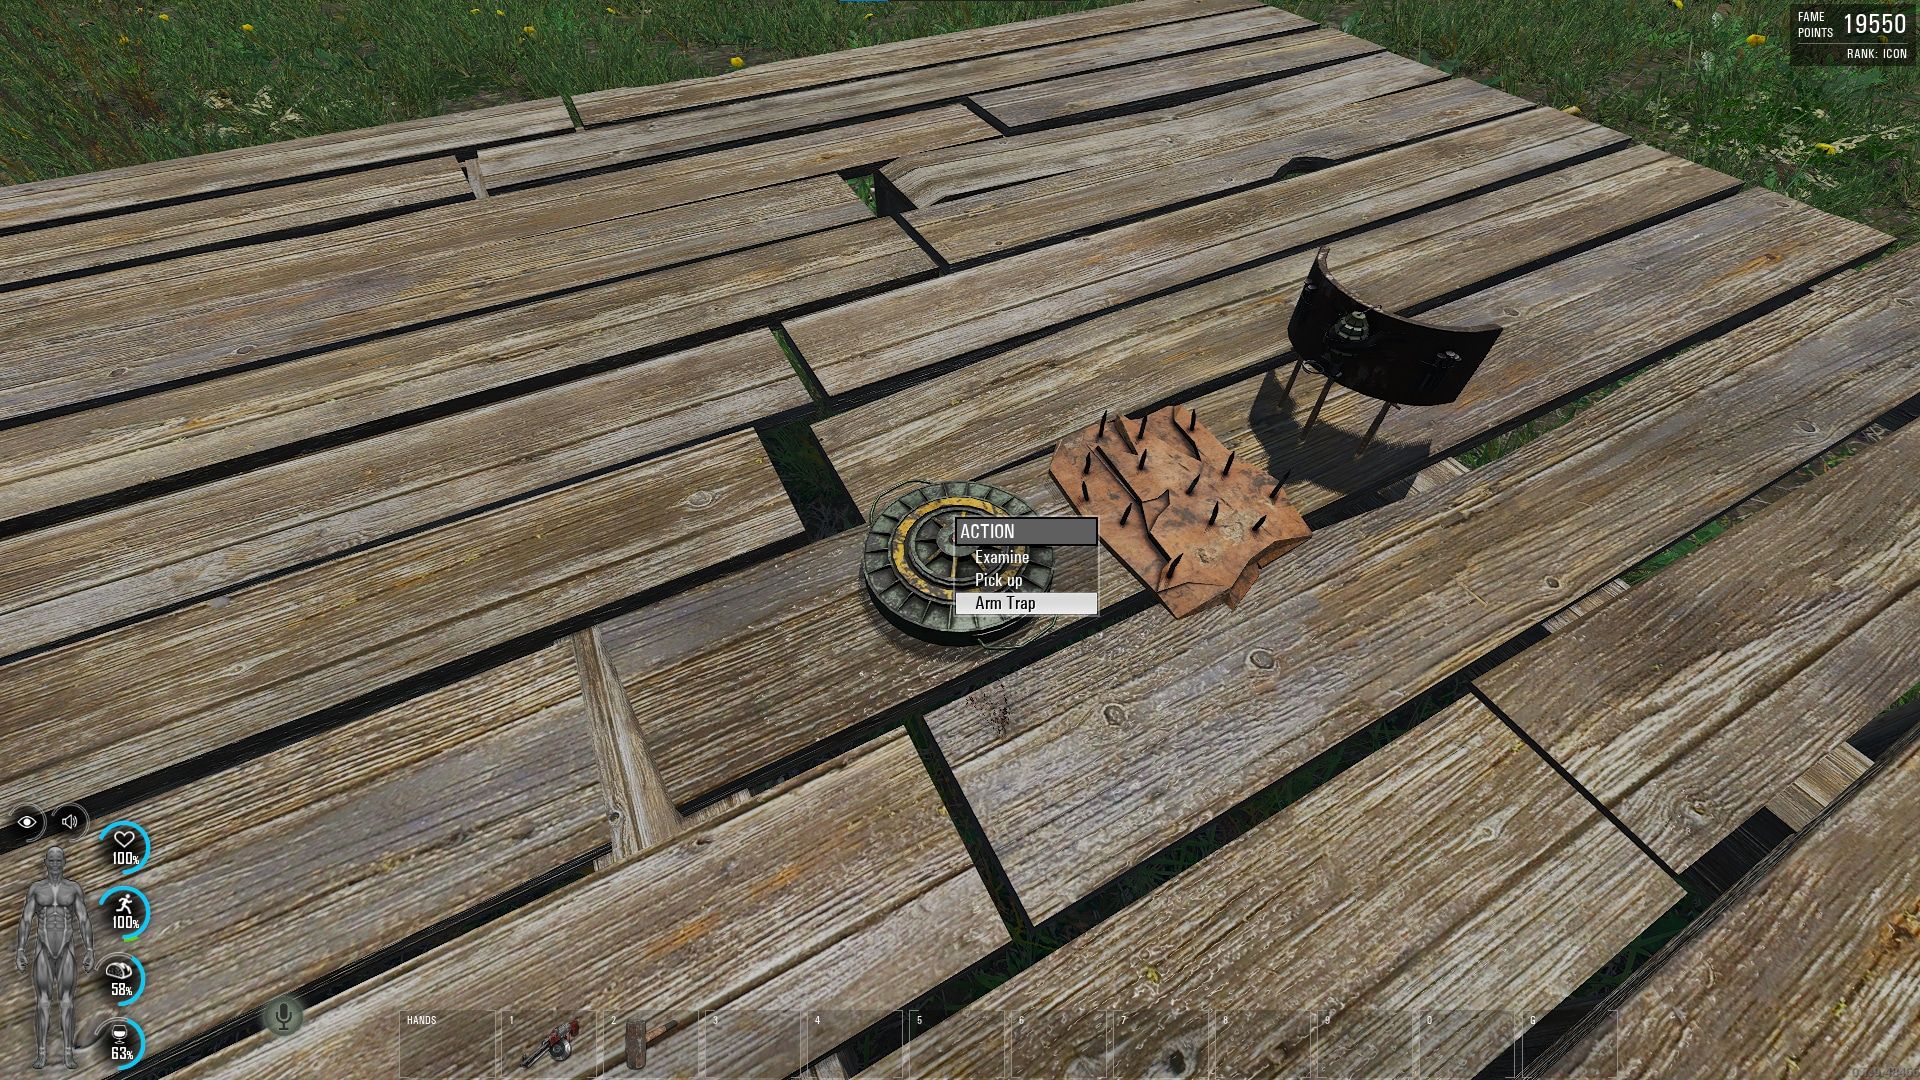
Here’s an anti personnel mine.
As you can see I’m standing on my traps while they’re armed and they don’t activate.
Mines can be buried with a shovel.

I’m stepping on three traps, but no boom and no damage, you don’t take damage from your traps inside the flag zone.
You can also use focus mode near your traps to recognize them easier.
Using Focus mode to spot my traps.
You can build multiple door frames in a line and place doors on each one to create a layer of multiple doors that the enemies have to lockpick.
It is recommended to at least upgrade the Wooden Frame and Doors to level 3 so AP (Armor Piercing) rounds won’t be able to penetrate it.
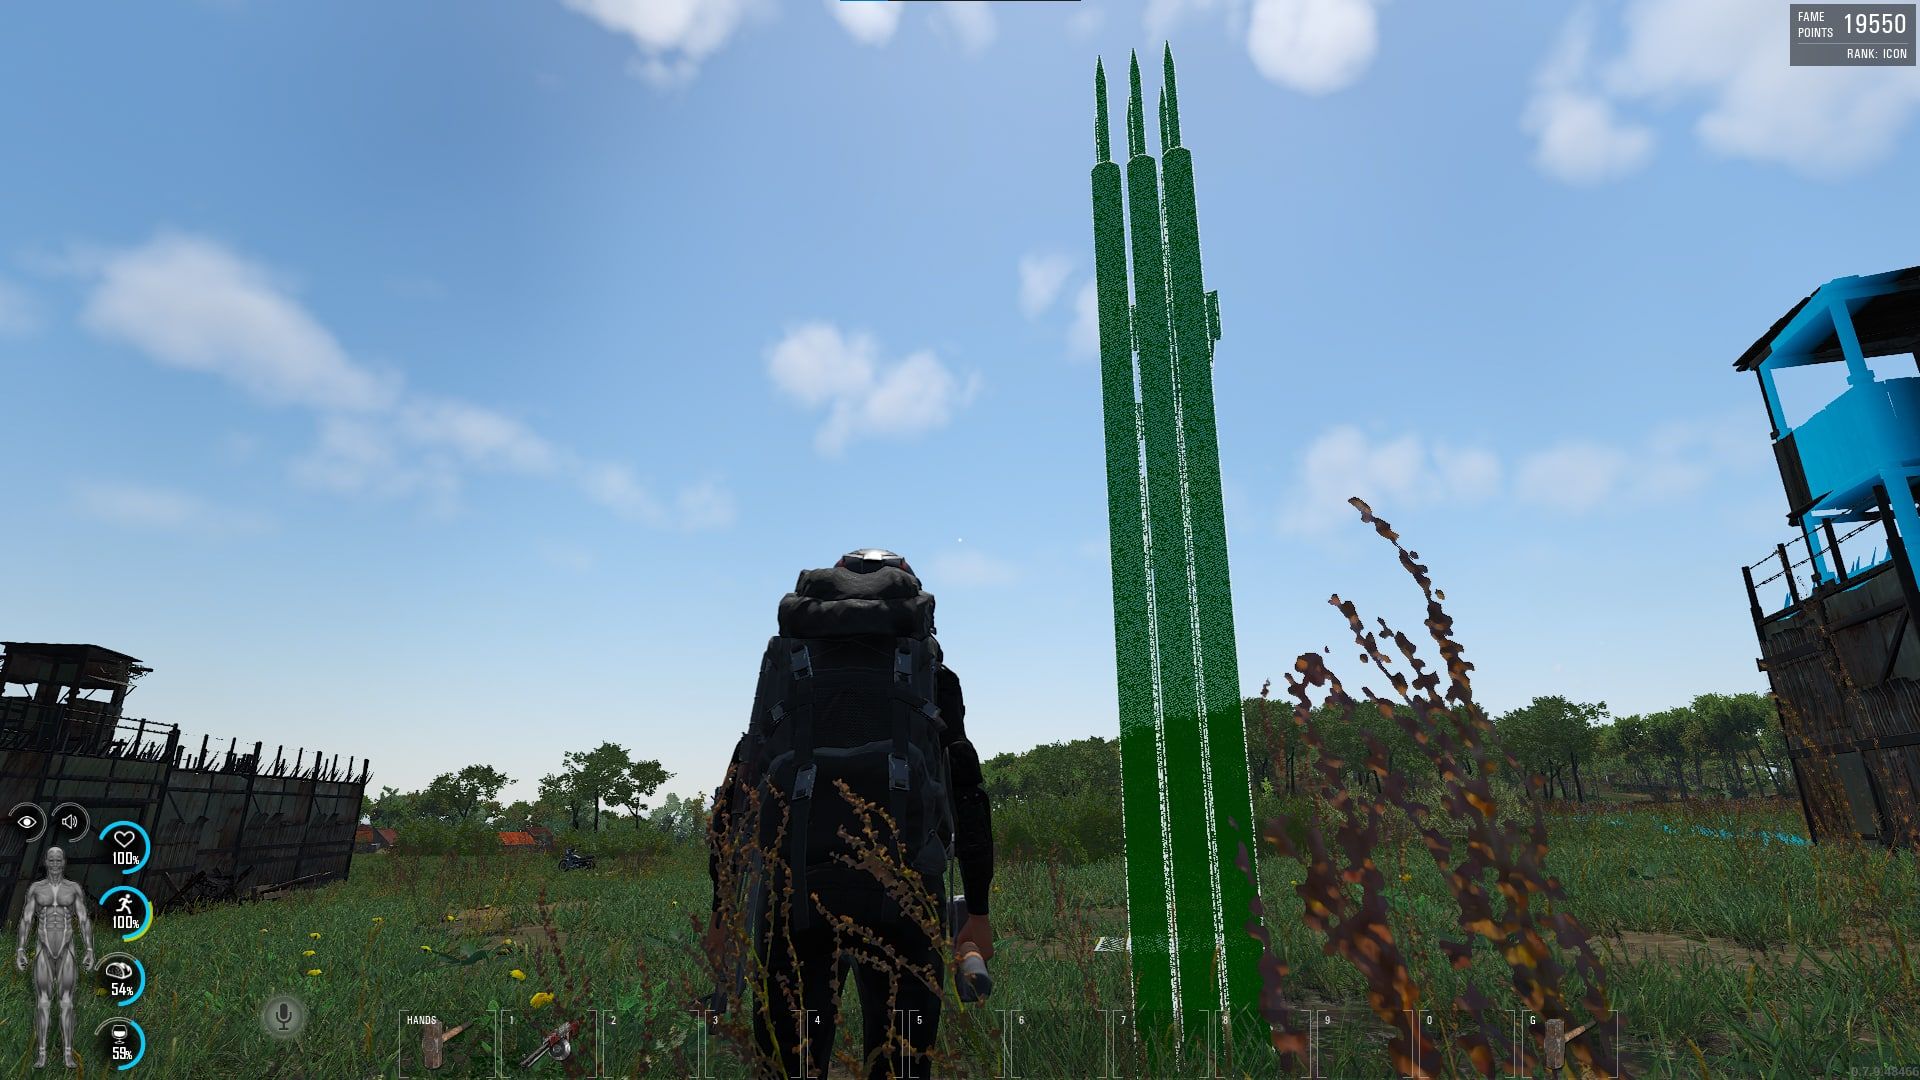
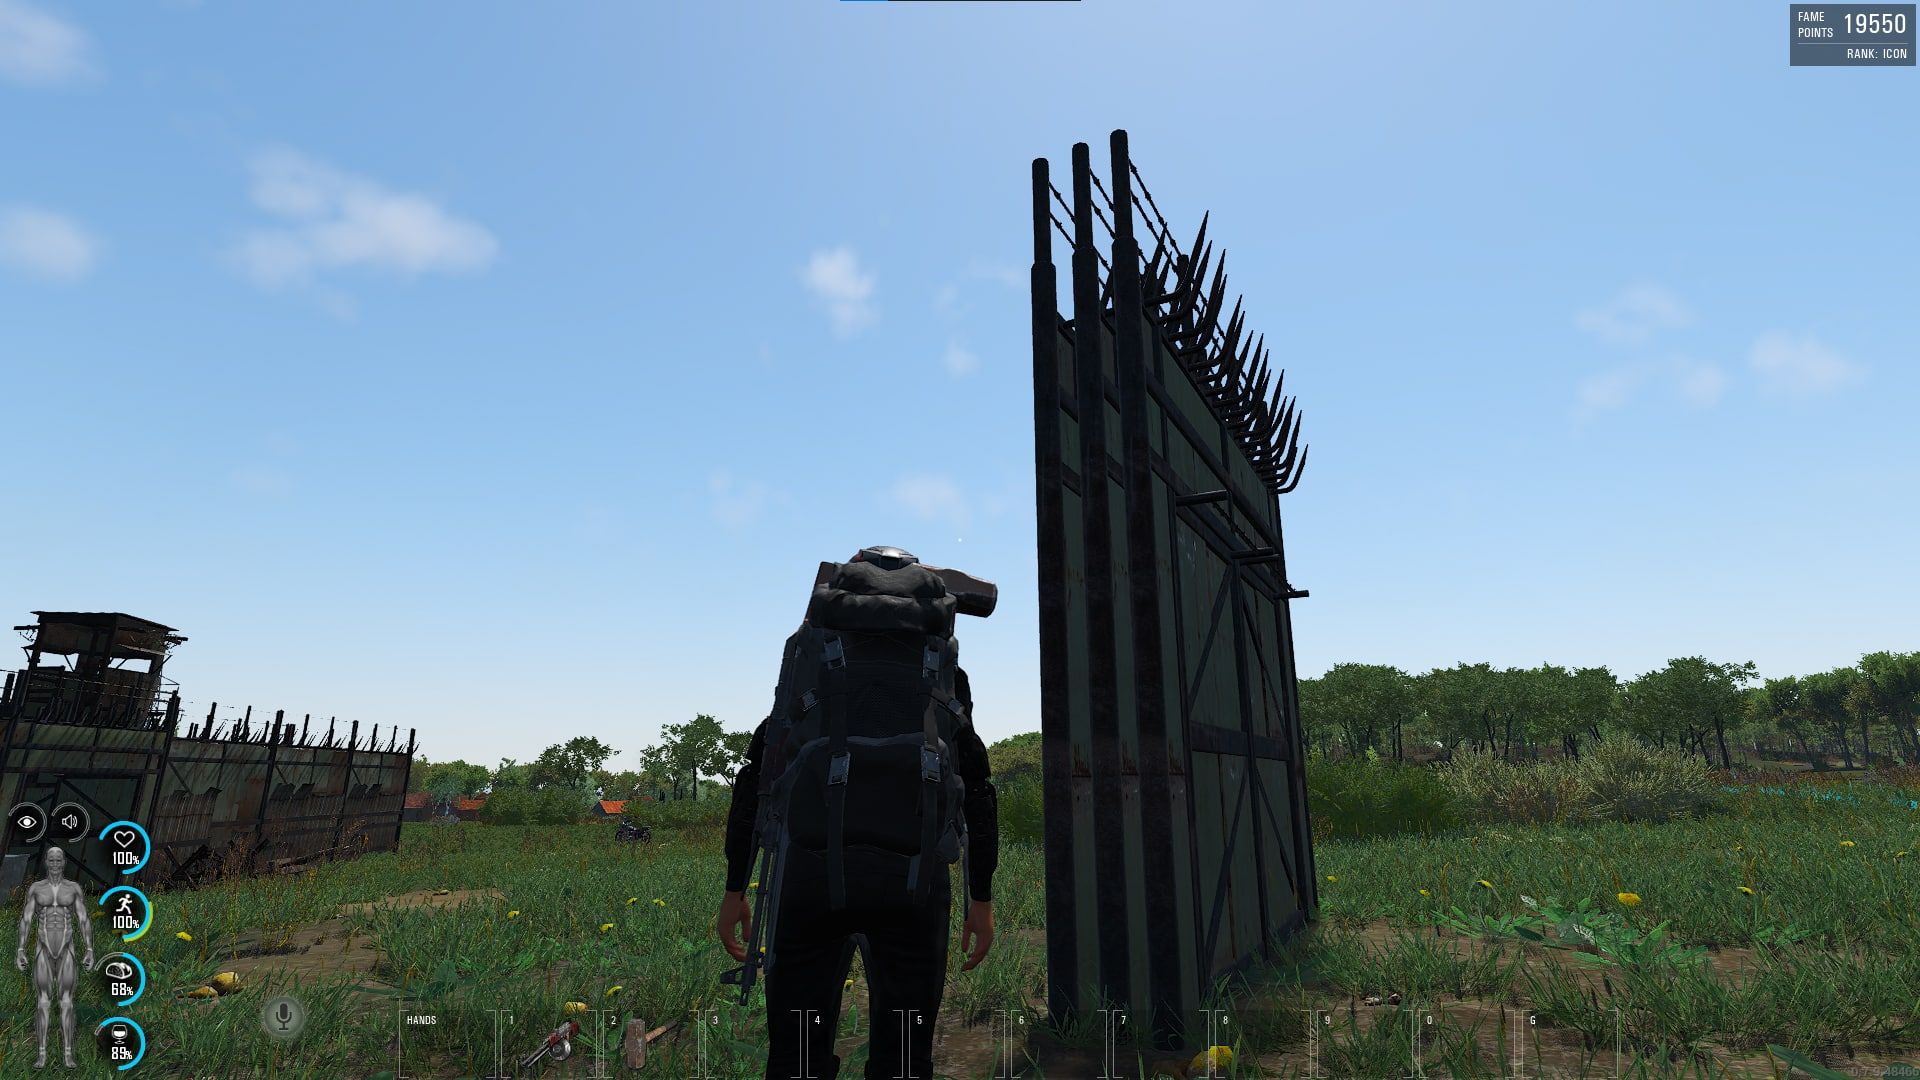
Here’s the green blueprint for the walls inside my base.
This is what it should look like when completed.
Three layers of doors.
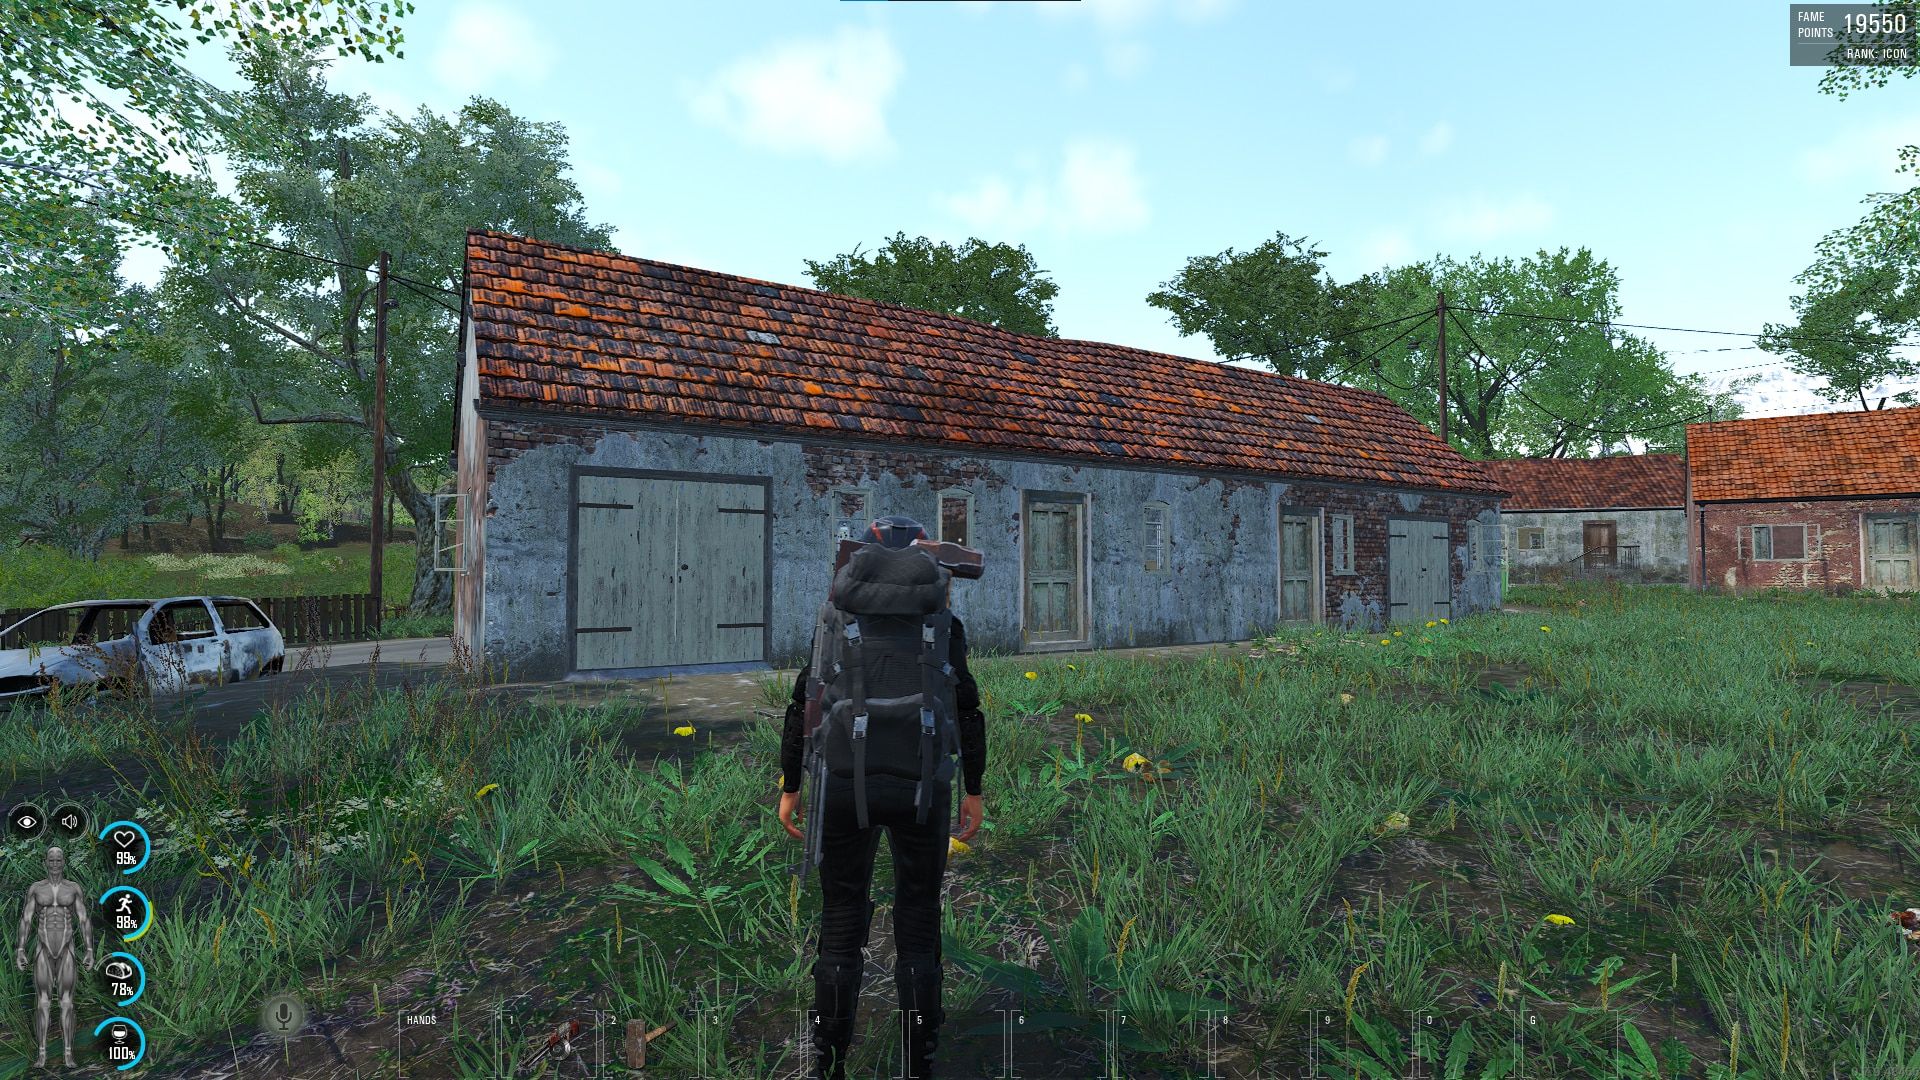
This is how Tool Sheds mostly look like.
If a server allows it you can build around prefabricated buildings, but if they don’t allow using prefabricated buildings as bases, try to build in a suitable location nearby.
Tool sheds have some workbenches like Lathe Machines and Drill Presses that will help you craft ammunition and accessories for weapons.

A Drill Press.
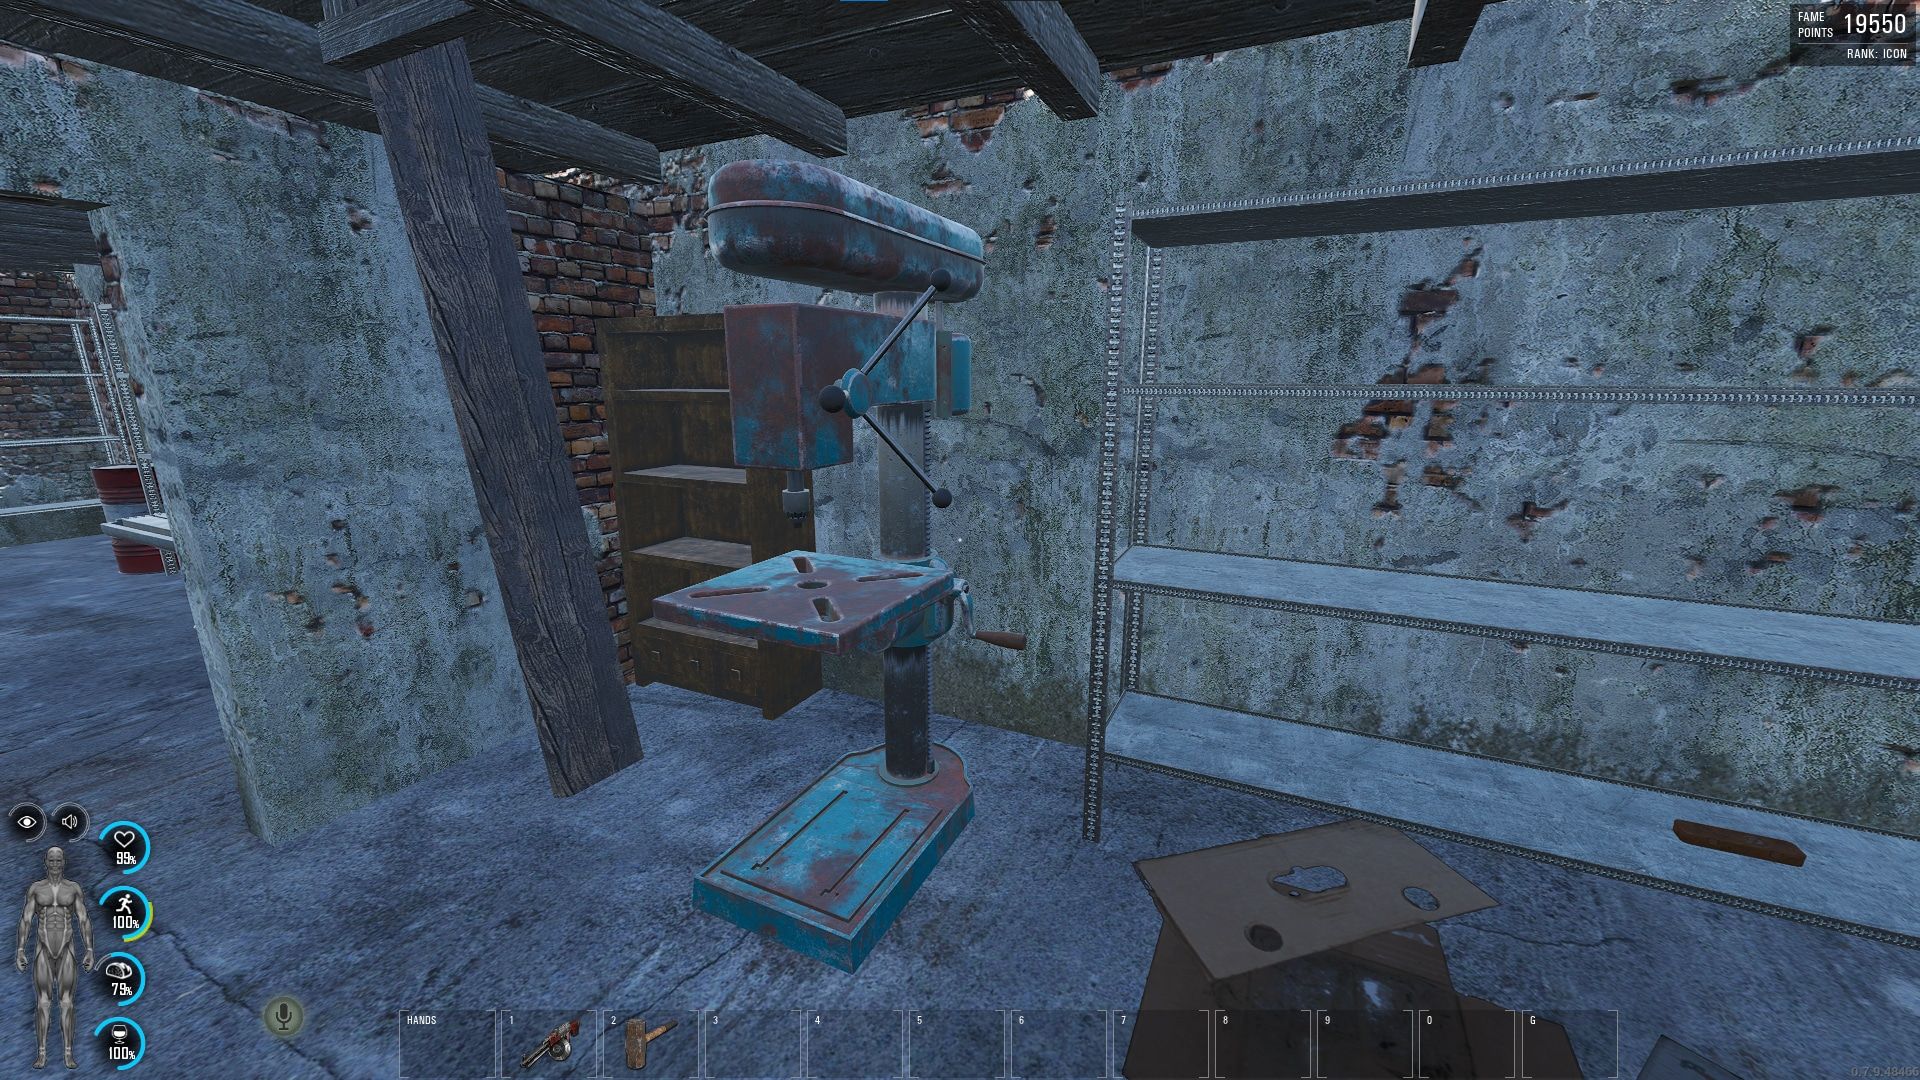
Another Drill Press.
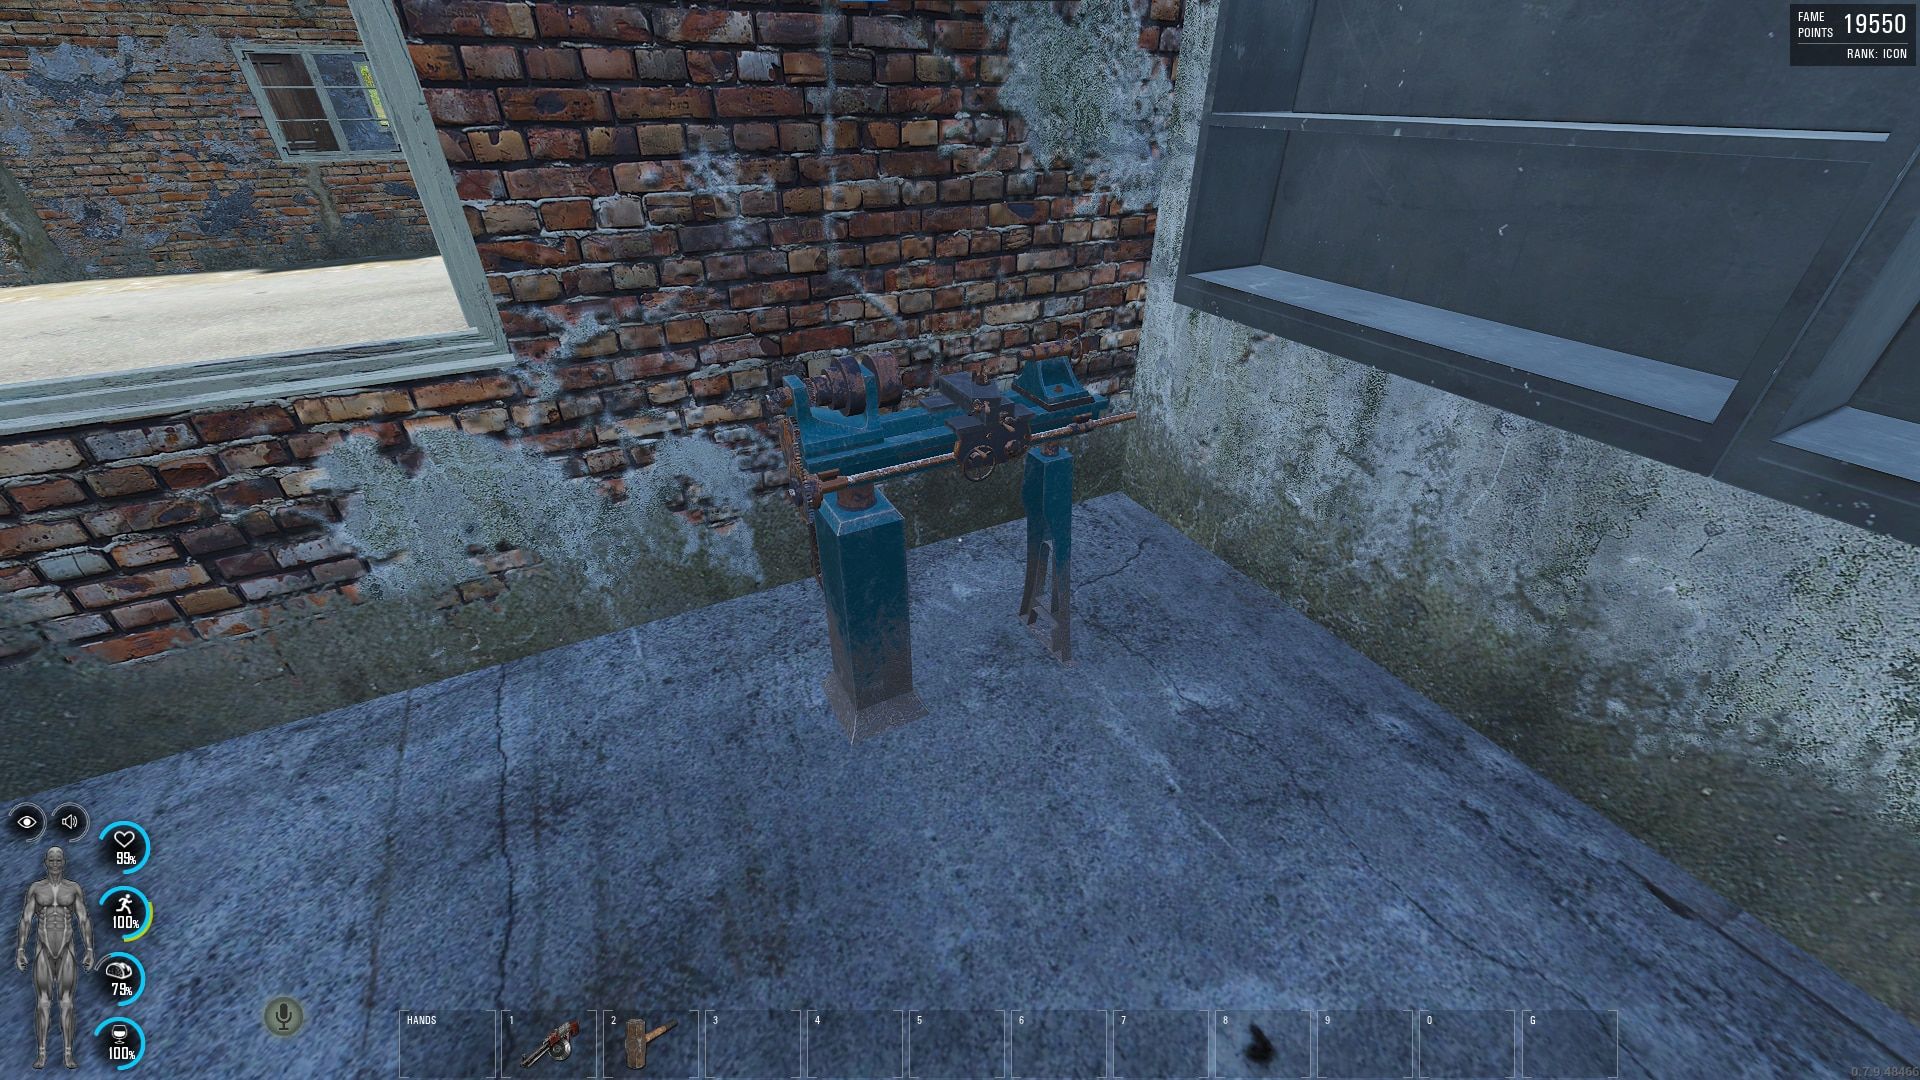
A Lathe Machine.
Unfortunately, you can’t build your flag inside a prefabricated building normally as it is intended by the developers so you have to build it outside and then make an Airlock entry.
If you have Medium Engineering you can make your own Improvised Workbench and craft everything that you can craft on the machines above.

An Improvised Workbench.
Airlocks work like a safe zone allowing you to take cover from snipers and other campers outside your base when you want to go outside or enter inside, it can also serve as a garage for your vehicles, and give you enough cover and prep time to scout the area before venturing out.
Airlocks work for prefabricated buildings (if base building is permitted everywhere) as well as your own from scratch.
The main difference is that you will not be able to place your flag inside a prefabricated building, only inside your airlock zone.
Keep in mind that puppets can sometimes respawn in prefabricated buildings.
This is an example of a simple Airlock.
The white arrow next to a blueprint indicates the direction it faces, it appears on wall and door blueprints, etc with the arrow pointing out, you can flip the blueprint before finishing the build by holding F but once it’s done and you made a mistake you have to destroy it with an axe or a sledgehammer and start over.
You can also make narrower passages and build your wall facing inside, this way the top part of it which sticks out a bit will close the area on top preventing parachuters from jumping into your base.
The upgraded wooden walls have barbed wire installed on them so the area they cover is greater.
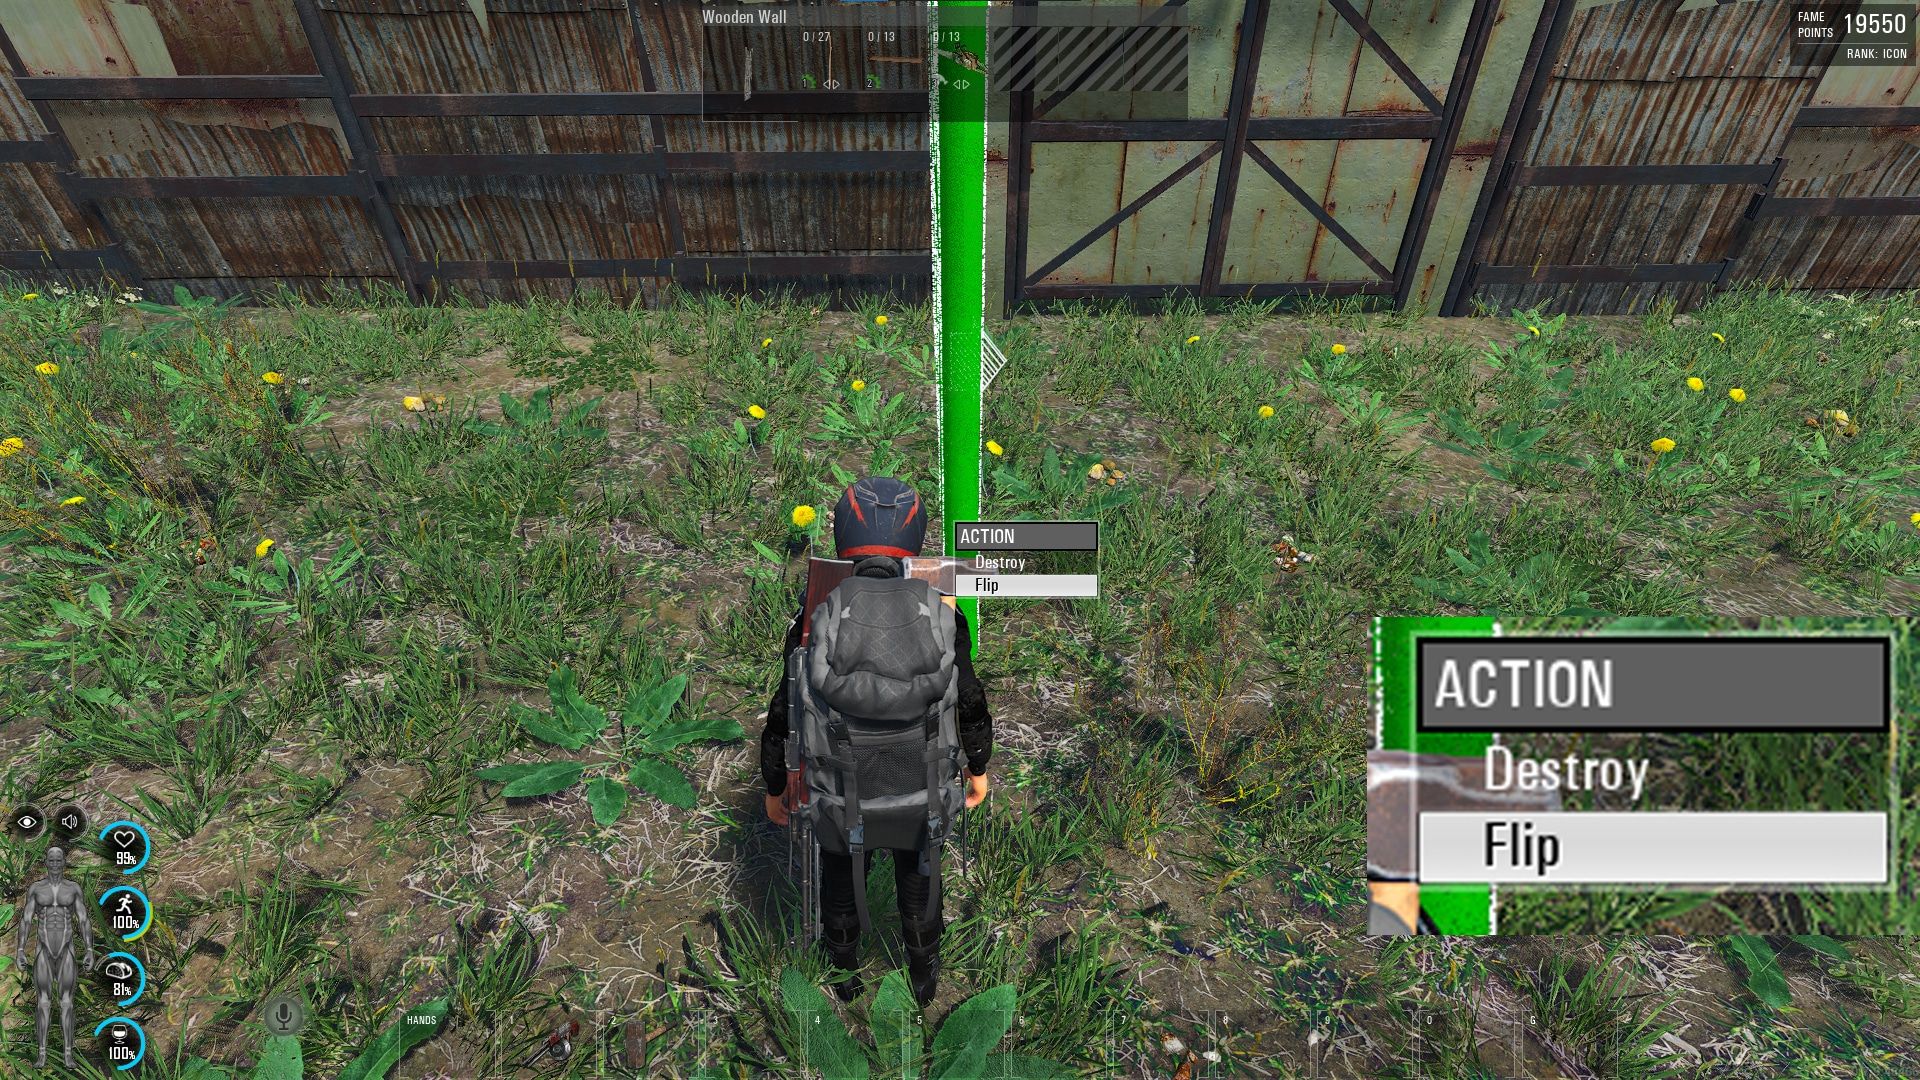
Press and hold F for the drop down menu and you will the option to flip the blueprint.
Be sure to build your walls either five or ten meters in distance so you won’t need to upgrade them in sections since the size of the wall determines its HP.

You can see the distance and the angle each time you place a wall blueprint.
The minimum suggested length is three meters.
While creating your central base area from scratch it’s best to protect it by surrounding it with multiple layers of walls.
These layers are called buffer zones and can make it harder for enemy players to raid your base.
We recommend you to build at least three layers until the central point of your base and upgrade them two times.
Also, the distance between the walls should be three meters or greater.
The reason is that if the enemies have C4 and your walls are too close to each other they will be caught in the explosion and take a lot of damage.
Here’s a base with a Basic Wooden Cabin, three layers of walls and gates, and plenty of space to store a couple of vehicles.

Here’s an example of a base with three layers of wall, three meters apart.
There are a lot of fortifications and different types of traps that can help you defend your base when you’re offline.
Be sure to place fortifications next to the walls, and traps behind doors.
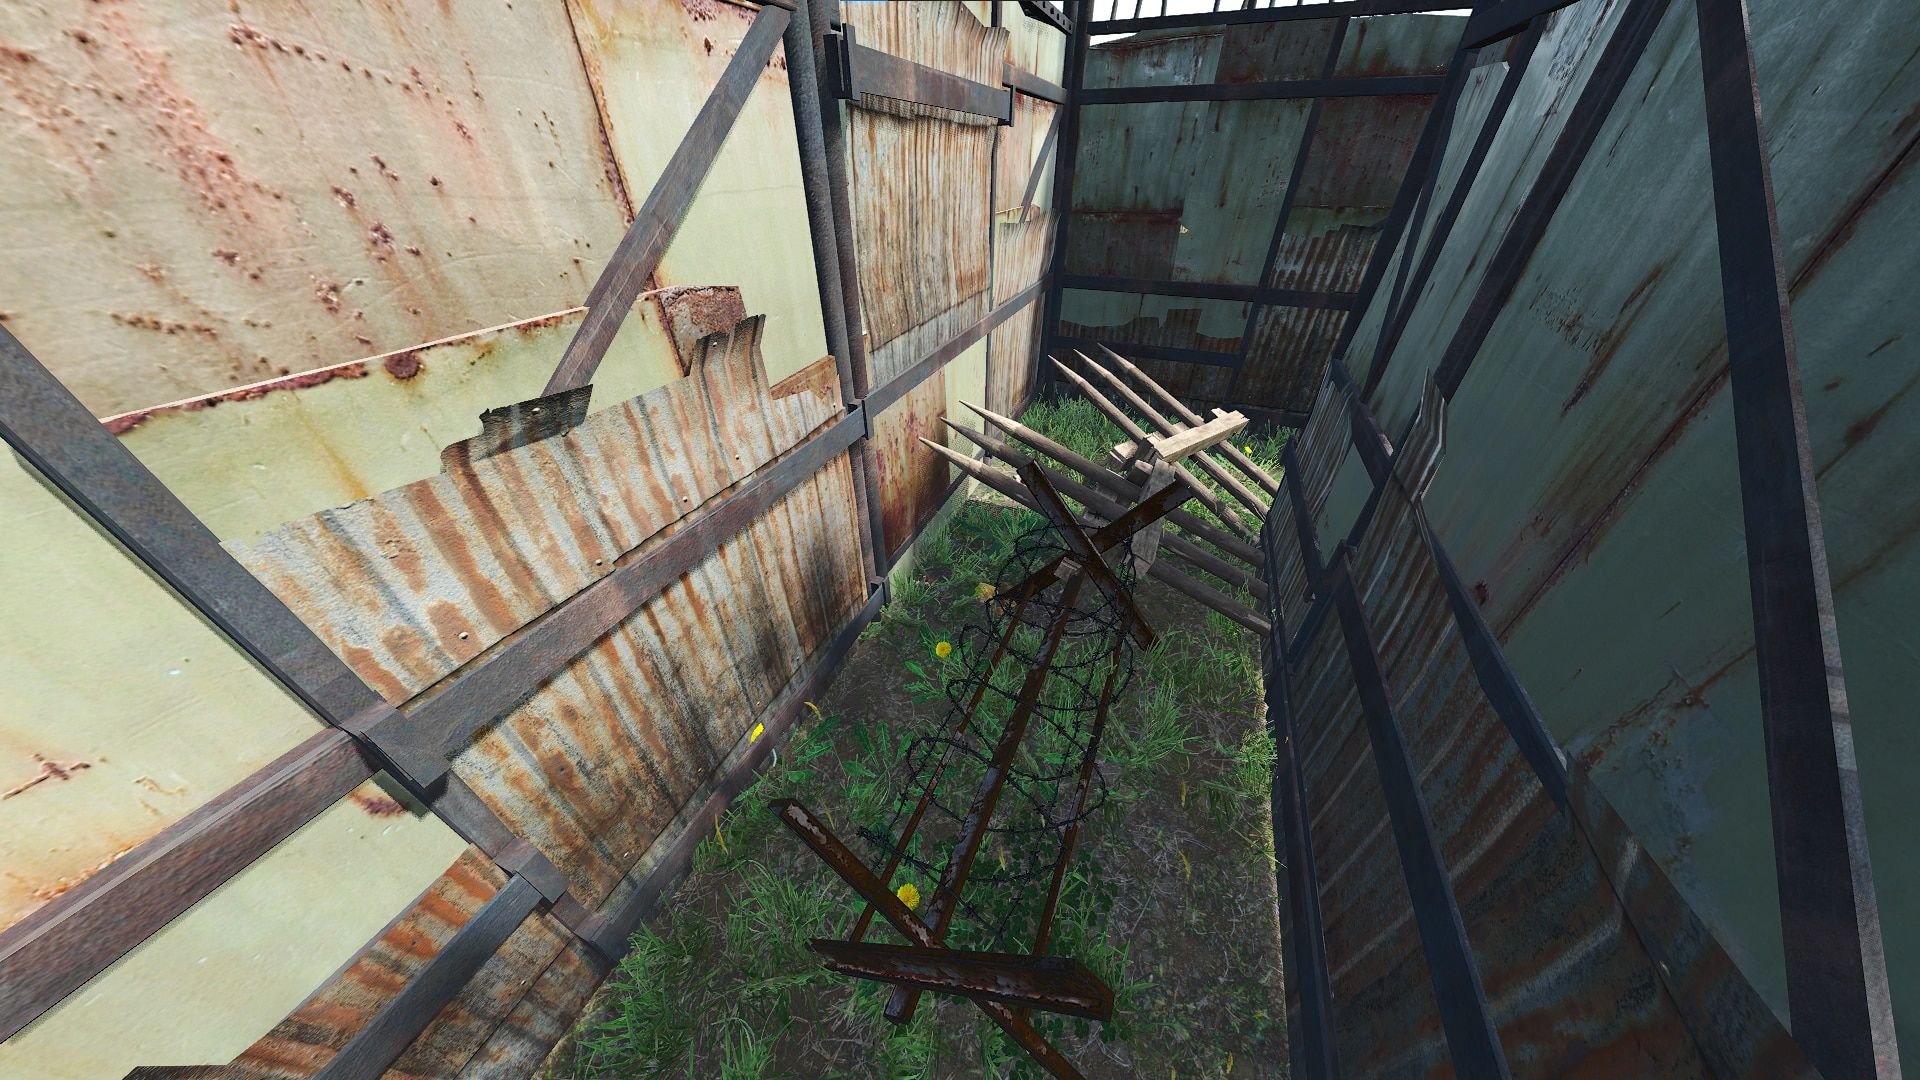
Barbed Wire and Wooden Barricades.
Barbed Spike Traps are really useful at the beginning and later on, you can craft Stake pits that can kill instantly.
Using Focus on the traps allows you to spot them easier.
Stake pits can be buried but everything you bury require a lot of stamina.

You can see the buried Stake Pits when Focusing.
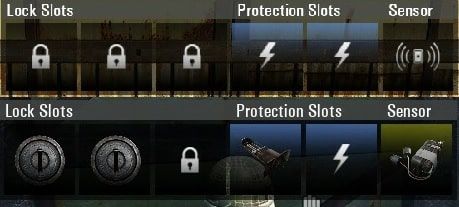
You can craft sensors and combine them with explosives to create even deadlier traps for your enemy raiders.

In this screenshot you can see a Motion Sensor, a Laser Sensor and an Improvised Claymore ready to be armed.
Two claymore traps set and armed just behind the door, the left has a laser sensor and the right one has a motion sensor.
Armed Improvised Claymores the left one has a Laser Sensor and the right one a Motion Sensor.
Holding Shift and tapping F while filling a blueprint stacks up more materials in your vicinity and helps you build faster.
Pressing Shift after placing a wall blueprint, it will snap on the grid making it easier to build geometrical bases.
Holding Shift before you place it will ignore the snap on other walls.
By holding Alt + C you can create a copy of the last blueprint you have placed, this shortcut might also recraft other items you crafted last.
When you are in a vehicle you can press Shift + C to open your inventory and transfer items into it while you’re seated, for example, if you are multiple players inside a car they can store and pick anything inside of it, you can only change tabs with the key tab shortcuts 1, 2, 3, 4, 5, 6.
Always try to build your base on the highest ground you can find, if you build your base lower than a hill or close to buildings that are higher than your walls, then there’s a chance you might be sniped and the enemies can find out details about the layout of your base.
You can always build a wall on your door entrances to give an extra protective layer when you log off, before doing so you can think if you want to stay inside of your base or make your walls outside and hide somewhere nearby.
Building Base Blocks next to walls can absorb a lot of C4 Damage so if you have the resources you can place them in front or behind them, just be sure that they are 3 or more stacked on top of each other so the enemies can’t climb up.
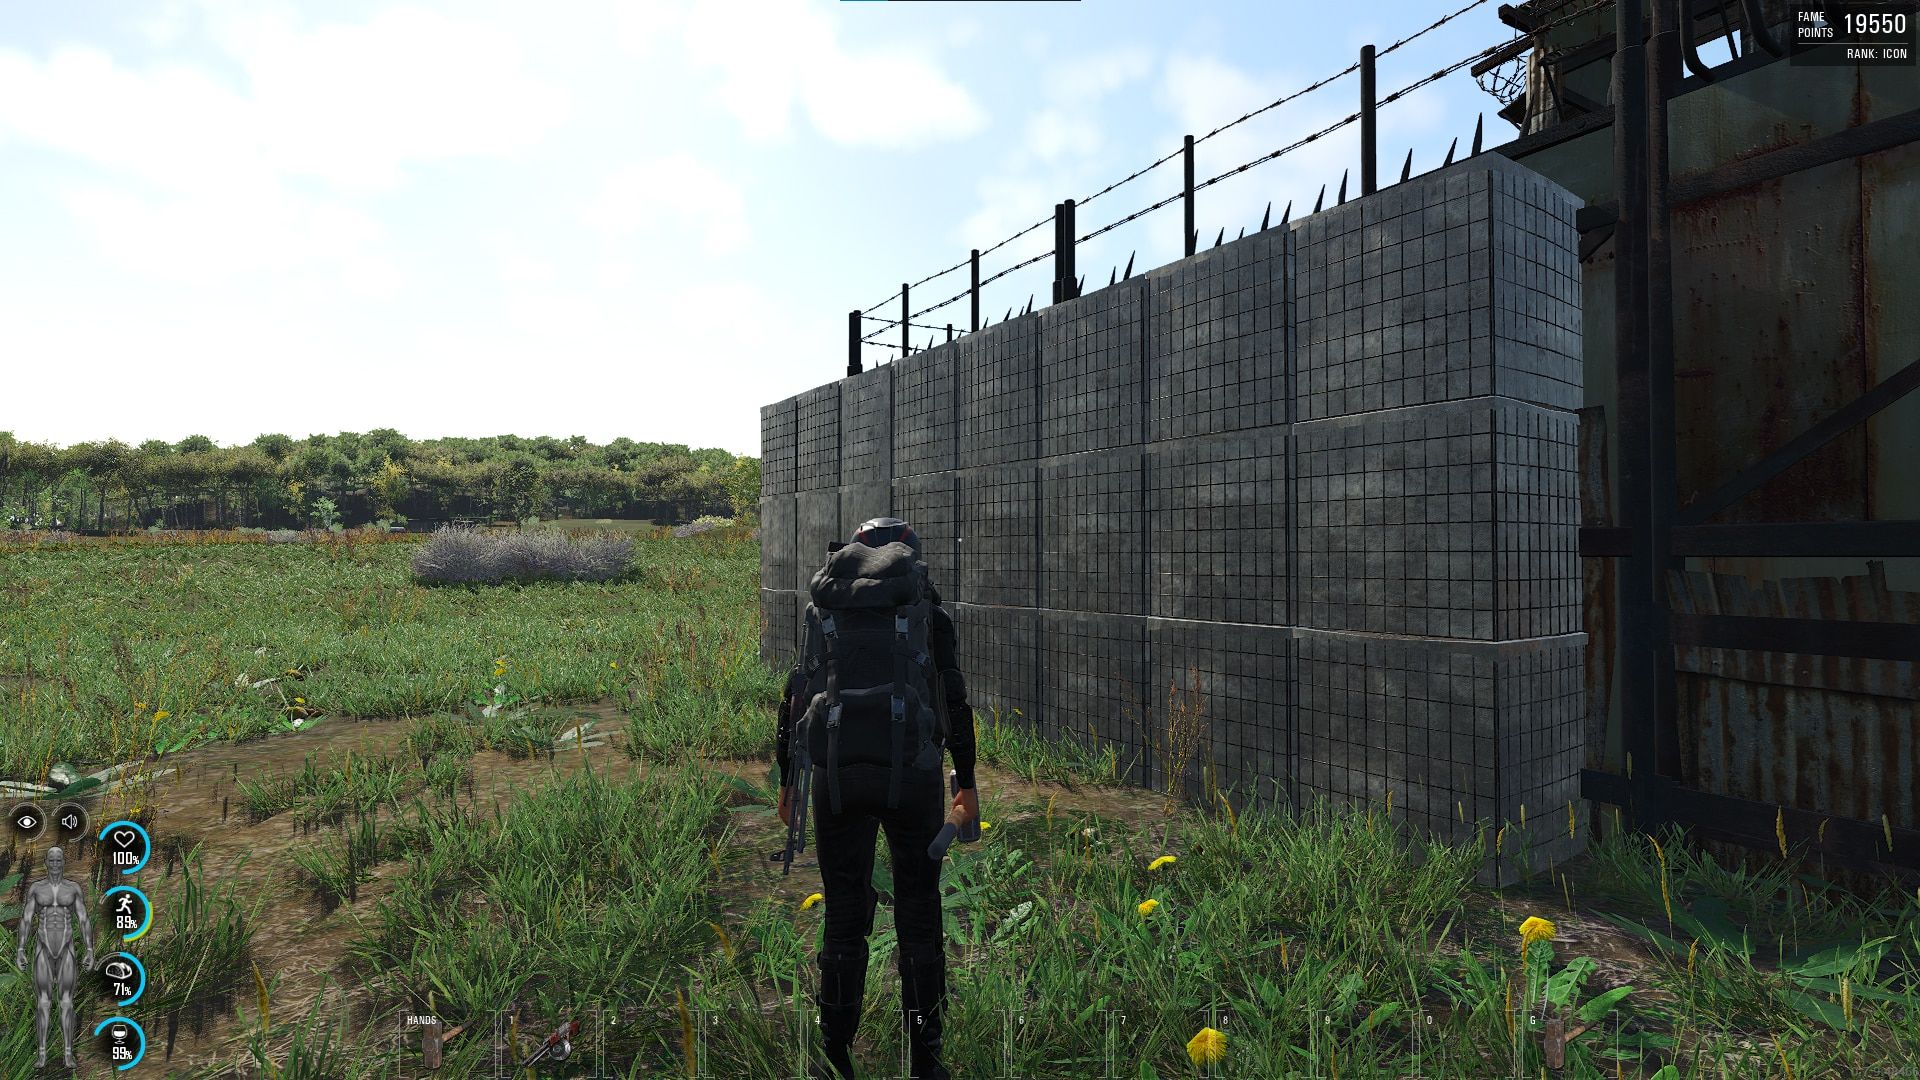
Three Base Blocks stacked onto one another.
Build Troy Walls. Troy walls are made by building a wall, preferably 3-5-10 meters, and then building single columns of a wall again then you sandwich it with another wall.
The three meter wall is upgraded once and the columns in the middle are upgraded three times to metal.
By building single wall columns and upgrading them to metal you can fool the Metal Detectors into thinking you might have traps.
Metal Detectors can also sniff chests.
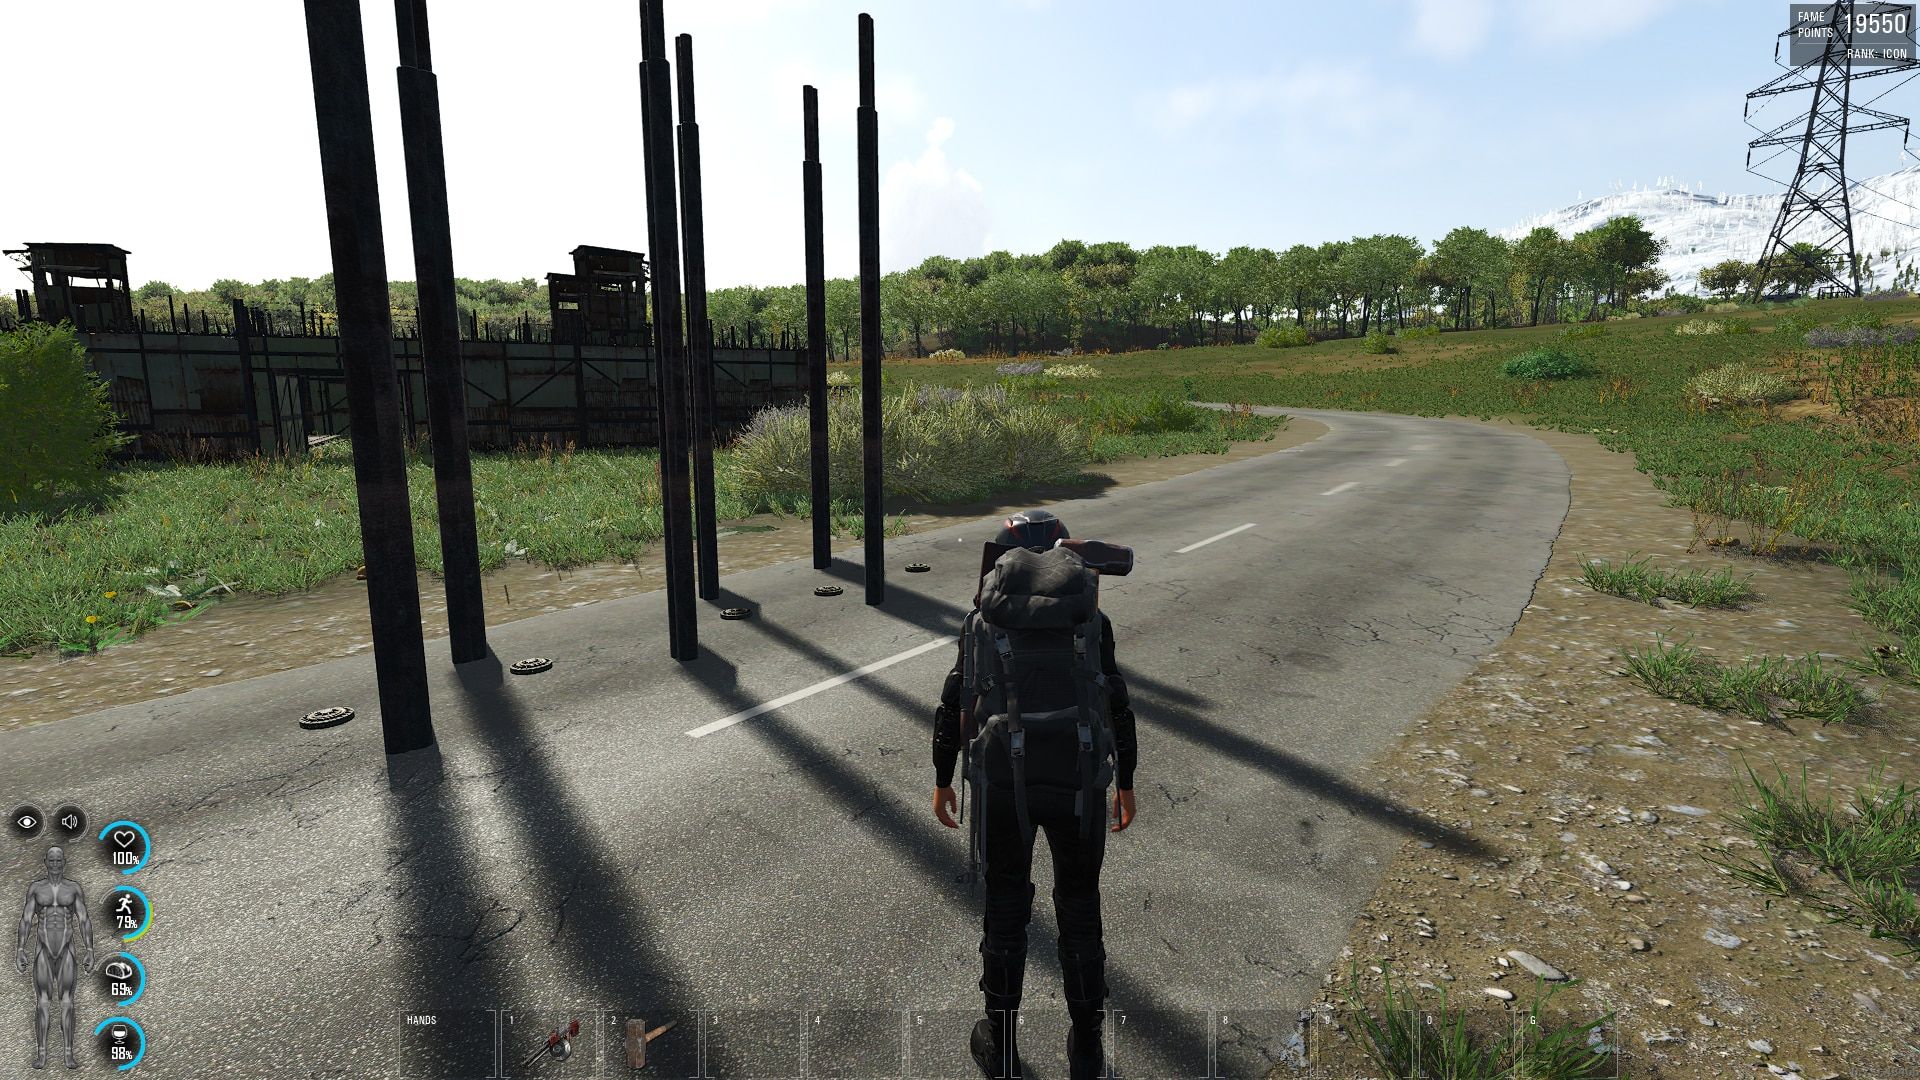
Here’s an example of placing Mines next to metal columns to confuse the Metal Detector, this example is shown on the road so you can easily see the mines.
We managed to find some videos across the internet with players giving their own suggestions, and though some of them have a few tips to share you can always experiment on single player and find what works best for you and your team.
In this video we see Casual Wardog building a watchtower a few walls, then use it as a base, this is great for solo players and beginners that are trying to learn how to play the game.
At first, he starts testing it out by shooting at it with an RPK-74 that has been equipped with Armor Piercing rounds, notice how he has enabled the bullet trajectory command (which by the way is #visualizebullettrajectories [true/false]) that means he is using commands in single player mode or in his own server.
The only weapon that can go through this base is the M82A1 which uses .50 BMG Rounds.
The reason why .50 BMG Rounds can go through this base is because it’s upgraded to metal walls, if you continue to upgrade it to concrete you will be safe from the M82A1 even if it has armor piercing rounds.
We suggest trying out different commands in single player, like spawning items and vehicles or teleporting into different areas to check the map faster and learn its surroundings.
Here’s a video from Soldier0003 touring us through his cave build.
Caves are one of the best ways to build a base but as with every base it also has its own cons.
Building in a cave can be a hassle because the walls you are trying to create might leave small gaps between the rocks, this allows enemies to peek inside so you have to add small layers of walls here and there.
You can see that he has placed a few base blocks next to his entrance to block the path to anyone who tries to raid.
Three layers of doors work as the entrance of the airlock and one more that leads into his base.
This is a big enough cave for a medium sized squad or as a solo base.
OGJustJack here shows us how to build a Cave Bunker Base, cave bases are pretty popular because they usually have one or two entrances which means you can focus all of your building materials there.
We can see that he’s building a troy wall and upgrading them to concrete, after finishing the upgrade he adds one more layer of wall to increase the defense of his base.
He has placed a door and says to upgrade it so you can add three locks on it.
Base blocks can be used to block off small holes that can’t be covered with walls or door frames.
After closing the door he says that this is not your main defense it’s just an obstacle to keep you safe while you are building.
He then places a wooden platform so he can climb up, this is a bit tricky since the barbed wire on the walls can hurt you, that’s why earlier he is saying which way to build the walls.
The door and the walls he is placing afterward are there to defend from shots, notice how he has left gaps to use as peeks.
He’s also showing a spot under a bridge where you can build a garage for your vehicles and a secret stash for chests.
In this video from MrGameHunter32 has created a base that is better suited for a big squad of people as it is resource and time intesive.
At first glance you can see he has upgraded his walls into concrete, has three airlocks that work as garages, which are protected by watchtowers and its outer layer is fully surrounded by barbed wire.
By looking better at the airlocks we can see that he has built base blocks behind his walls, and left small gaps between them, these are usually called peeks and they are used to shoot unsuspecting raiders or have a spot with good cover to protect you in a gunfight, in this case, they look out to his doors in order to shoot at wannabe pick lockers.
He has also built cabinets on top of his wooden cabins to provide cover from gunfire and shoot back at them.
When 0.7 launched Scum developers introduced airplanes and skydiving into the game, this base to us looks like it’s a little open at the center, so what this means is that the game always evolves and makes players new ways to think of protecting their bases.
It’s better to take advice and learn from designs that other players made and implement them to your own base.
After the 0.7 update was released, Airplanes were introduced into the game.
This changes the meta experience now because if people want to raid you and your base has an open space, they can simply jump off a plane and parachute their way in.
In this video, Raykit shows us how to defend in case this scenario happens.
As you see in this video he shows that if you build your walls facing inside, the barbed wire will close off the top making it really hard for players to get into your cabin and steal your loot.
Obviously, this is just a way to show what you can do to build your own base so with that in mind use what you learn and make your own.
We managed to find 10 of the best locations to show you where you can build a base on your own and we will also include all the caves you can find on the map below.
We suggest copying and pasting the coordinates in a single player game to learn how the area around the game looks like in order to find the spots.
The command for teleporting is #Teleport we will have each command ready with the coordinates to teleport to those places right away from here.
Here’s a map with all the caves.

Here are all the caves in the game till now
All credit goes to scum-map.com where you can find even more information about bunkers, POIs, towns, and vehicle spawns.
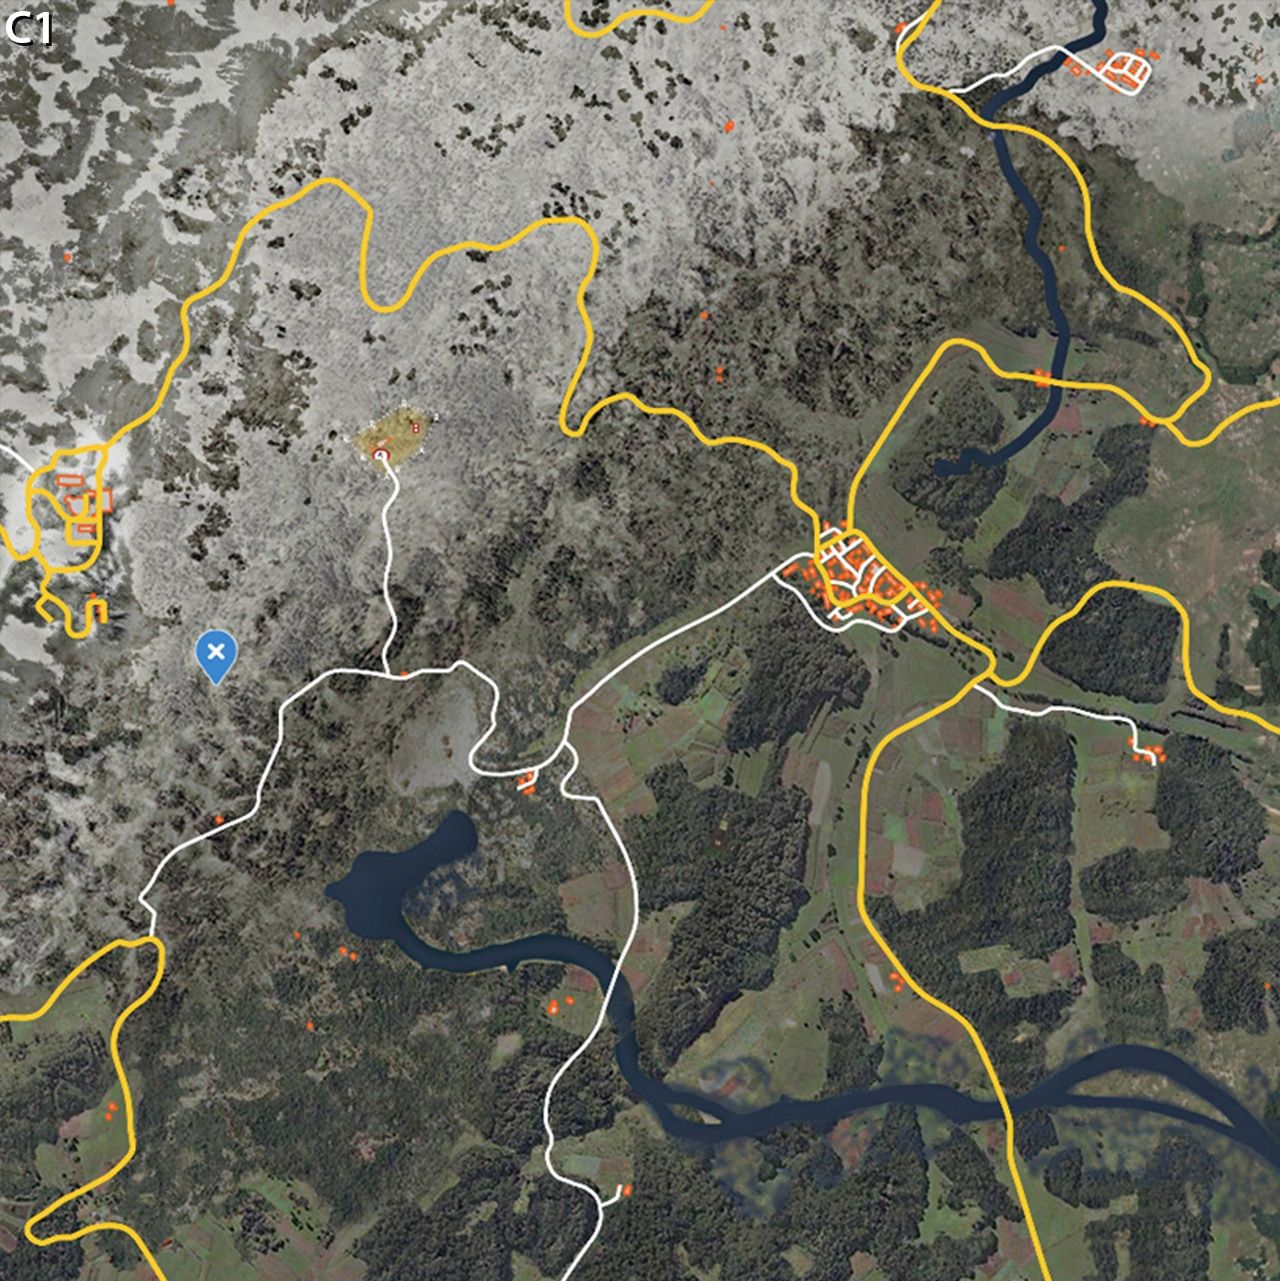
This is a pretty good base to start off since it is close to a bunker and has no high ground around it.
It also has a village to the south which makes it a great place to loot all the things you need.
It is surrounded by woods which can make it harder to be spotted from afar.
This location is also pretty close to the city there’s a lot of loot there but be careful there are also a lot of Puppets and other players.
You can build foundations on it and a small cabin, some walls and you can grow from there.
Coordinates on the map: #Teleport {X=162221.016 Y=298475.750 Z=41178.293|P=329.417236 Y=132.764465 R=0.000000}
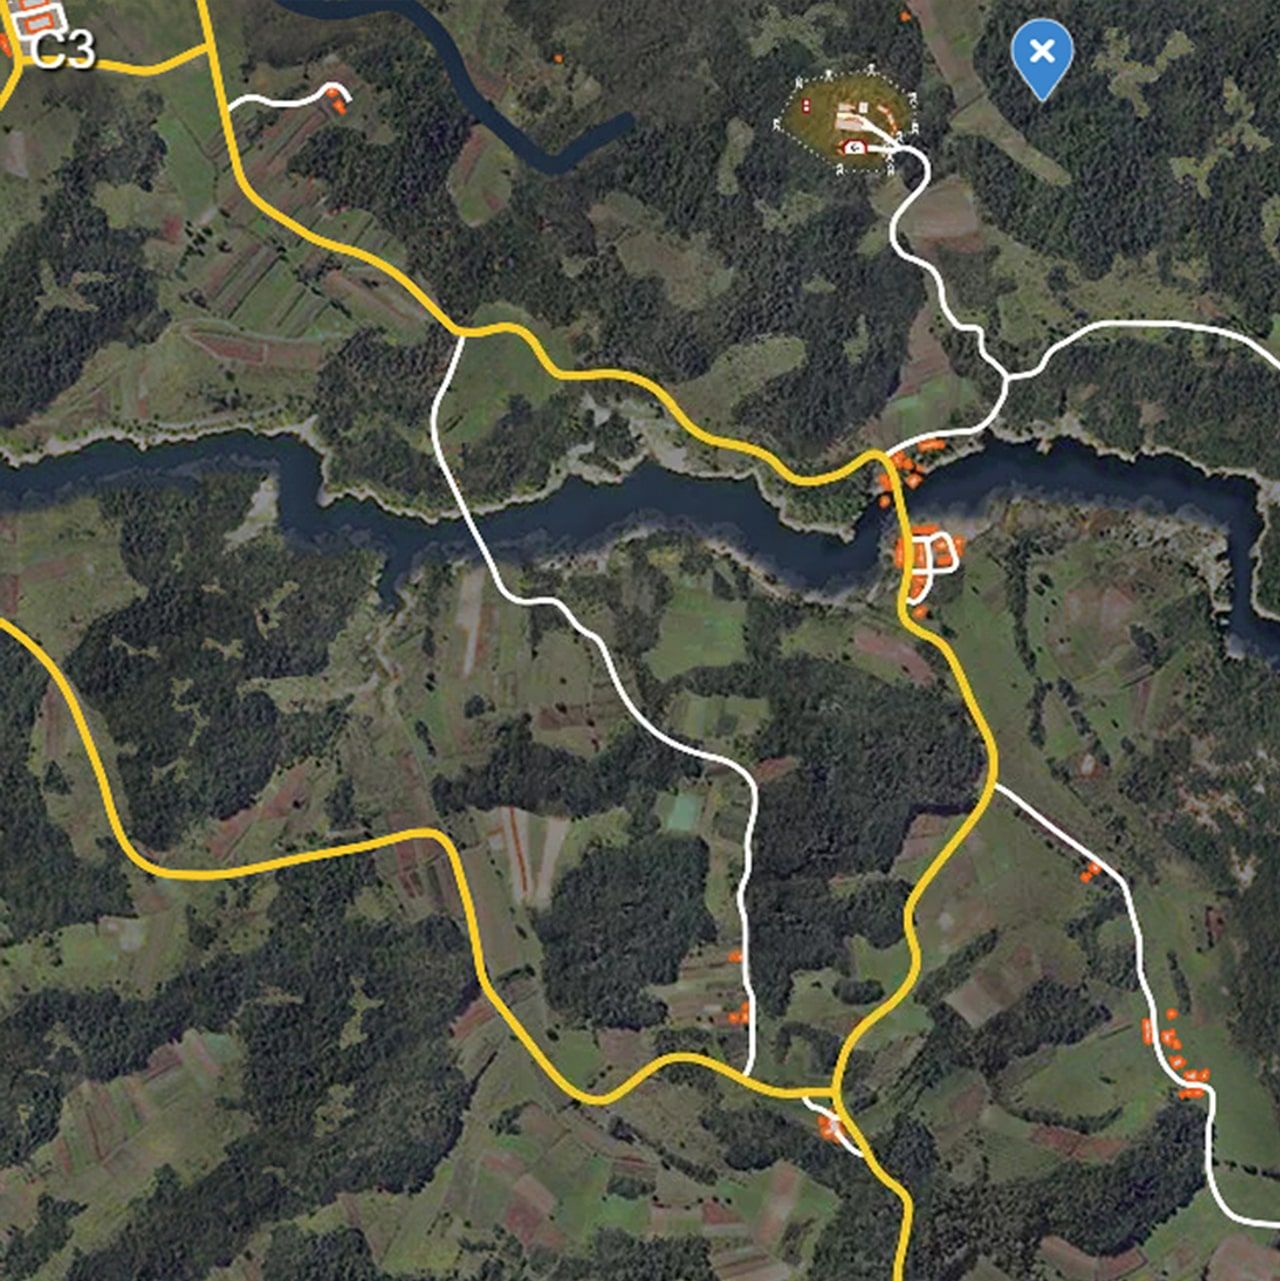
This is the location on a zoomed in map of C3.
Here’s what it looks like up close.

This is the place up close.
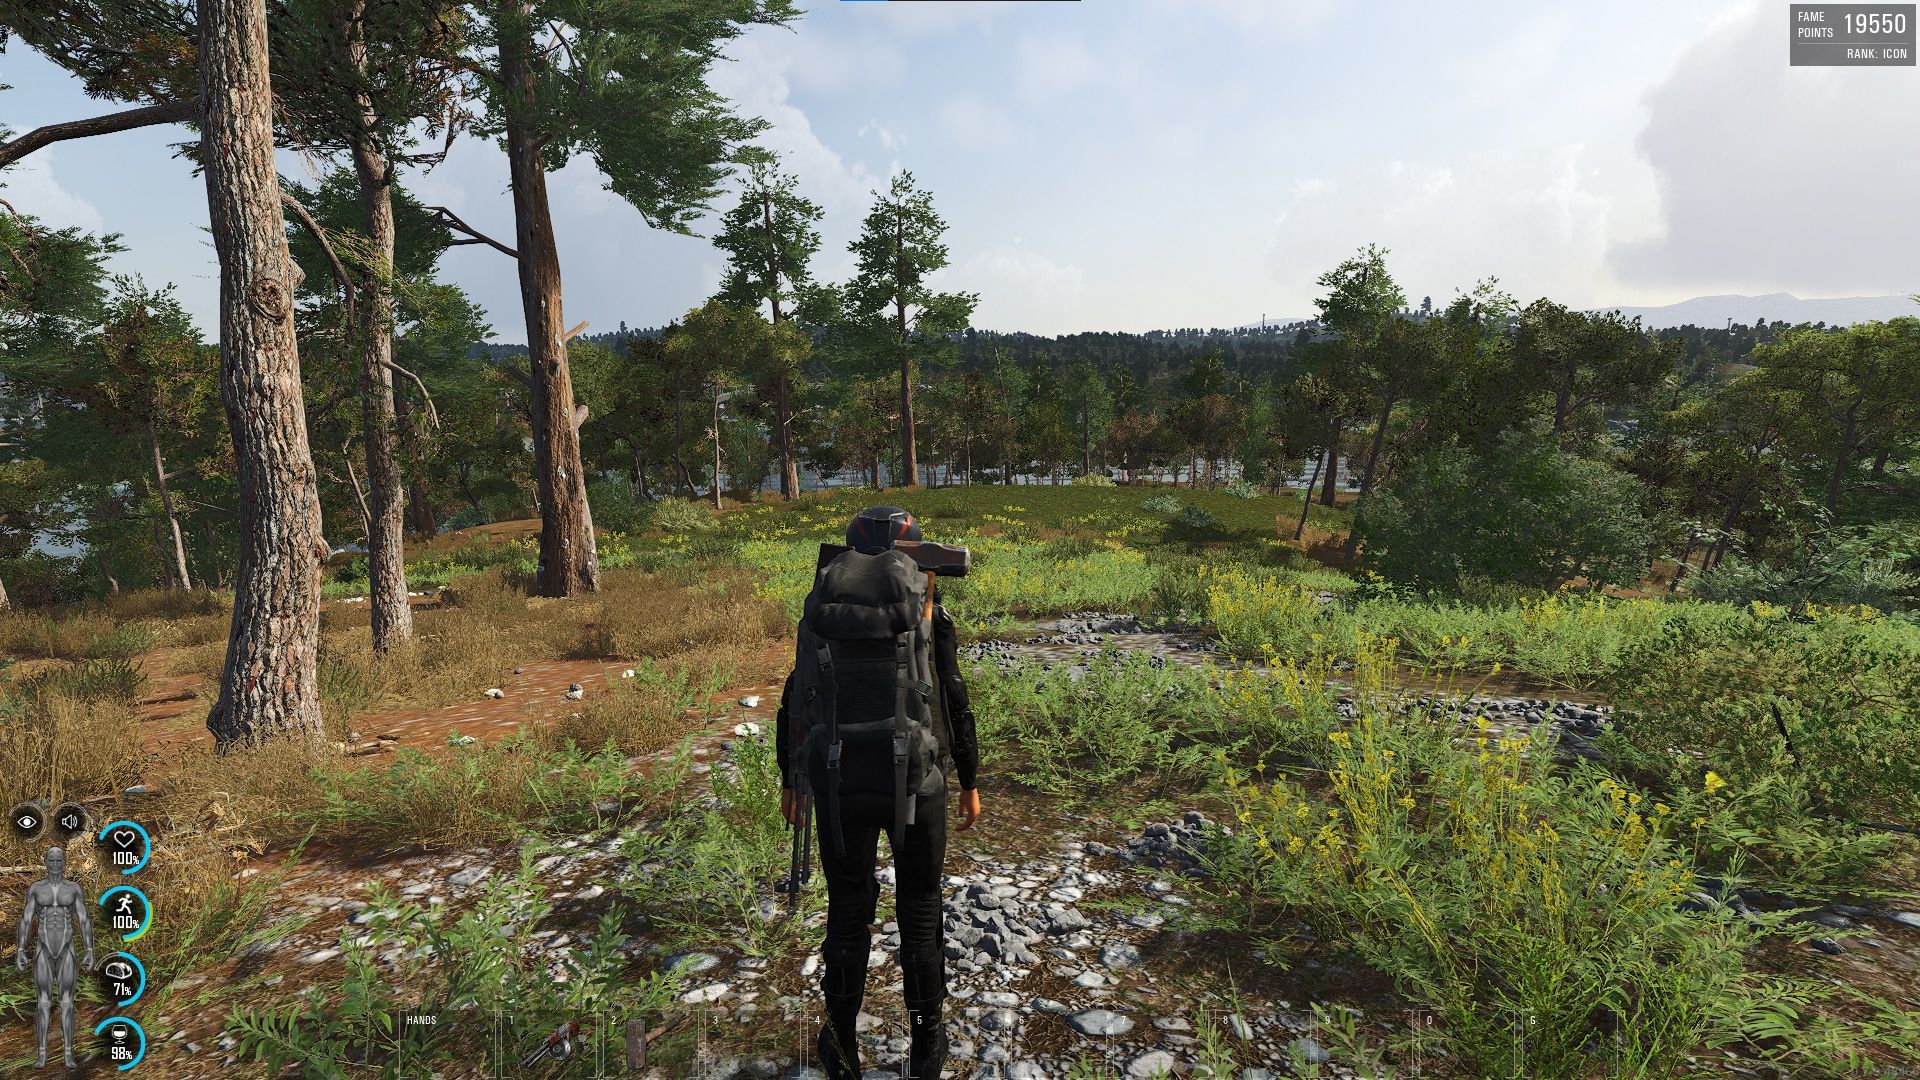
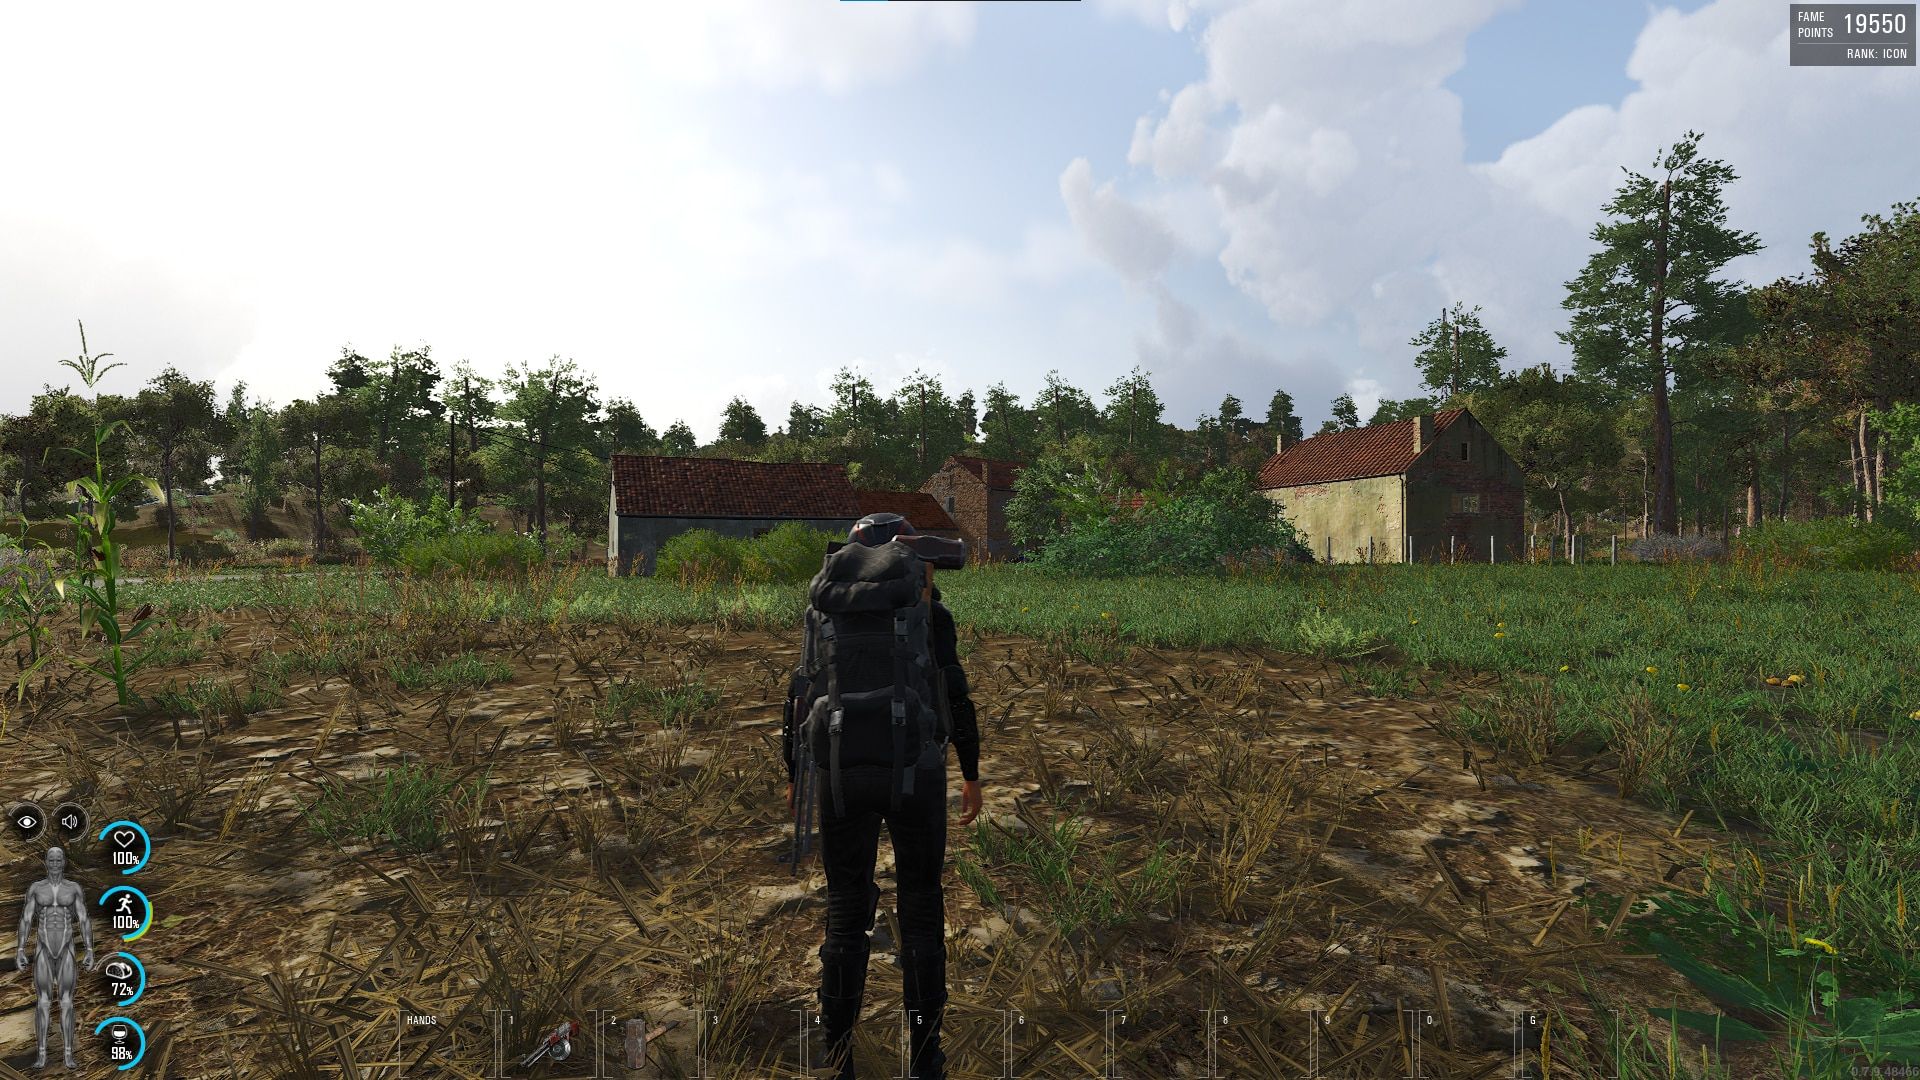
Another woodlands area with no high ground nearby, pretty good at hiding your base, and spacious and flat to build as much as you need.
It is close to another bunker towards the northwest and the city to the north.
It also is next to a river so water is abundant here.
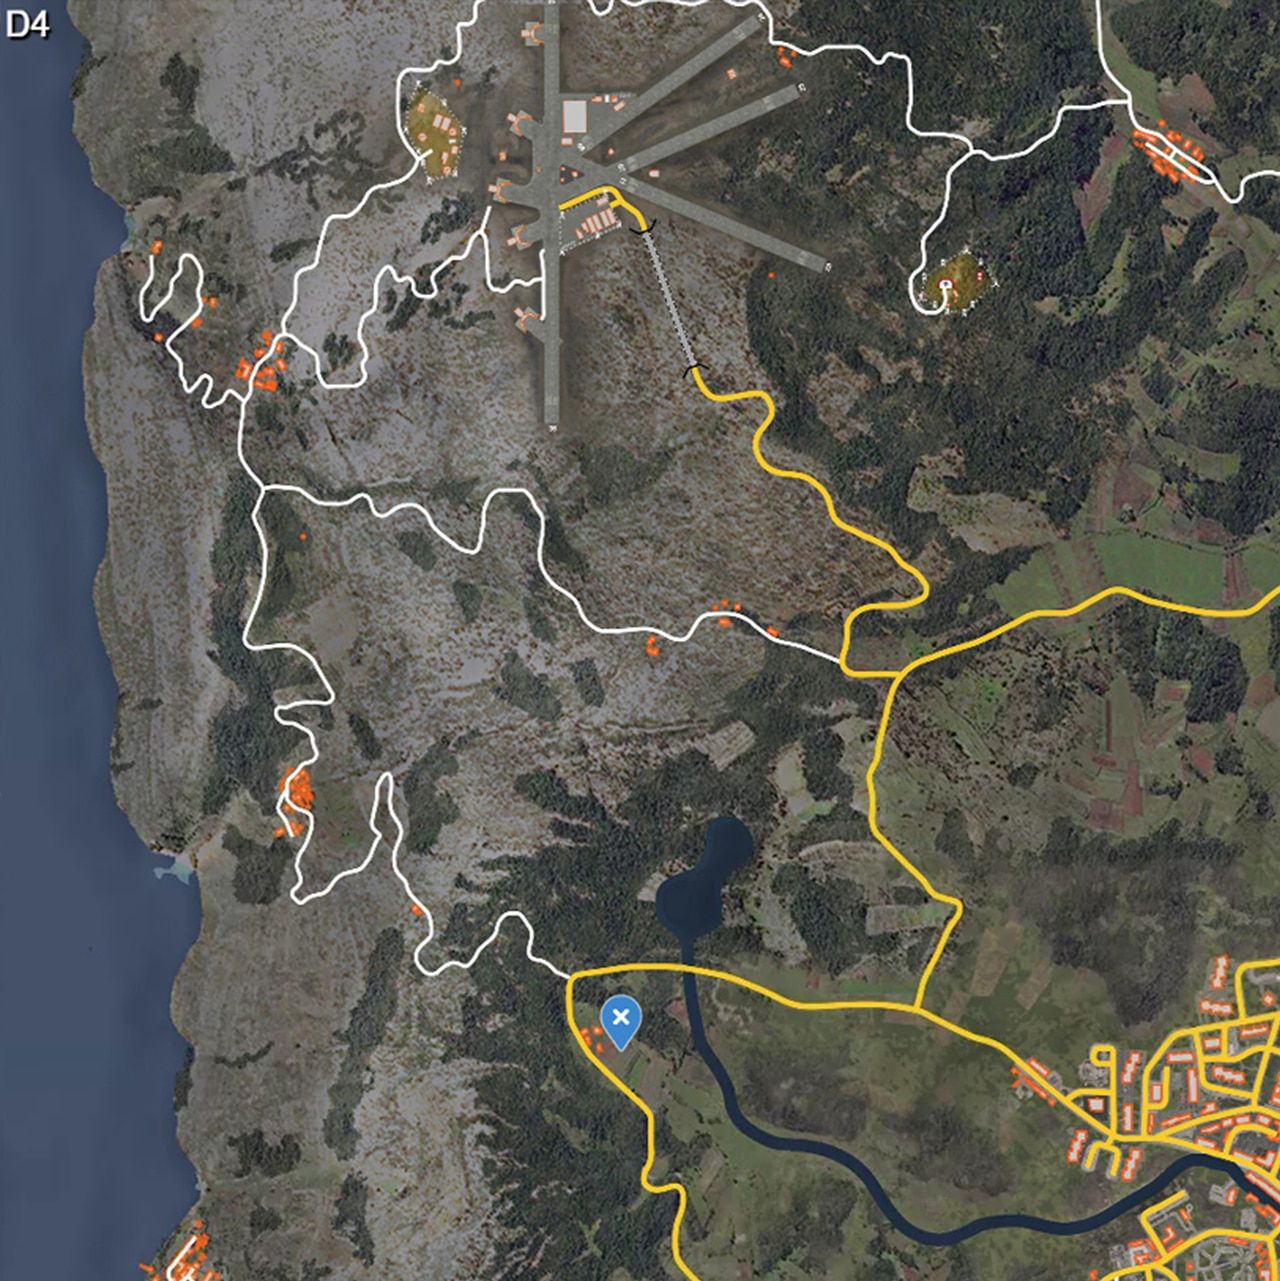
Coordinates on the map: #Teleport {X=396575.188 Y=221981.984 Z=17341.779|P=350.038055 Y=158.819641 R=0.000000}

This is the location on a zoomed in map of C4.

Here’s what it looks up close.
This is a pretty secluded area to build a base but has a lot of flat ground, and wind turbines close by which have a chance of spawning a vehicle.
There’s a bunker to the west and the trainyard to the northeast that is full of loot.
Beware though because it will have a lot of puppets and probably other players.
Coordinates on the map: #Teleport {X=-120553.234 Y=-836413.688 Z=11213.873|P=339.301239 Y=58.042522 R=0.000000}

Here is the location on the map.

Here is what the place looks like up close.
This is a seaside base location with plenty of space and enough wood around to build anything you like, and a bunker towards the northeast side.
There’s limitless water and since this is the part where the biggest body of water is in the game, you should find a boat to travel around the area for loot.
You can find a world war 2 bunker to the southwest side and a fish factory to the north where you might find a boat.
Coordinates on the map: #Teleport {X=-302148.813 Y=-498539.313 Z=3943.693|P=352.058868 Y=255.259659 R=0.000000}
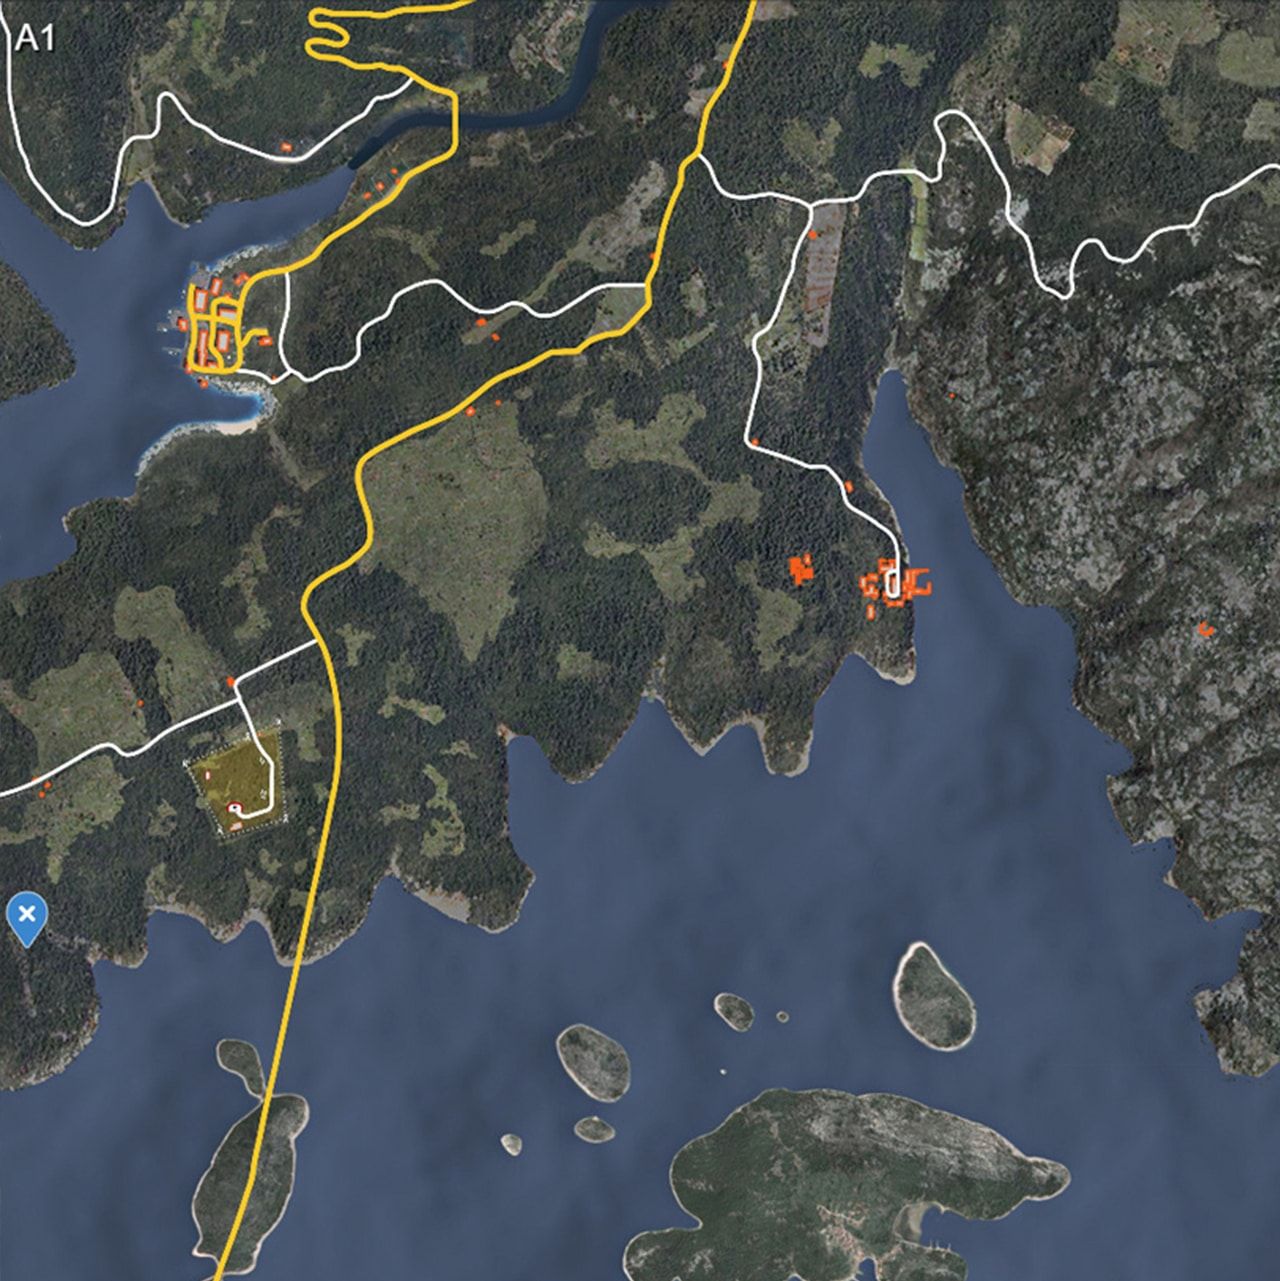
Here is the location on the map.
This is what it looks like up close.
This is probably one of the most resourceful places to build a base as it has four buildings and you can build walls all around it.
There’s the city to the east and a bunch of towns in all directions.
You can find a bunker all the way to the south, the military airfield to the north, and right next to it there’s another bunker.
The disadvantage of this place is that players can easily find it so be sure to make it tough.
It also has a straight open field so you can also build a shelter for an airplane.
Coordinates on the map: #Teleport {X=479134.375 Y=390212.656 Z=11594.988|P=356.184509 Y=10.040435 R=0.000000}
Here is the location on the map.
Here’s a screenshot of what the place looks like.
If you want to be left alone and keep your stuff safe then this cave is perfect for you.
You will definitely need a boat for this base, the boat can hold two hiking bags inside with a little bit of space left for other stuff.
There are no places you can loot here, so the boat is crucial for bringing loot to this base.
Even if the enemies find out you have a base here they will probably leave it alone because they need a boat as well.
Coordinates on the map: #Teleport {X=-513991.906 Y=-552139.625 Z=2706.266|P=2.418447 Y=67.382736 R=0.000000}

Here is the location on the map.
Here’s what the entrance looks like.
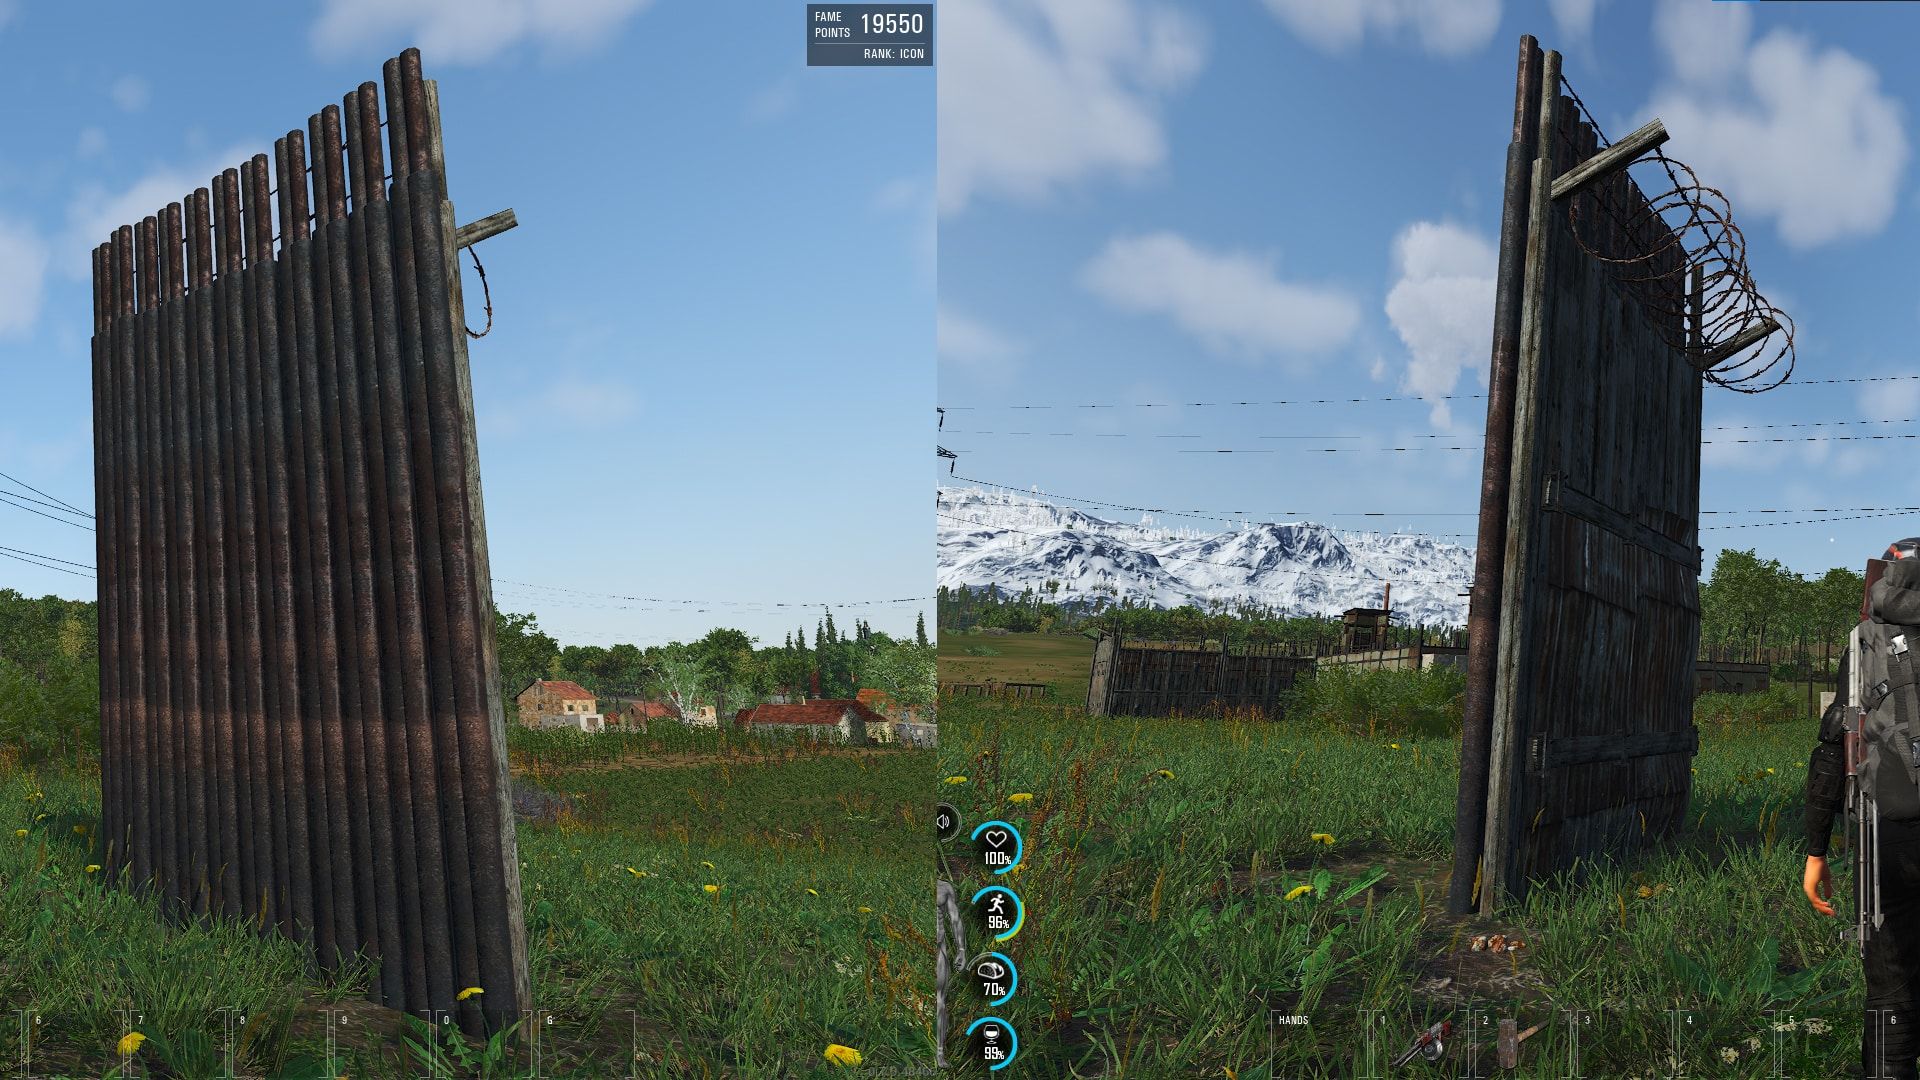
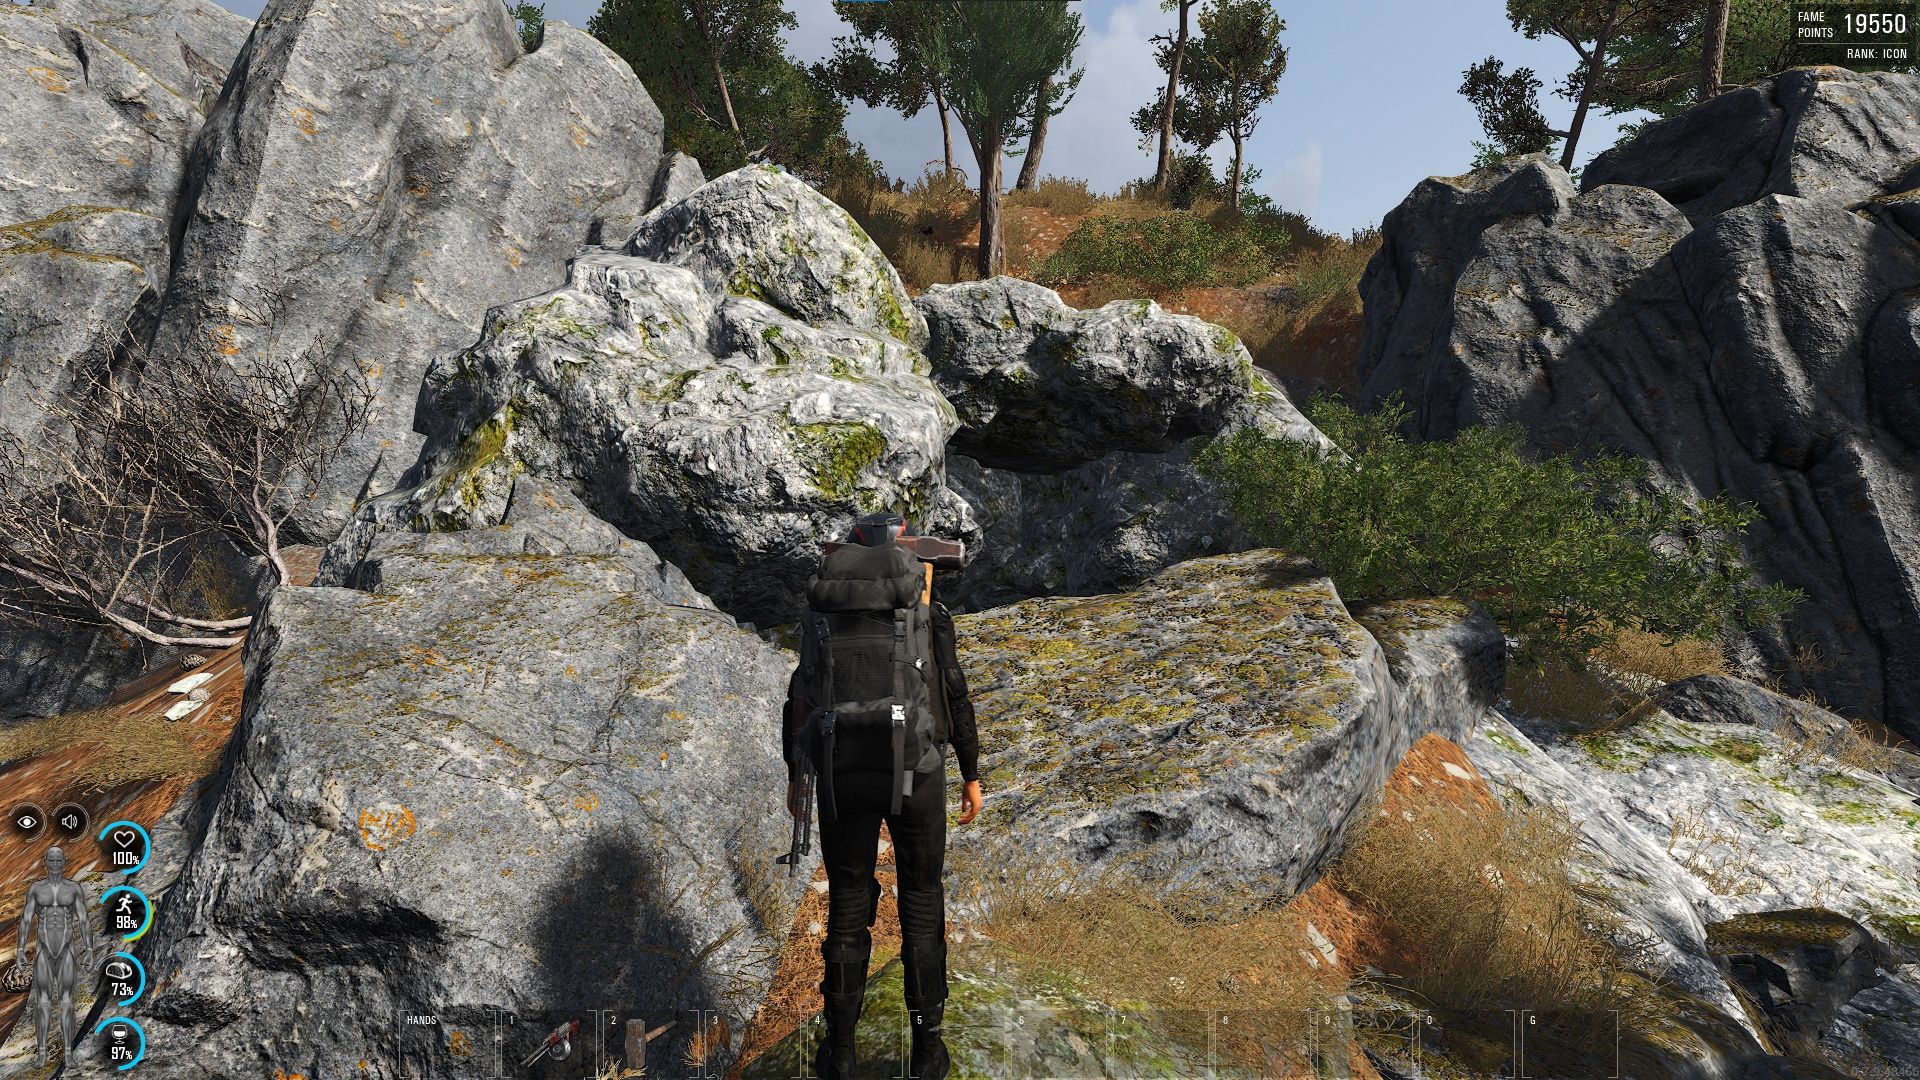
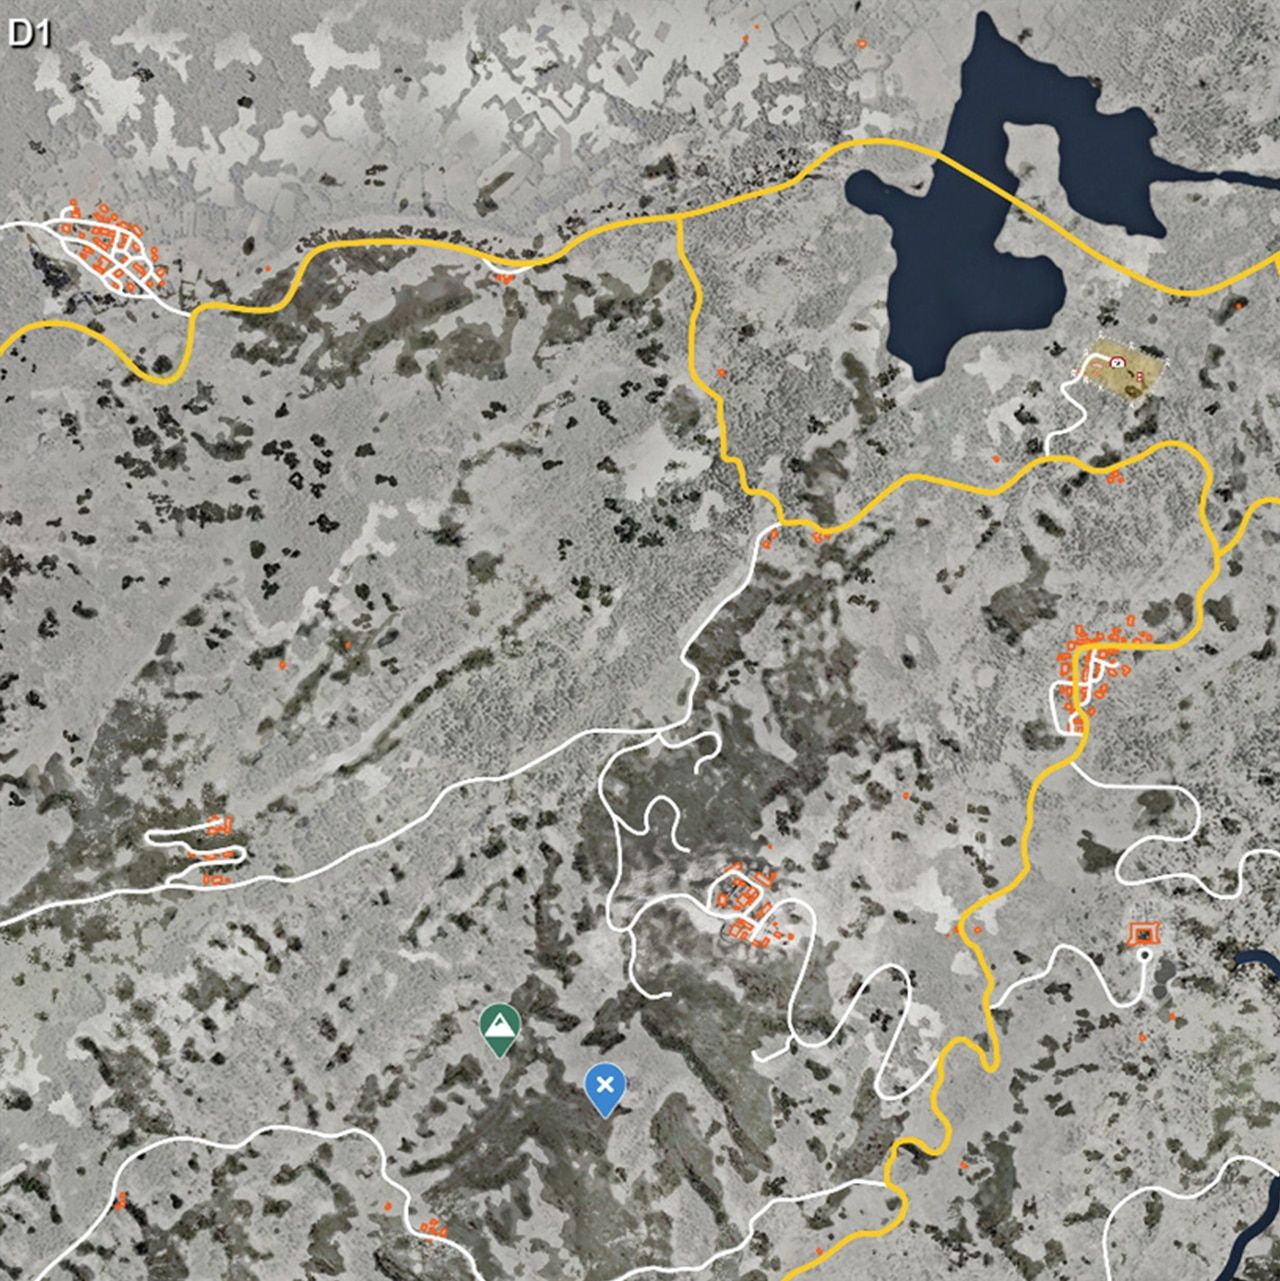
This is a snowy mountain cave that you can build walls inside and make it extremely hard to get raided once your walls are upgraded to concrete.
There’s also enough space to store bikes.
It has a prison to the east, the dam to the north that has a bunker, a small village to the southwest, and a town even further to that direction.
Coordinates on the map: #Teleport {X=1529.862 Y=178278.766 Z=65974.711|P=11.761100 Y=274.941406 R=0.000000}
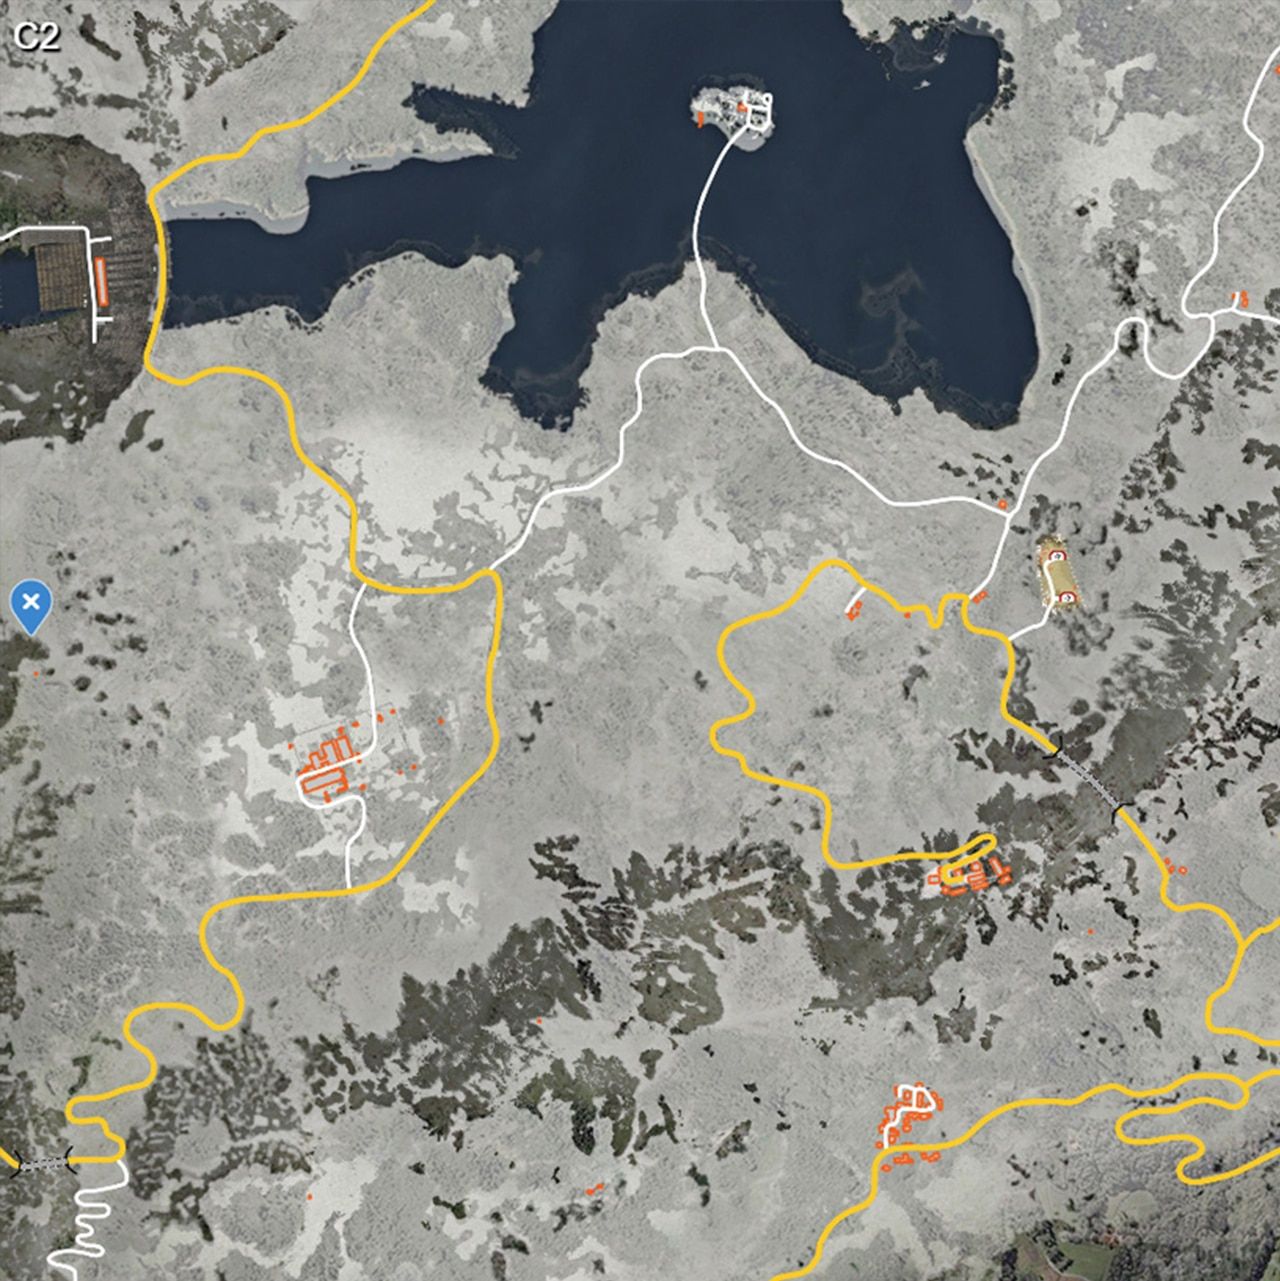
Here is the location on the map.
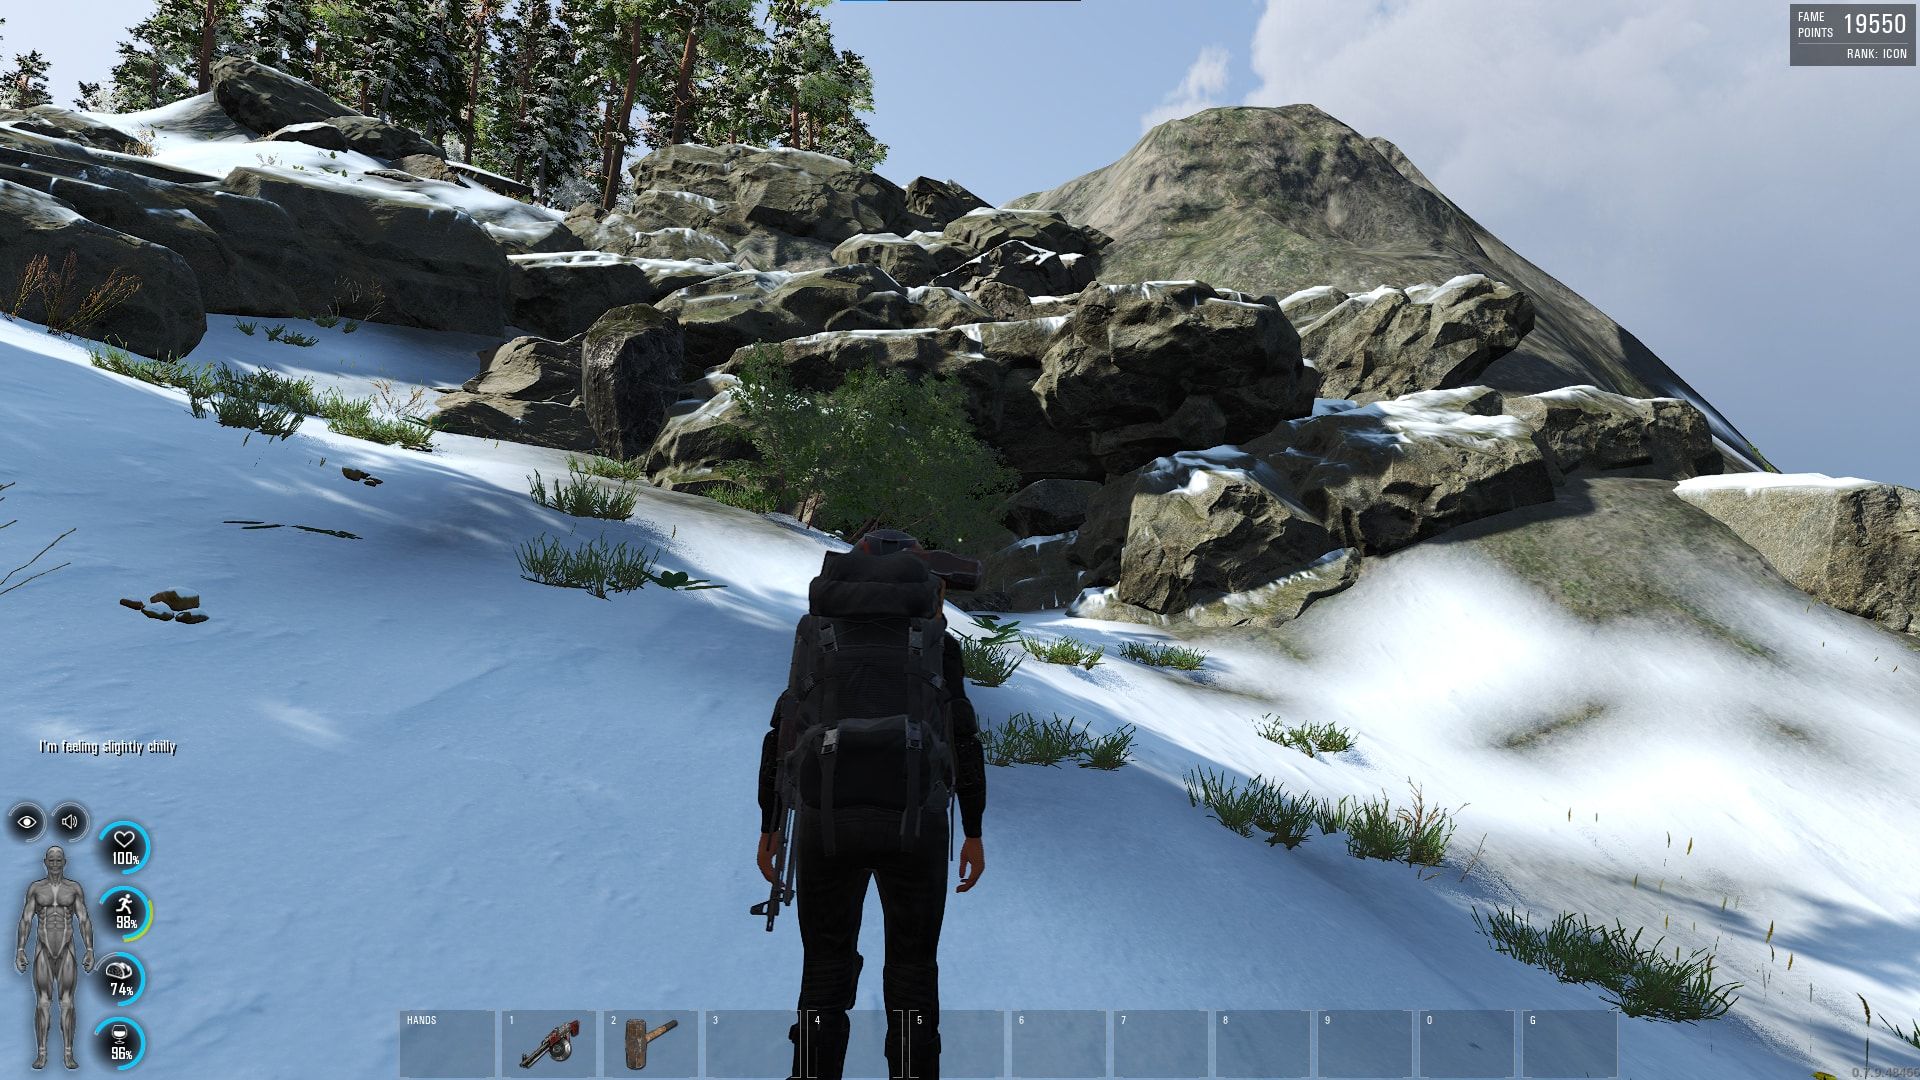
This is what the entrance of the cave looks like.
This cave has two bunkers nearby, one is to the west and the other to the east.
It also has a small town and the city to the south, so loot is abundant here.
There’s a source of water to the southeast as well.
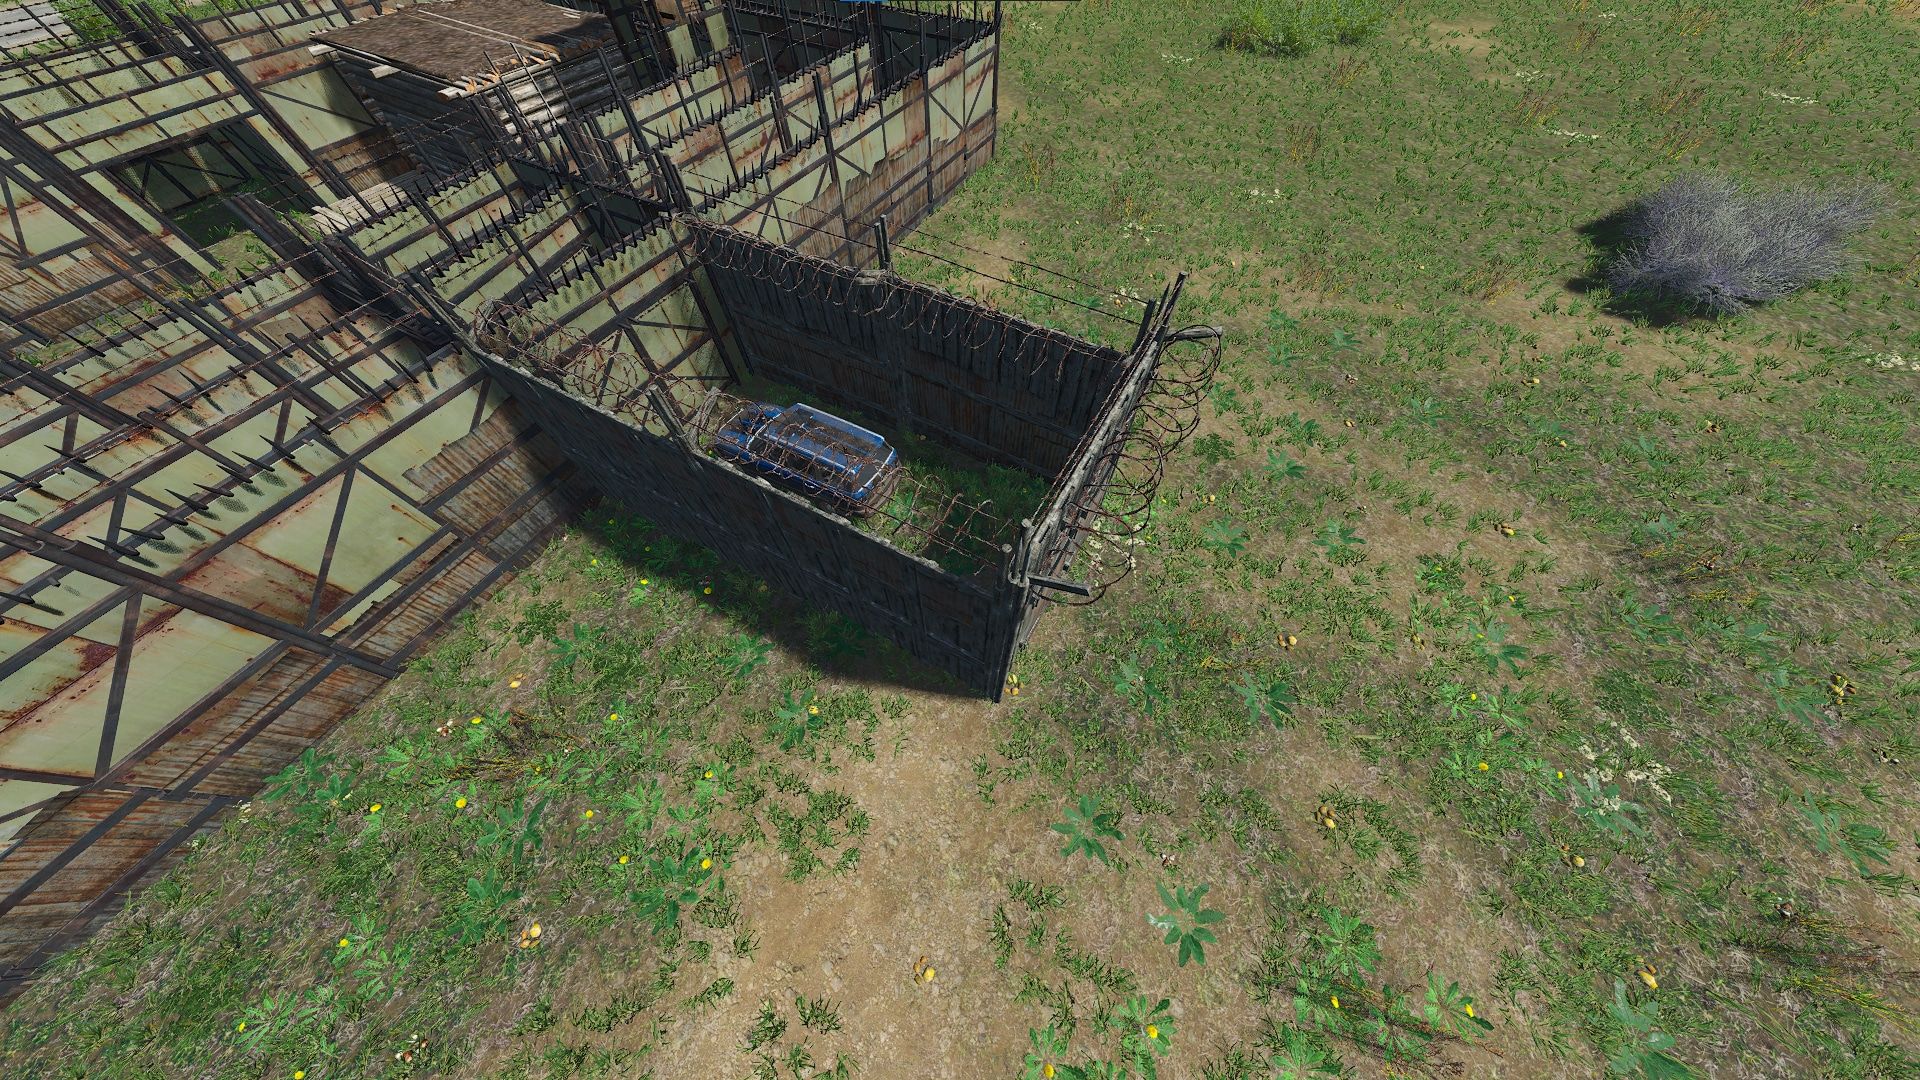
The entrance is big enough to fit an SUV so you can store any vehicle inside.
Coordinates on the map: #Teleport {X=247665.422 Y=571616.563 Z=22107.662|P=10.069732 Y=303.788940 R=0.000000}
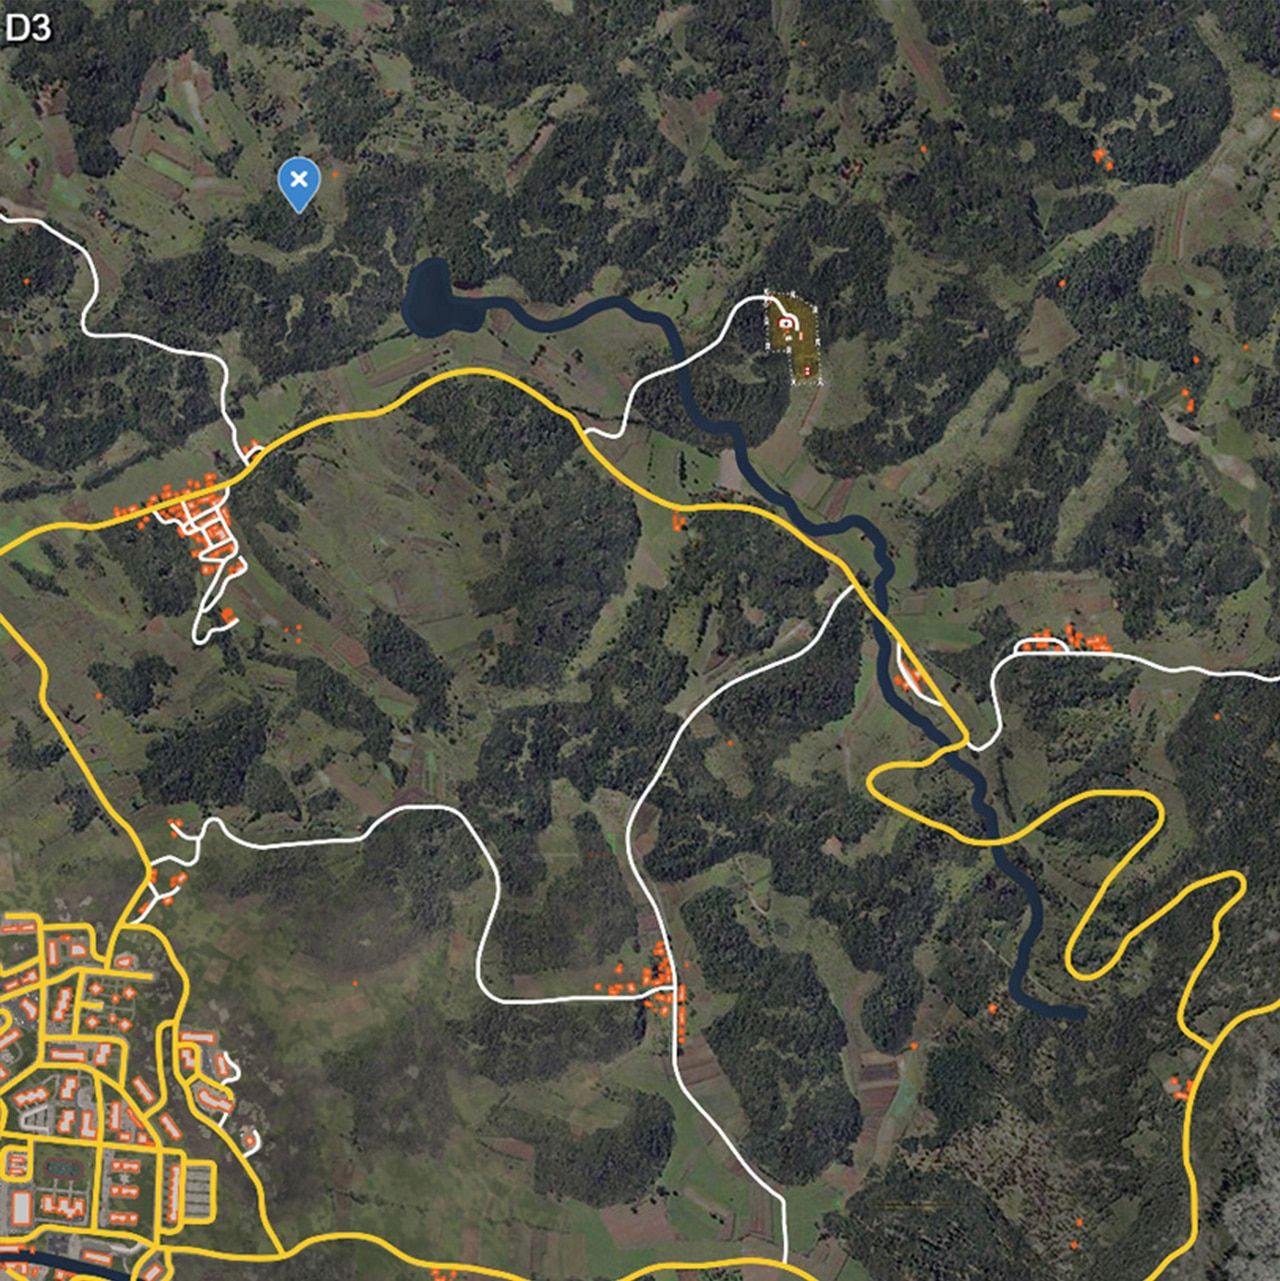
Here’s the view on the map.
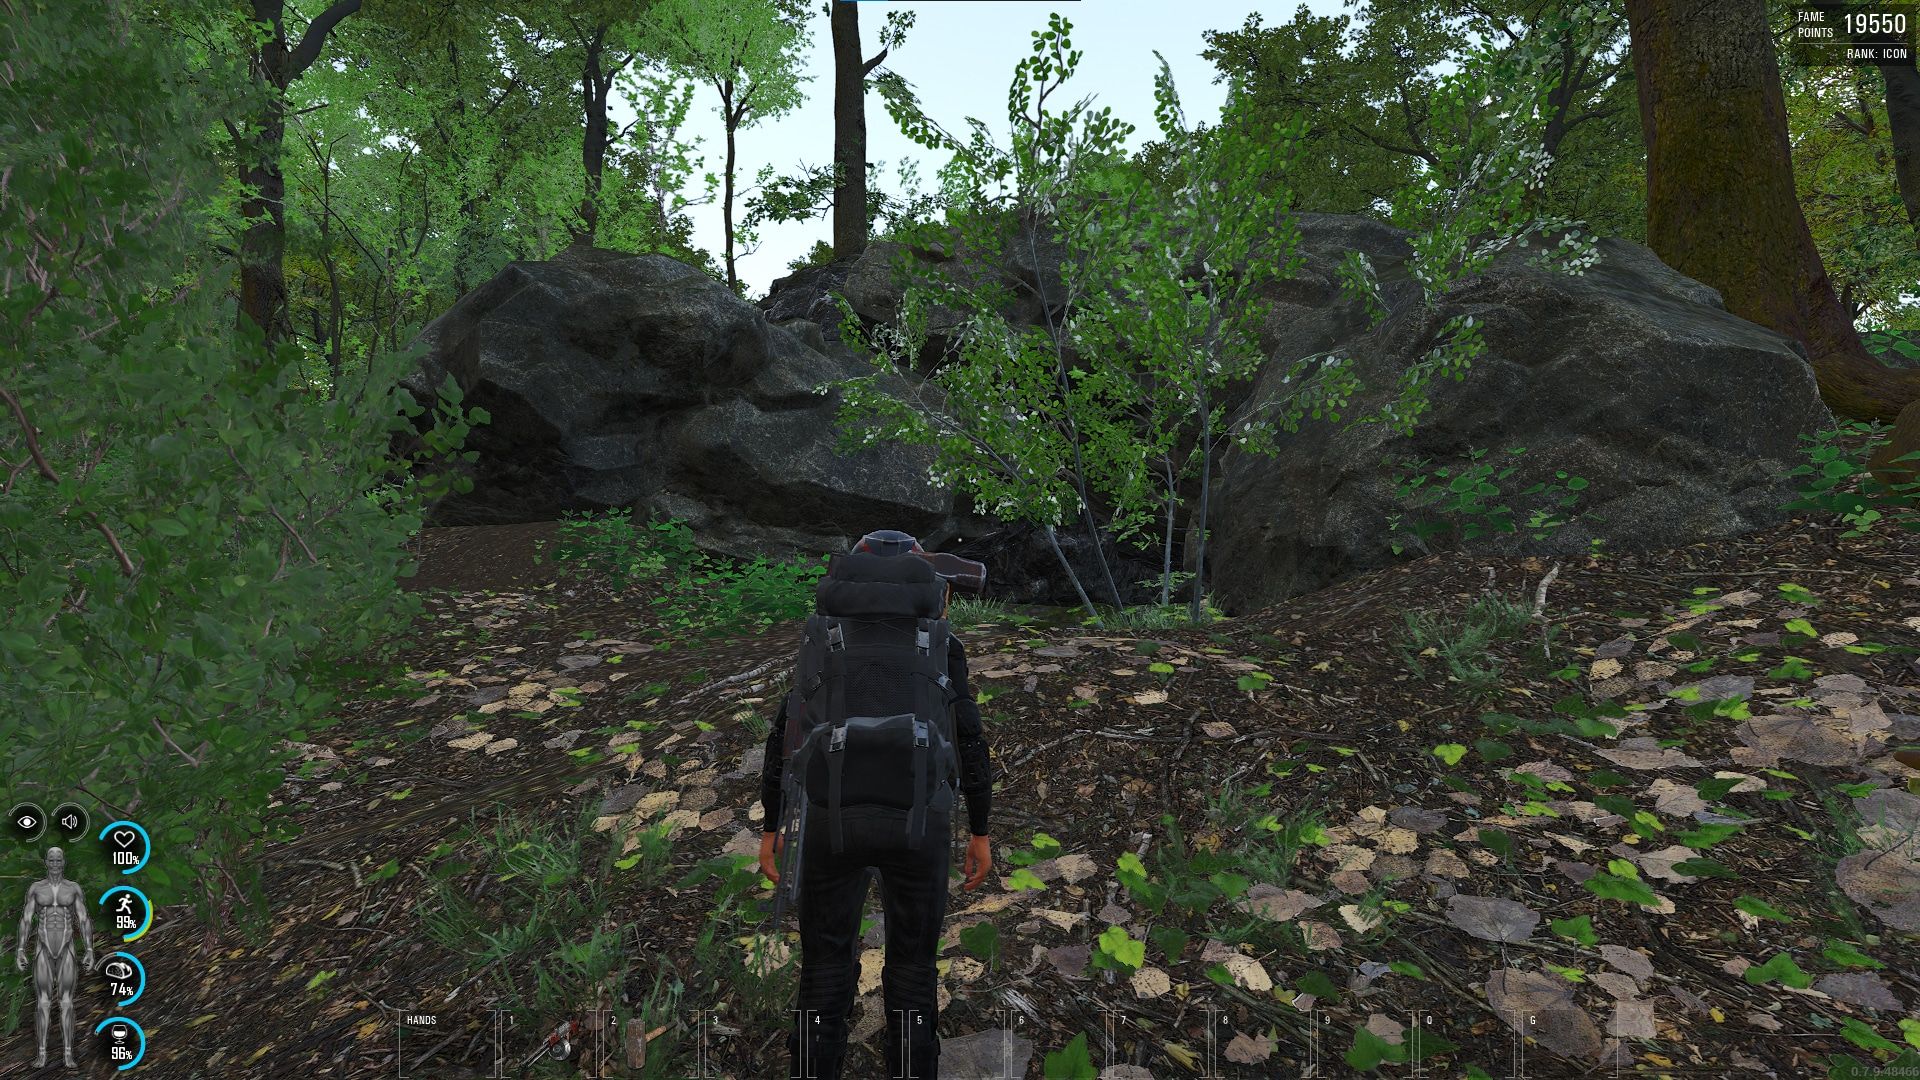
This is the entrance of the cave.
This is a great place to build your base as it has two entrances and it can fit an SUV and other vehicles.
It is pretty spacious so this cave can be a base for a squad of 5 people and maybe more.
There’s a bunker to the northeast, the observatory to the west, a small town to the east, and a lake to the southeast.
The airport is also pretty close to this location so you can go and check if there’s a plane and some good loot.
Coordinates on the map: #Teleport {X=-357840.906 Y=167013.063 Z=58980.480|P=13.278996 Y=11.510080 R=0.000000}
Here’s the view on the map.

Here’s the entrance of the cave.
This is a mountain top location that has enough space to build a rather large base.
It is pretty cold so you need to have a lot of clothes to stay warm.
As it’s pretty high up and the hill is steep if players want to raid you they will need a vehicle.
This location also has a cave towards the northwest that can be used as a backup base but also has a big enough entrance to store bikes.
You can find a town northeast, another town, and a bunker in the same direction.
There’s one more bunker to the south and one more town a little bit further in C1.
Coordinates on the map: #Teleport {X=-427872.281 Y=378167.500 Z=93077.680|P=341.436859 Y=141.891251 R=0.000000}
Here’s the view on the map.

This is what the spot looks like.
We found an image on the internet that shows where you can build and where there are restrictions.
This is probably for all the official servers.
All credit goes to www.scumworld.de.
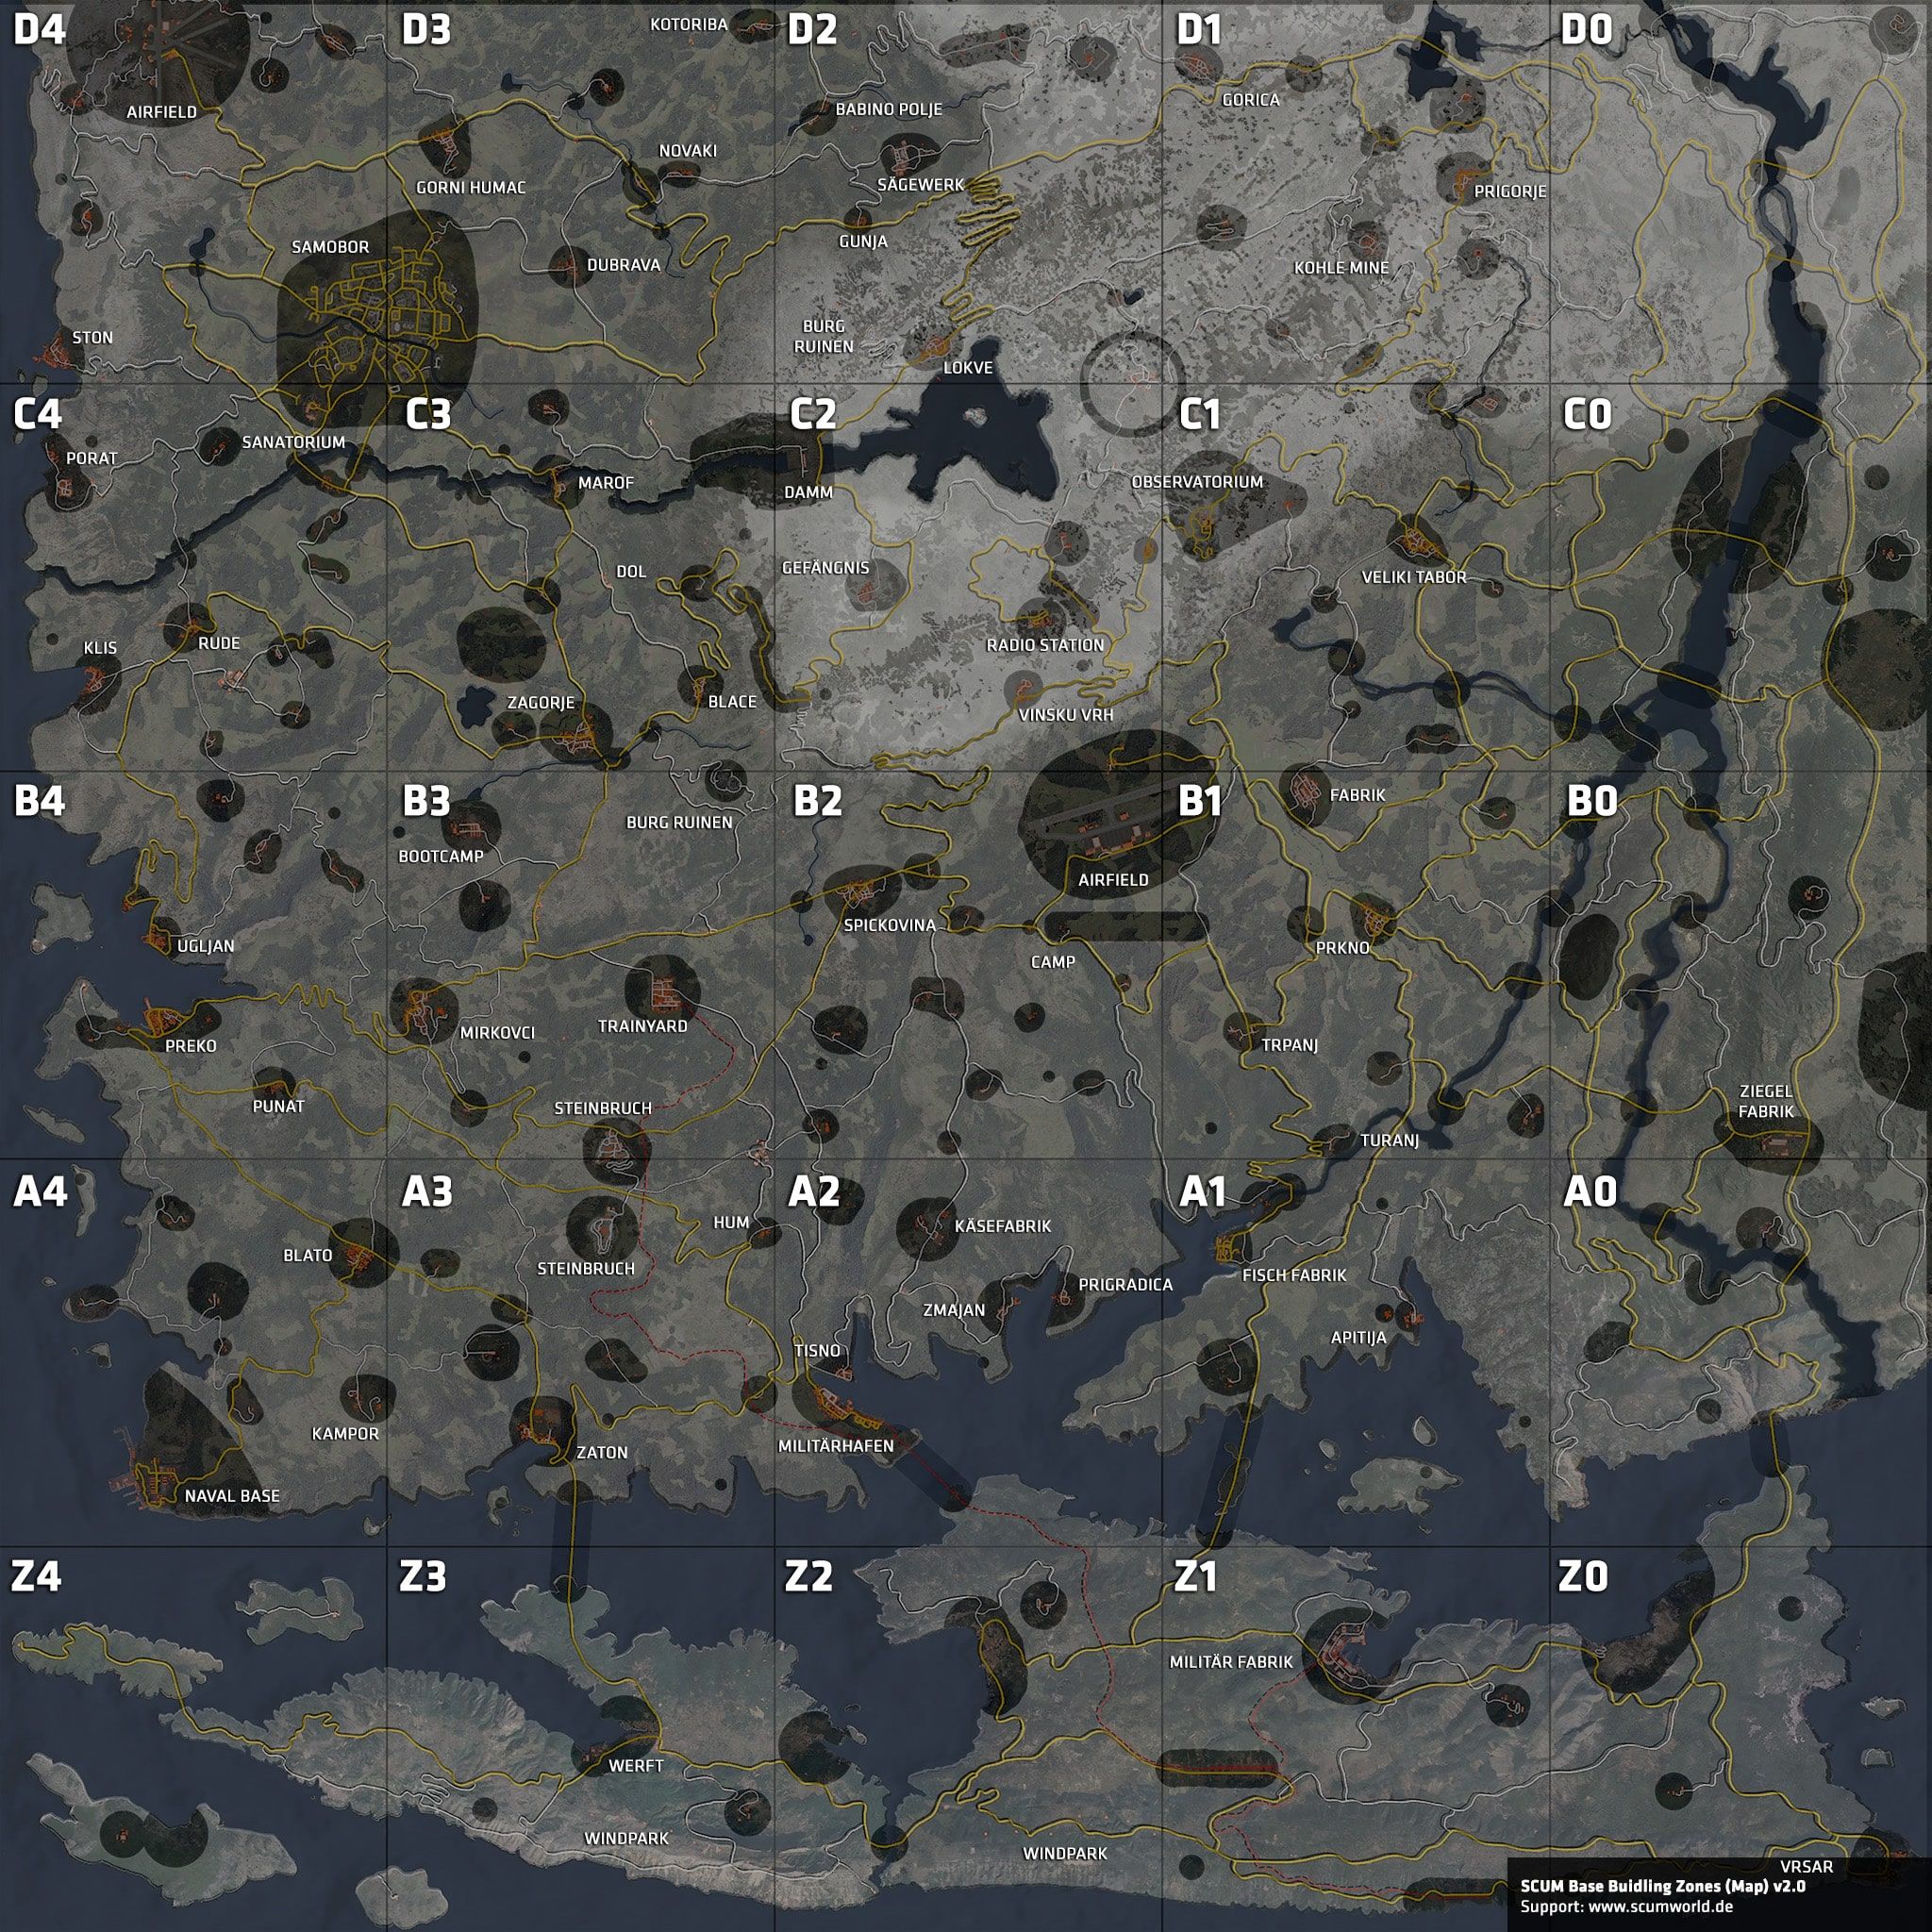
The white highlight means you can build, but in the darker areas building is prohibited.
It seems like the developers are planning to release an updated version of the base building in the future.
Here’s a video from RayKit showing some early stages and what we could see coming in the game with the next updates.
That’s it for now about base building, we hope you enjoyed our guide and if you have any suggestions please leave a comment.
|
|
VitaminDeD
Been a gamer since birth. I don't have a certain taste in genres, so I try every type of video game I stumble across, from racing games, to RPGs, to shooters - anything that clicks in me I play it, and if i become obsessed with it, I'll also write about it .
|
This is a nice article about SCUM – thumbs up!